
In the last chapter of the series on how to build an eCommerce website from scratch, we covered optimizing eCommerce product pages. Now we’re on the next step, where we’ll cover how you can optimize images for web and eCommerce stores in detail.
Please note optimizing images for the store doesn’t fold at compressing images and using small files. Every step you take, right from clicking the images to using them on the website, needs optimization.
To make it easier for you, we have divided image optimization into three parts:
Product Photography Optimization
Product photography optimization involves optimizing the photography processes, like fixing the setup, camera, and everything which helps you take relevant images.
Website Image Optimization
Website image optimization is the process of optimizing and editing the images to make them worthy of uploading to your store.
SEO Image Optimization
SEO image optimization is the last process, wherein you optimize images for search engines. You take care of file sizes, naming conventions, sitemaps, and many more optimization criteria.
Now let’s optimize the image for your eCommerce store in 3 detailed parts.
- Image Optimization Part #1: Product Photography Optimization
- Image Optimization Part #2: Website Image Optimization
- Step #9: Choose the Right Format for Graphics
- Step #10: Use the Right Level of Compression While File Creation
- Step #11: Use an Advanced Image Compression
- Step #12: Replace GIFs with Videos where Relevant
- Step #13: Load Images Responsively
- Step #14: Use WebP and JPEG2000
- Step #15: Use CDN for Image Loading
- Step #16: Cache the Images That Don’t Change
- Image Optimization Part #3: SEO Image Optimization
- Step #17: Research Your Keyword for An Image
- Step #18: Mind the Size of the Photo
- Step #19: Lazy Loading
- Step #20: Website Map in Google Search Console
- Step #21: Image Alt Tags
- Step #22: Use Structure Data for Image
- Step #23: Use SEO-friendly URLs For Images
- Step #24: Optimize Image Thumbnails For All The Other Marketing Channels As Well
- Step #25: Check Out The Image Types In SERP
- Step #26: Use Responsive Images
- Step #27: A/B Testing of Images
- Conclusion
Image Optimization Part #1: Product Photography Optimization
Product image optimization is optimizing product photoshoots.
Step #1: Prepare Your Product

The first step of product shoot optimization for your eCommerce pages is getting along with the aesthetics. Ask these questions:
- Is the product clean?
If the product is not clean, you can brush off the dirt and make sure it looks cleaner.
- Does the product have a reflective surface?
Products with reflective surfaces are hard-to capture. You may capture them, but the reflection would compromise the quality of product and category pages. And it gets more challenging when the product has a glossy surface.
One way to optimize reflective surface photography is by positioning your camera slightly higher than you generally do. This will light up the backlit product, so you’re looking down and shooting products slightly placed down.
The process eliminates the reflection and helps you capture images from different angles without worrying about lights.
Okay, but what if you tried your best but couldn’t get the photo shoot in the best possible hygiene? Well, here’s how you can use three photoshop techniques to remove dust from your products and make them look cleaner for the eCommerce pages.
- Dust and Scratches
- Painting onto a layer
- Frequency Separation
Here’s the video.
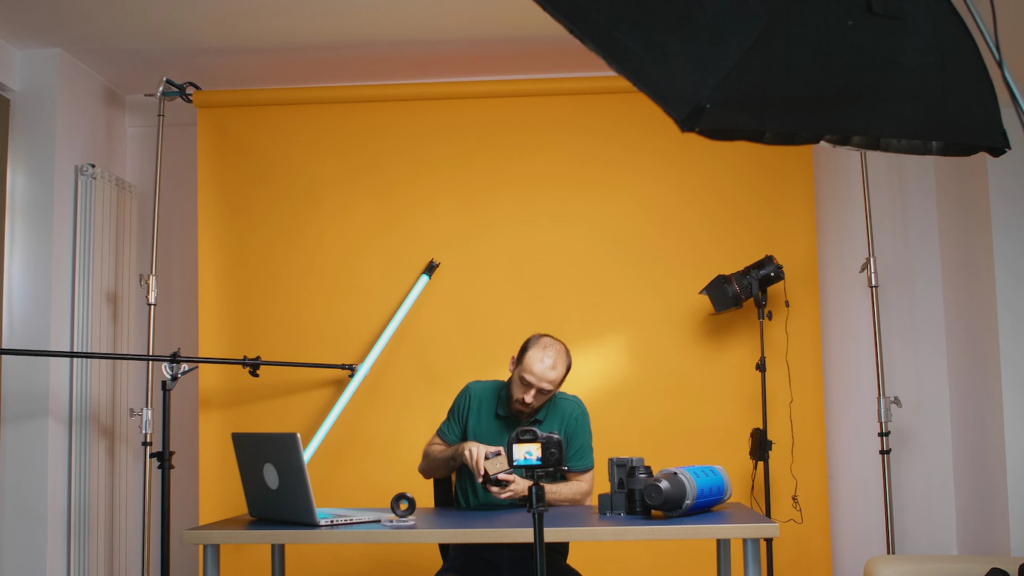
Step #2: Set up Your Studio
After preparing the product, try to find a spacious room to accommodate your camera tools and setup. According to the type of product, you can choose your setup.
There’s no “this is the only rule for product photography.”
- An aesthetic background may work great with cosmetic products, and a bold, black-and-white background may need to be revised. It depends on the color of the product!
- You will also have to decide the types of lights you will use. Most product photographers use soft light to avoid any shadows.
- The step would also demand you to find the best angle for the best shot. Do you need side profiles, top profiles, or maybe all? It’s always a good practice to capture your product from all angles.
Step #3: DIY Lens Setting
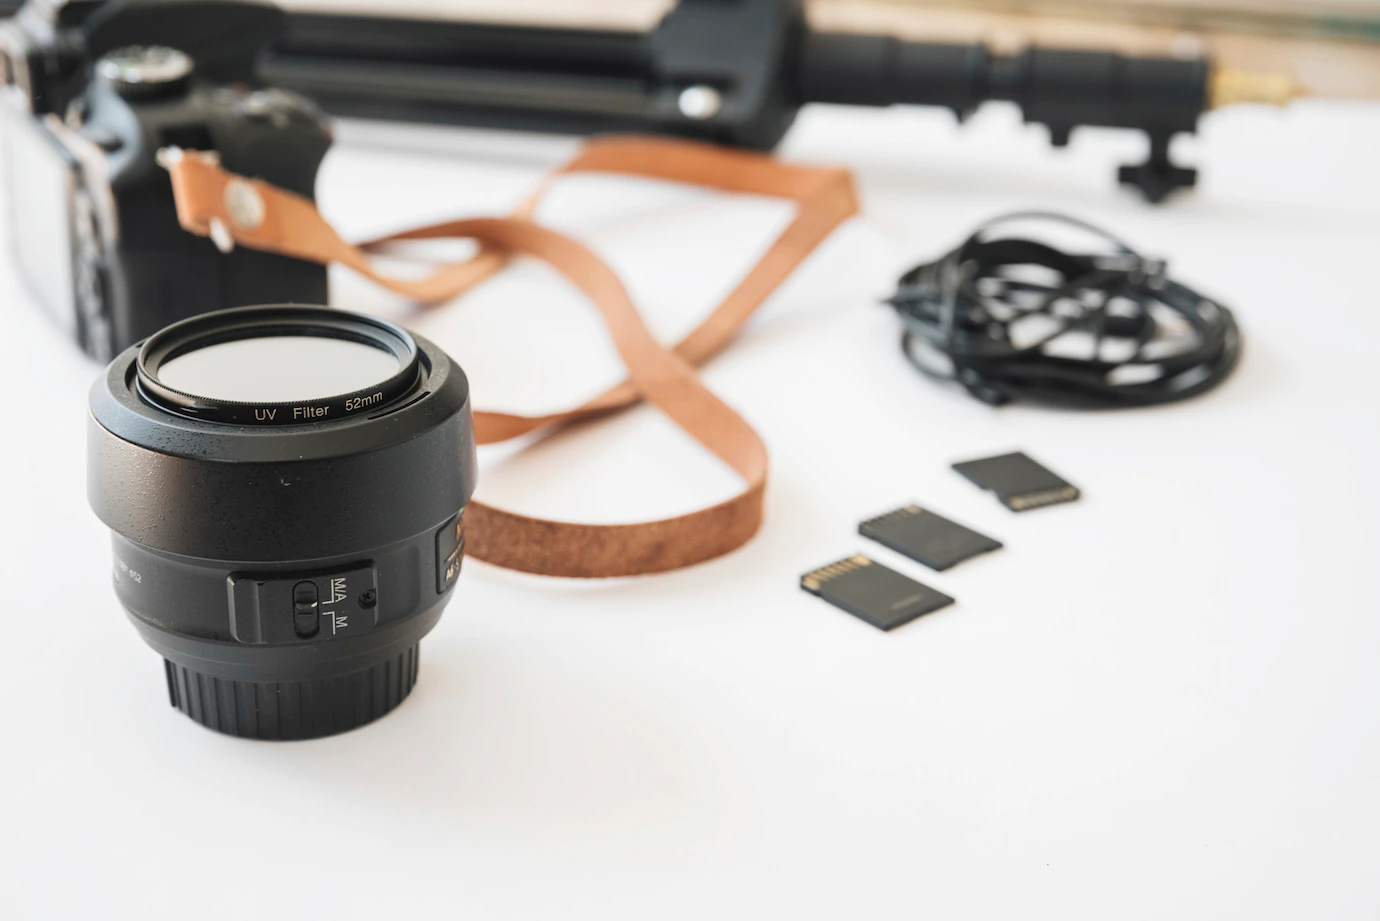
Before setting up the camera lens, we must first decide what camera lens gives the best results for product photoshoots.
- Lenses ranging between 24 to 70 mm would give the best result for a small studio with a small product.
- You can also check out multipurpose lenses to click versatile images in and outside the setup.
Most people use a 50mm f/1.4 USM lens for DIY product photoshoots. It’s a little pricier than f/1.8, but a little leap in aperture means better sharpness and quality.
Once you have selected the lenses, here are some settings you’d like to have:
- Keep ISO setting as low as possible for a less grainy image. For natural light, the ISO setting between 200 to 800 works wonderfully.
- Keep the aperture as high as possible (between F16 and F22 because the camera will be on a tripod, and the light will be consistent). Generally, shutter speed is not an issue in product photography because you have a consistent environment, including lights. Keep the aperture low if you want to focus on any particular product area.
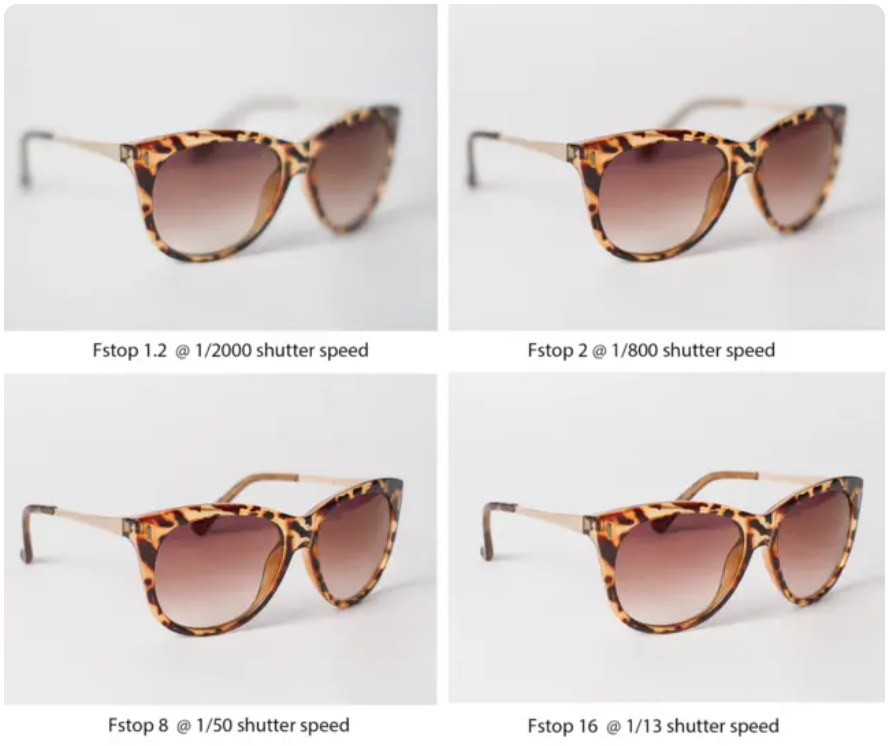
- Shutter speed is not a matter for non-moving, non-living products. If you’re capturing the product image of moving toys, etc., you’ll need to have a faster shutter speed. Otherwise, a slow and steady shutter speed is good for still photography! Use a low setting like 1/13 for products being clicked on a tripod. You need a faster shutter speed to capture frozen images of moving products.
Step #4: Set Up Your Tripod
It’s a no-brainer. You need a tripod for a still product photoshoot. And placing the tripod begins with choosing the location that would work best with all the SKUs.
- Make sure you place the tripod against the backdrop that will work with all the products.
- Point one leg in the same direction as you’re going to place the camera. It means one leg of the tripod and camera should be in the same direction.
- Make sure the legs of the tripod are on a solid surface.
- You can also hang something in the center to make the tripod sturdy of the base.
- Check the levels of the tripod.
Step #5: Use Props Wisely
You may feel tempted to use props for your products. It’s advised to use them wisely… Or only when needed, as you don’t want to set wrong user expectations.
Generally, eCommerce businesses use props to give context to the items. Props can be used to highlight the features as well as provide crucial visual messages related to the product.
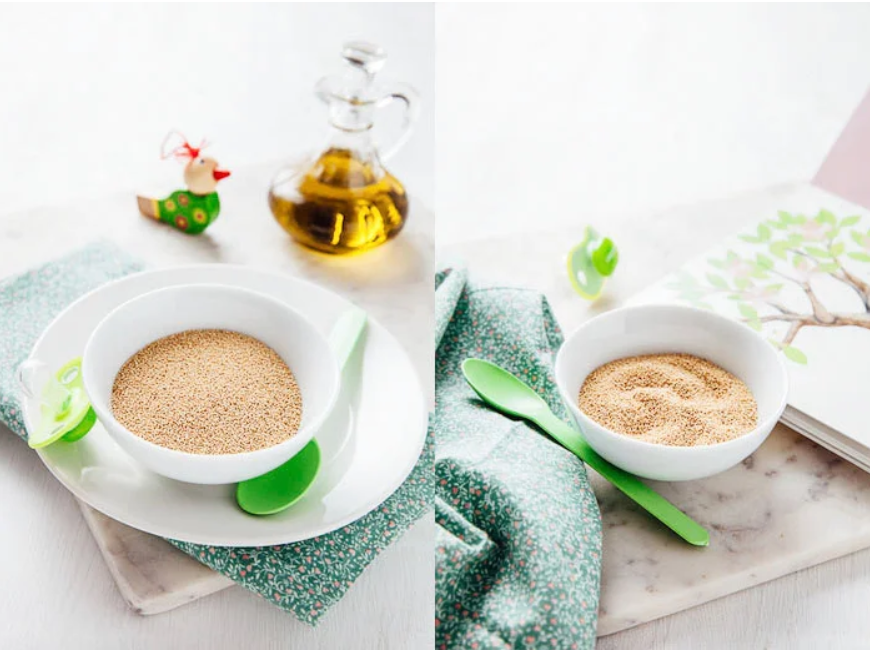
The product is the ingredient here for baby food. To give deeper context to the product, the photographer used toys around the product.
Things to consider while choosing props for product photography:
- Put thoughts into the product’s color, shape, and size. Try to use props with neutral colors or one that resonates with your brand.
- Avoid props with any signs or logos.
- Keep the right balance between props and products. Make sure the user understands what you’re advertising, and there’s no confusion between both.
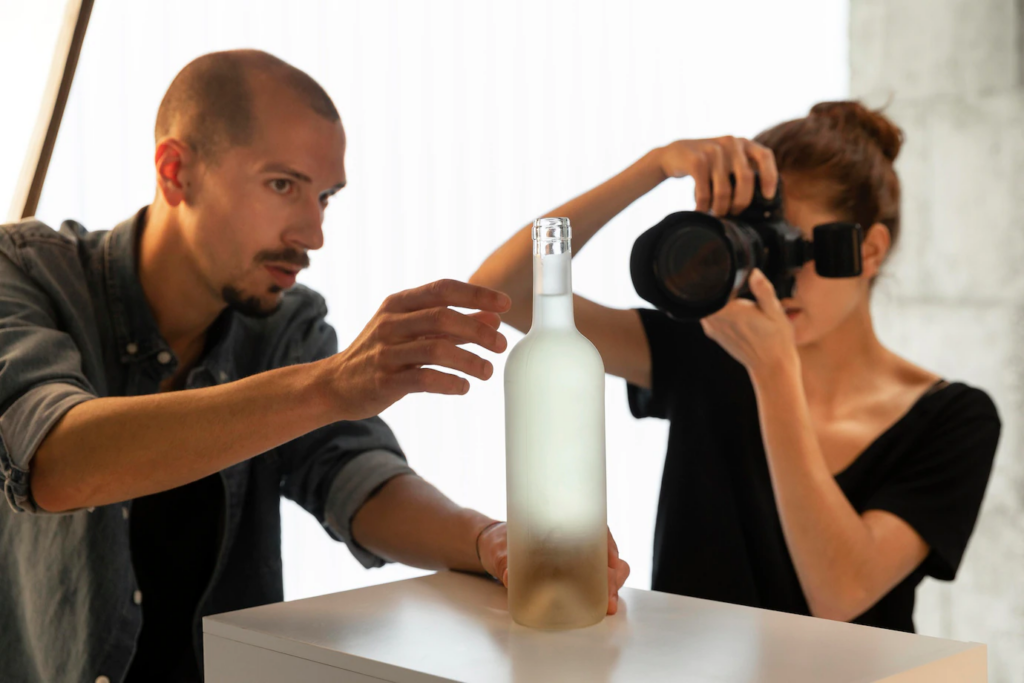
Step #6: Shoot from Different Angles
While you’re product shooting, users must know your products in and out. And the only way to do it virtually is to try out different camera angles.
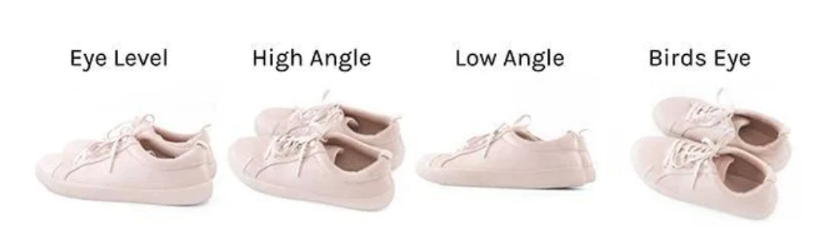
Here are some camera angles to try:
- Eye level: It’s an angle at which you see the product straight at eye level.
- High angle: It’s an angle at which you look at the product as if you’re looking down at them. It’s not entirely a bird’s eye view but is placed at a certain angle. Look at the picture above for clarity.
- Low angle: It’s a shot at which the camera is placed below eye level, and the subject is captured as if they seem upward. Cameras are placed closer to the ground to take low-angle photos.
- Bird’s Eye angle: It’s a shot in which the camera is held at 40 degrees above the product. Although it’s not compulsion, many photographers use 90-degree angles to produce a bird’s view product image. It will ultimately look like you’re standing above the product.
Step #7: Optimize the Image in Post-Production
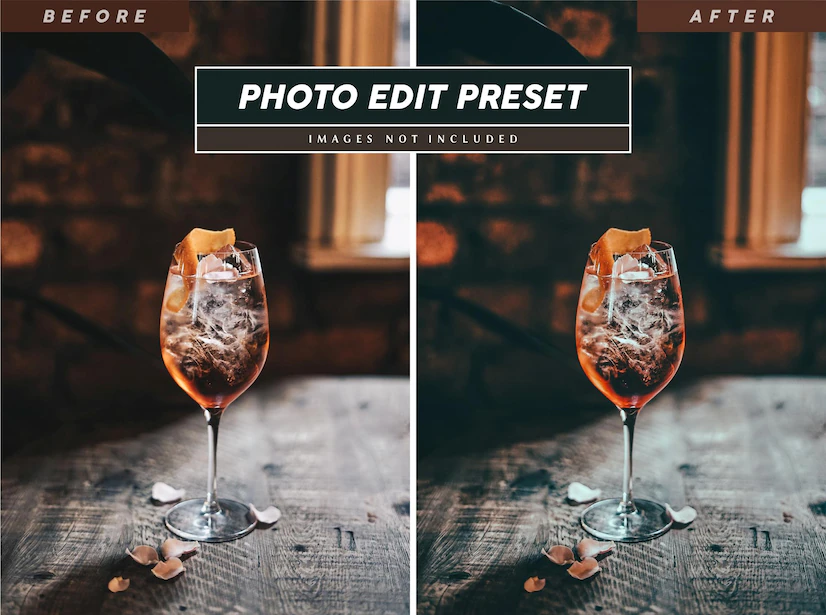
Even after all these steps to make our product refined, some distortions would be left in the shots. This is where you need to refine those images further by editing them. Post-production optimization is like passing the images through the quality filtering test.
You use editing tools like Photoshop to
- remove the background
- remove the shine
- use shadow effects
- recreate the background
- remove glares
This makes your product look similar to the real object.
Step #8: Fail Fast. Repeat Fast.
Now how do you know your product photography and optimization have failed? Simple! Event tracking once you have uploaded the files on your eCommerce store! Take, for example, social shares.
Every eCommerce businesses give users options to share product images. The more shares you get, the better your images are performing.
Another tracking metric would be engagement time. You can track how long the user spends on the page before and after uploading the new images.
And the third and the most obvious would be a change in conversion rate. If there’s a positive change in coversion rate, it means your images are convincing.
Image Optimization Part #2: Website Image Optimization
Now, the next part is optimizing images, so it’s worth uploadable on the website.
Step #9: Choose the Right Format for Graphics
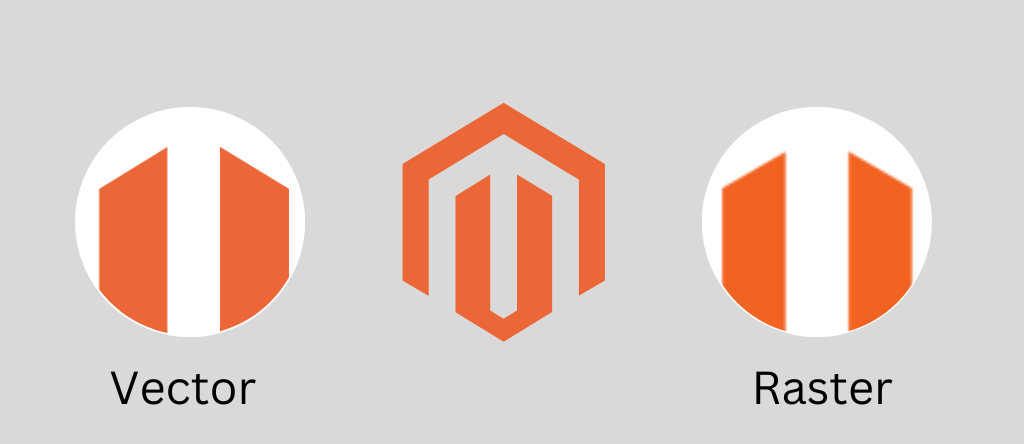
Raster or Vector? What do you use for your product photoshoot? The answer is: it depends.
Raster format uses pixels to create a photo. It means every raster image has hundreds and thousands of tiny square colors. The more pixels, the better the quality of the image.
Vector image uses mathematical formulas, equations, lines, and curves to create logos, complex graphics, and illustrations. Here’s the table which makes it easier for you to decide when to use either of them.
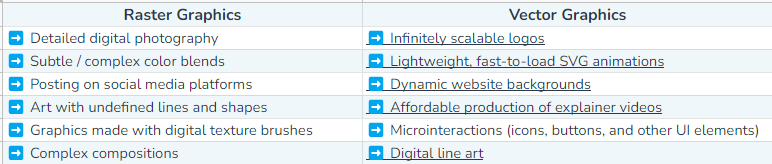
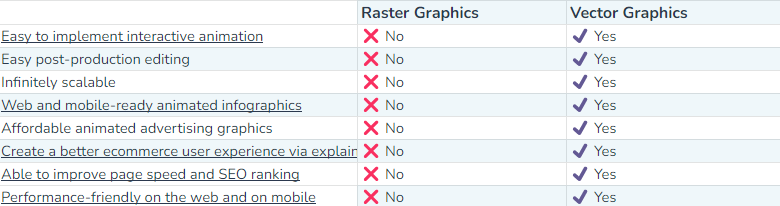
And here are some reasons that will make you choose vector over raster.
Step #10: Use the Right Level of Compression While File Creation
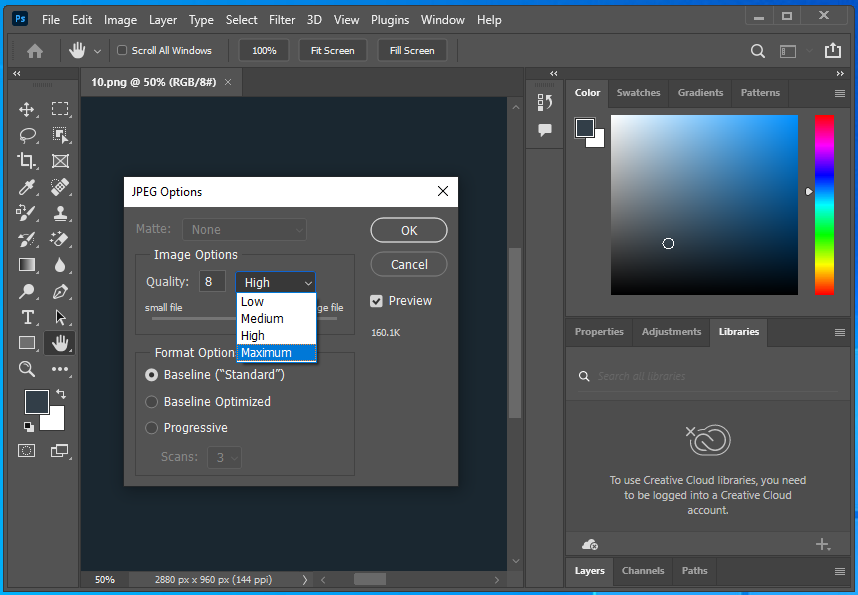
So what do we mean by the right level of compression? If we ask you to pick one
- 10% compression for clear but largest files
- 20% compression for a little less clear image, but a large file,
- 40% compression for a blurry image, but the smallest file.
What would you choose? Well, most editors give you options while compressing the images. And there’s no fixed answer to using the right level of compression for your store. You have to find the balance between compression and the quality of the image. And this only comes with permuting and combining all the possibilities for the images.
Step #11: Use an Advanced Image Compression
Usually, when dealing with more significant file types, you might want more than the compressed images it has processed. In such scenarios, using an Advanced Compressor can help to further compress large images. It mainly operates in generally used file formats and is readily available online for free.
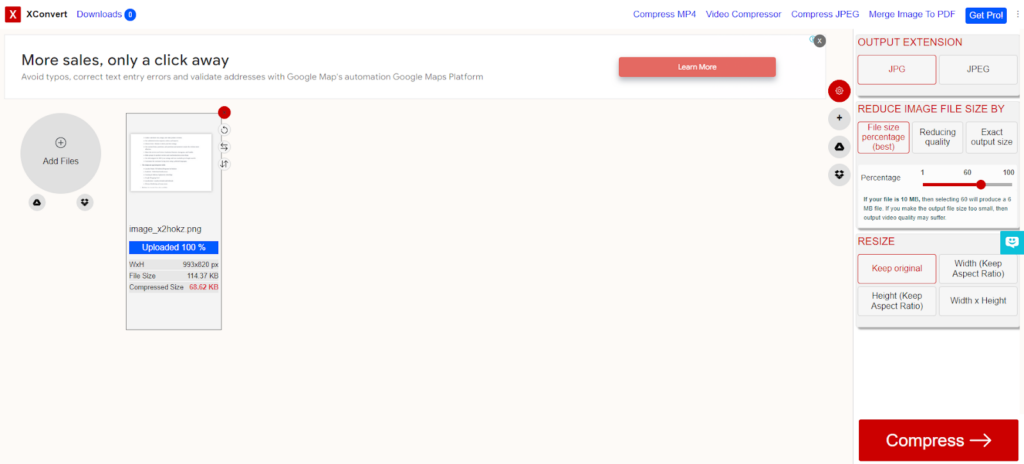
We recommend using XConvert tool for compressing your files as it supports more formats. You can also choose the percentage of compression and compression techniques too.
Here’s how you can use XConvert to compress bigger files:
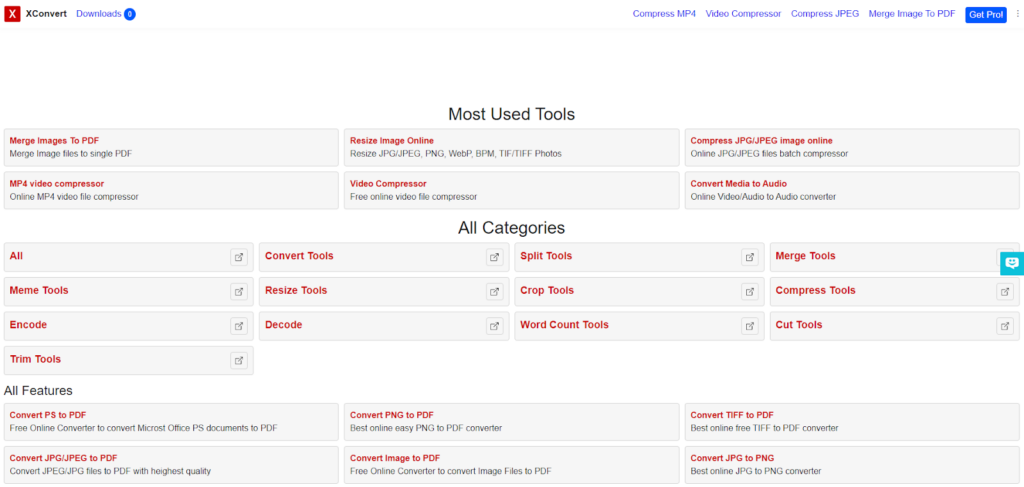
1: Go to XConvert’s website.
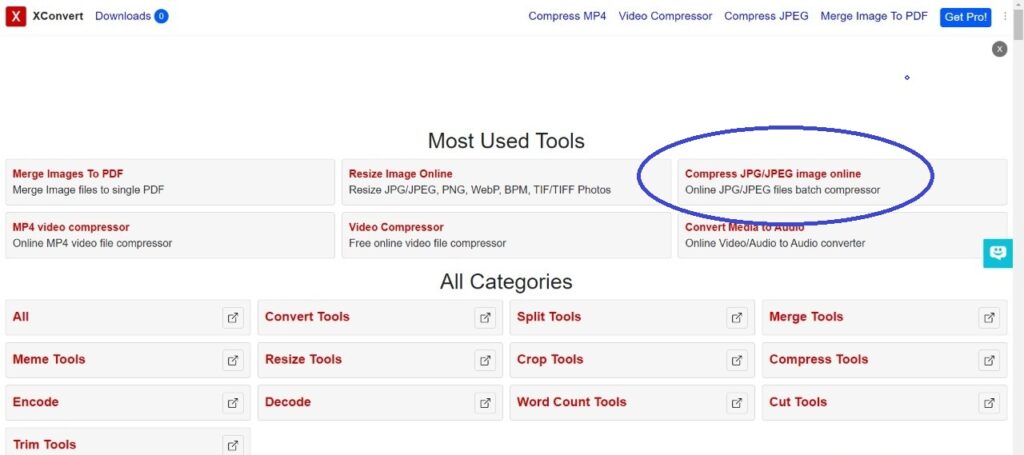
2: Choose the option of compressing a JPG/JPEG image online on the side of XConvert.
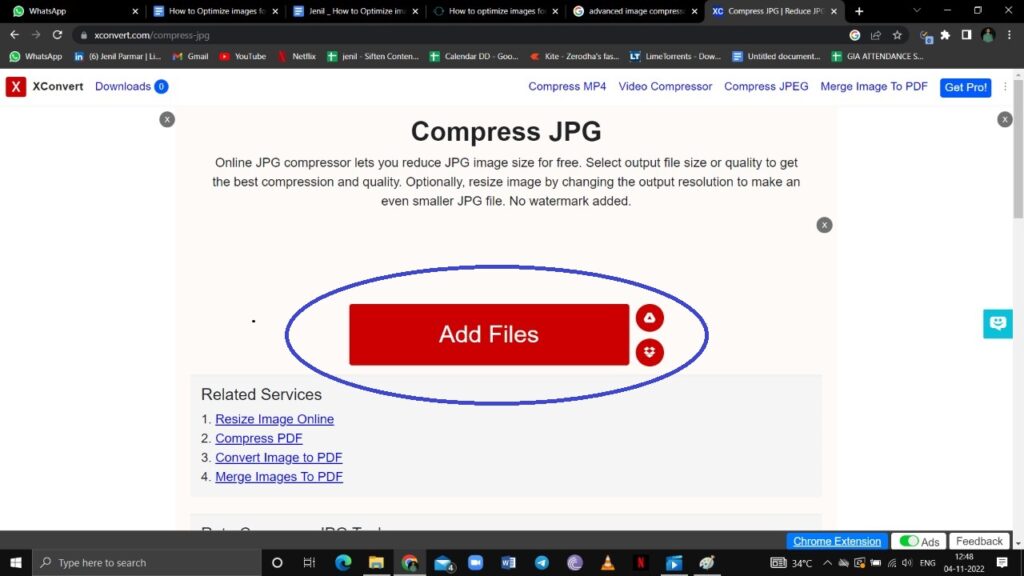
3: Select the option of Add Files. Select the file you want to compress from your PC.
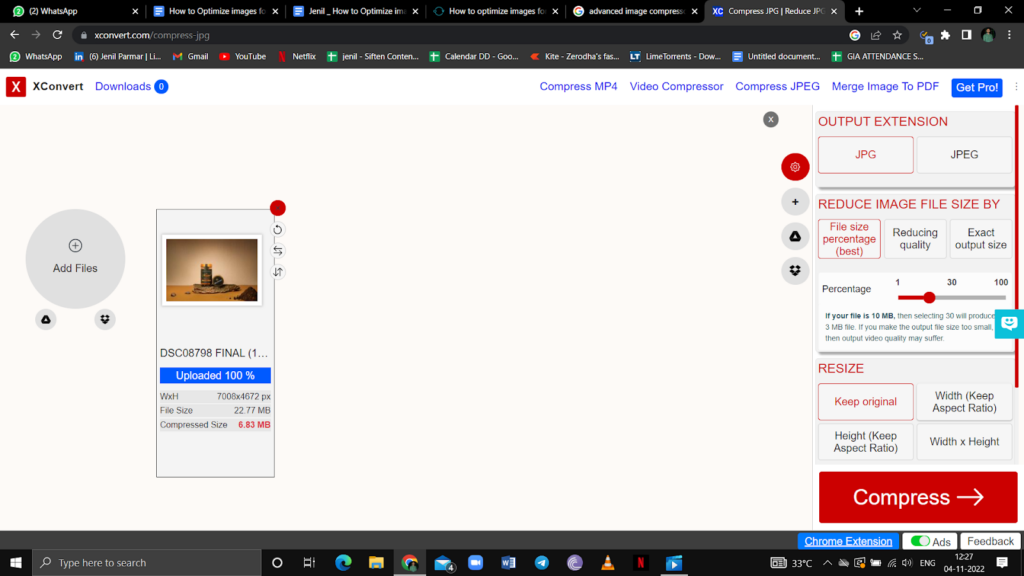
4: Select the JPG/JPEG images as Output Extension. Then, you can set the image compression ratio to a level – normally to a certain percentage.
After selecting all these options, click on Compress.
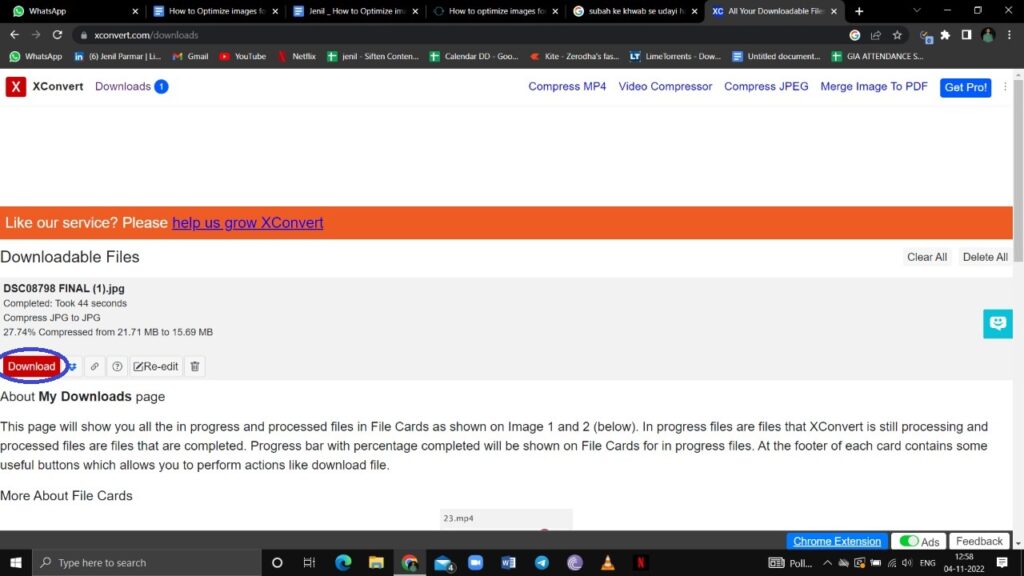
5: When it is compressed, click on Download to save images on your PC.
Step #12: Replace GIFs with Videos where Relevant
GIFs are bulky and might slow your website’s load time. Replace GIFs with multiple video files to reduce file size comparatively.
Even since HTML5 came in browsers, it has been easier than ever to play animated videos on browsers. You can convert your GIFs to MP4 files to reduce their size and bandwidth.
You can try out YouTube-embedded or other online videos to prevent the browser from loading them directly from the server. This is one of the best practices to load faster.
Here’s how you can convert your GIFs to MP4 files on FreeFileConvert:

1: Go to FreeFileConvert and click on Choose File.
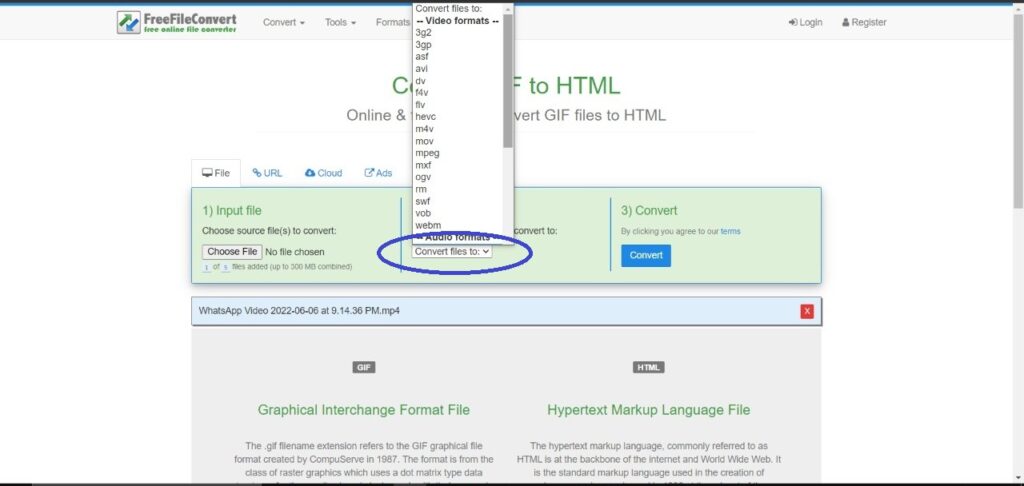
2: Choose the file you want to convert it to and press Convert.
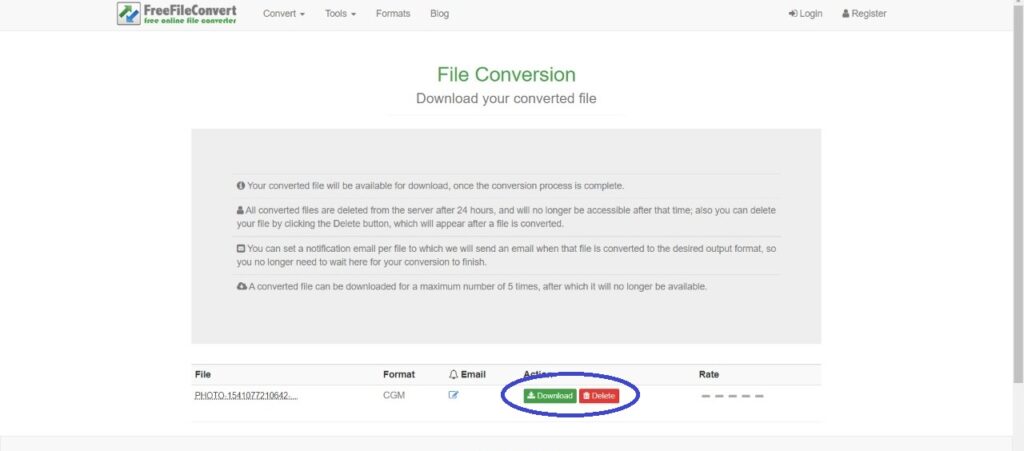
3: Click on Download to save your converted file.
This is how you can convert your GIFs to Video files and upload the same on HTML5 player to optimize it further.
Step #13: Load Images Responsively
Your websites get loaded on different devices which have various dimensions. PCs have more giant screens and hence have larger dimensions than mobile phones.
To avoid distortion, ensure your Content Management System loads the entire site – with higher quality images and larger files – perfectly on every device.
You might not feel like considering this is important, but it plays a vital role in website optimization.
Step #14: Use WebP and JPEG2000
Image formats such as WebP – developed by Google – and JPEG2000 give the best result of compression while keeping the quality of images intact. You can use these formats, which are the best for your web and are SEO-friendly.
WebP format provides lossy and superior lossless compression while keeping the quality untouched to give the best image. You can also adjust the level of compression to suit your needs.
Here’s how you can convert your images for the web to WebP image format online:

1: Go to OnlineConvert’s site and click on Choose File to upload a file or images.
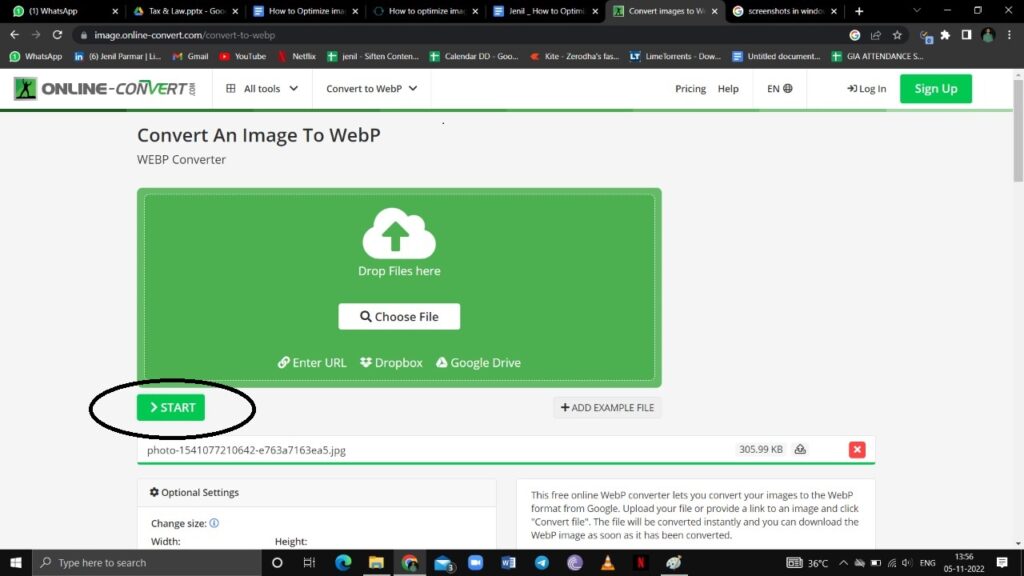
2: Select the file or images you want to upload. After uploading, click on the Start option to convert the file or images.
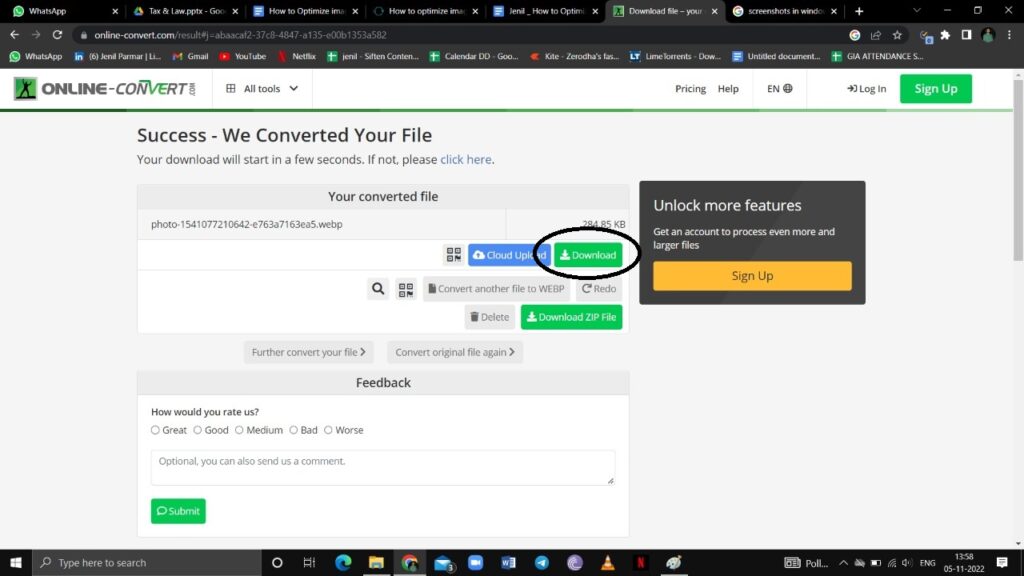
3: Your converted file or images will be downloaded. You can click on the Download option if images need to be downloaded manually.
Step #15: Use CDN for Image Loading

Usually, images and other visuals added to a website is loaded directly from the server. This process becomes lengthy and takes time to load images.
Moreover, with Content Delivery Network(CDN), it is time-saving as all the content is saved on the CDN server based near the user’s proximity.
CDNs can be very beneficial, and the image sizes are saved from 40-70%.
Step #16: Cache the Images That Don’t Change
The cache is a temporary CPU cache memory. Various images remain unchanged. Converting these images into a cache can bring you the benefit of loading the site speedily.
Understand this as someone making trips to bring items you ordered at his cafe. Fortunately, he can bring 3-4 items simultaneously, whereas your browser has to take rounds for each image, javascript and CSS file. That’s a lot of trips. You can avoid this with the help of a cache.
In other words, cache stores images that don’t change into the user’s drive and load them directly. Browsers handle a cache. This works best for users who visit your website regularly.
Image Optimization Part #3: SEO Image Optimization
Now the third part is SEO image optimization. Every optimization technique is to satisfy search engines as well as users. It begins with researching the keywords.
Step #17: Research Your Keyword for An Image

Before optimizing your site, you need to see what customers want to see in your images. And also understand their needs. You need to know your customers’ requirements to find them correctly.
Pitching images to the targeted audience is always tricky without the right keywords. Consider using WordStream for searching and seeing stats regarding a keyword.
When you optimize images, you can add frequently used keywords in the image description. You can search for simple, generic and frequently used keywords from SEMRush and add it somewhere in the image description. This proves to be a good image optimizer.
For example, if the frequently used keyword is ‘Affordable,’ you can title your optimized image as ’10 Affordable Cafes in Mumbai’ or ‘5 Affordable Smartphones in 2022’. As simple as cutting a cake!
Here’s how you can conduct Keyword Research for your website from UberSuggest:
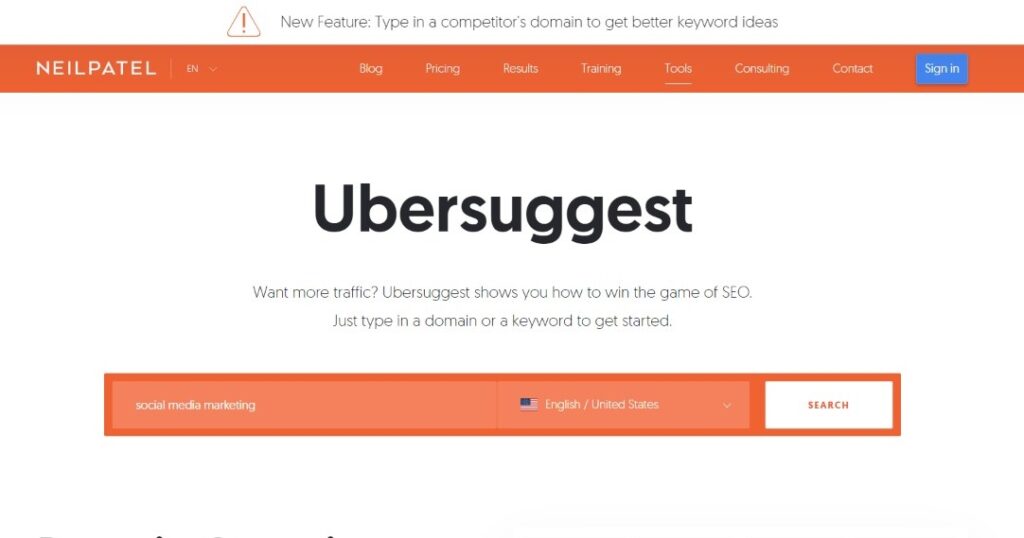
1: Go to UberSuggest’s website. And search for a topic you work for. For example, Social Media Marketing.
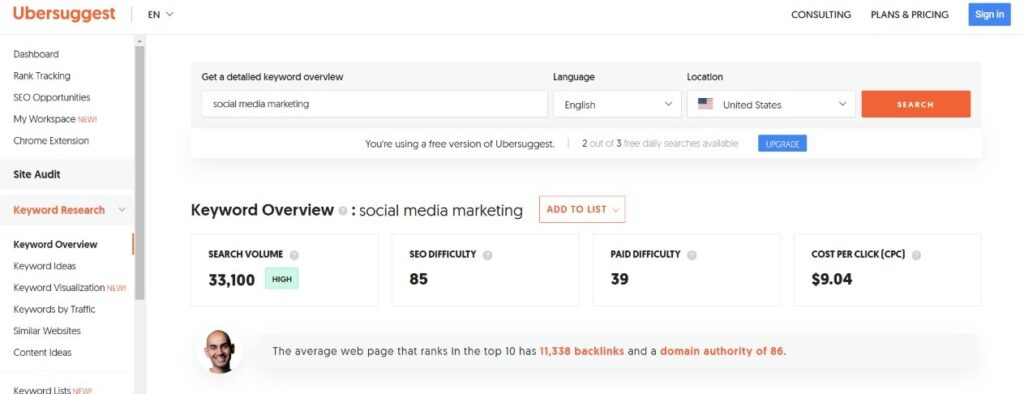
2: These would be your search result containing four different terms:
- Search Volume: number of keyword searches during a month.
- SEO Difficulty: estimated competition in organic reach.
- Paid Difficulty: estimated difficulty in paid search.
- Cost Per Click: average cost per click for a Google Ad.
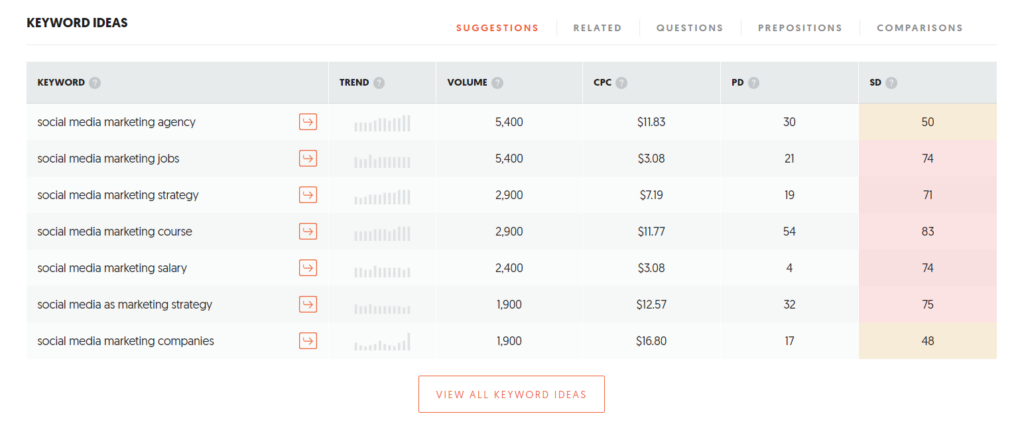
3: Scrolling below the website, you’ll find this table. You’ll find five options above the table here.
- Suggestions: When you type a word, Google shows relevant suggestions.
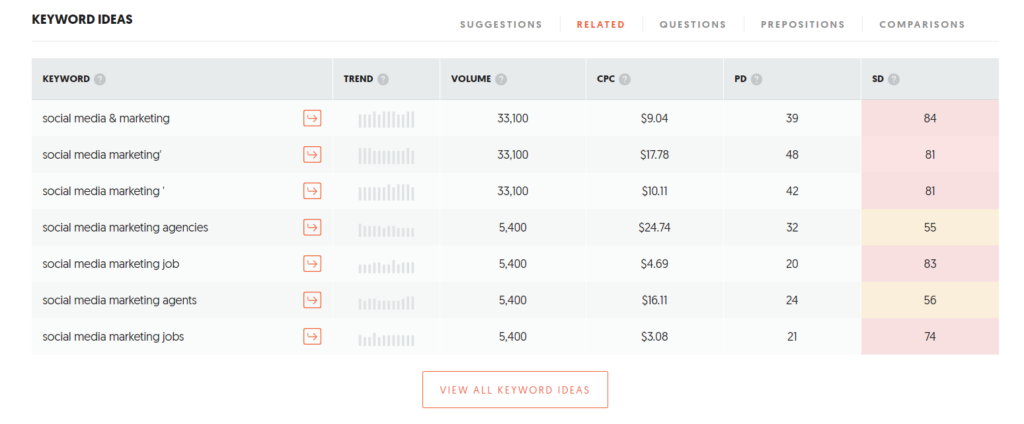
- Related – If you’re looking for the most extensive list of keywords containing your phrase.
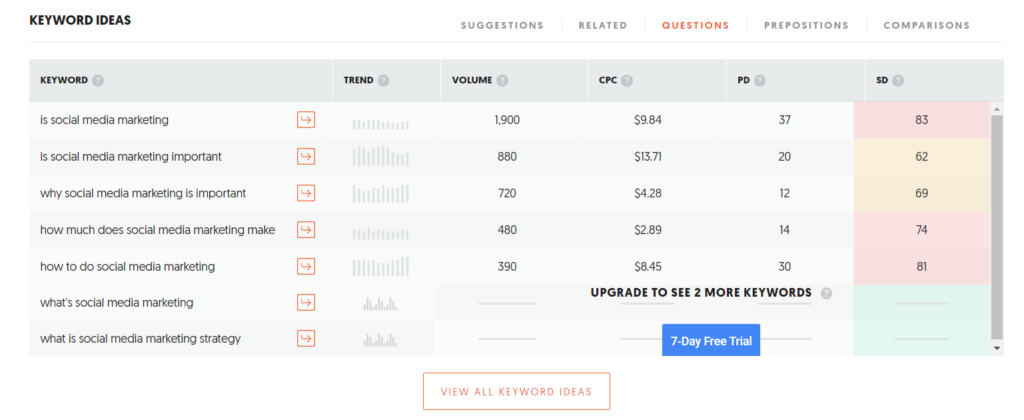
- Questions: When you want to know your phrase as a question.

- Prepositions: When the sentence containing your keyword start with a preposition.
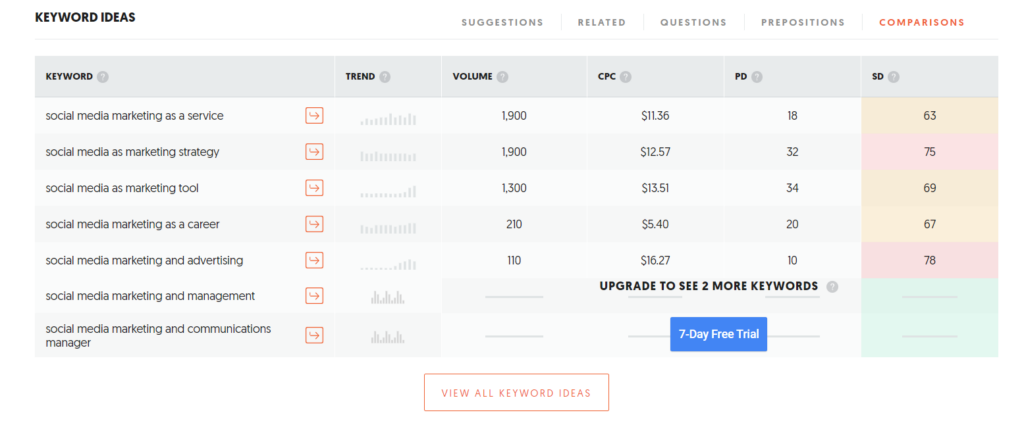
- Comparison: When you want to see your phrase in comparison with the other phrase.

4: You can find the most commonly used phrase from these five bars and use them as your keyword.
Apart from that, you can go further below to see the ‘Content Ideas’ table to see which site containing your keyword ranks the highest. It also shows the estimated website visits.
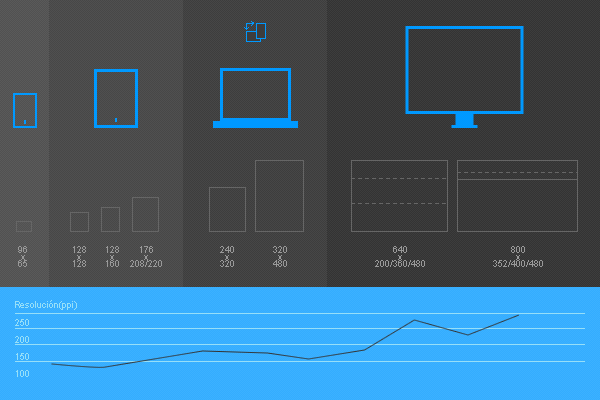
Step #18: Mind the Size of the Photo
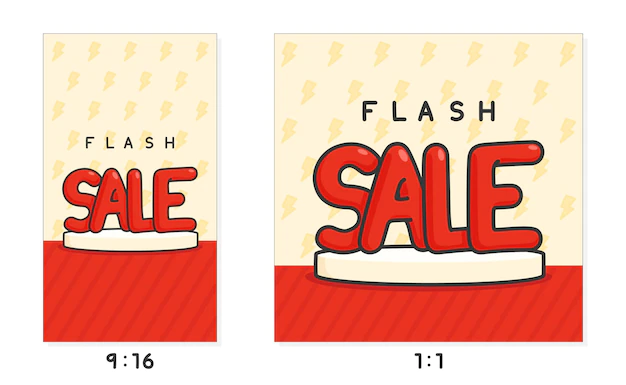
By size, we mean to say dimensions and aspect ratio. Not all images have the same dimensions across the website. If you’re keeping it the same, you’re probably not thinking of every device.
But it’s also challenging to remember the dimensions of all the images. For that reason, we have created a table of all the image types, along with their dimensions in pixel and aspect ratio.
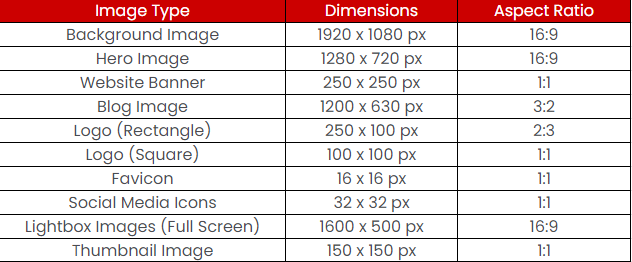
Look! It’s not the gospel truth. Size may vary a bit among websites, but this is just the general yardstick you can use for your eCommerce store.
Step #19: Lazy Loading
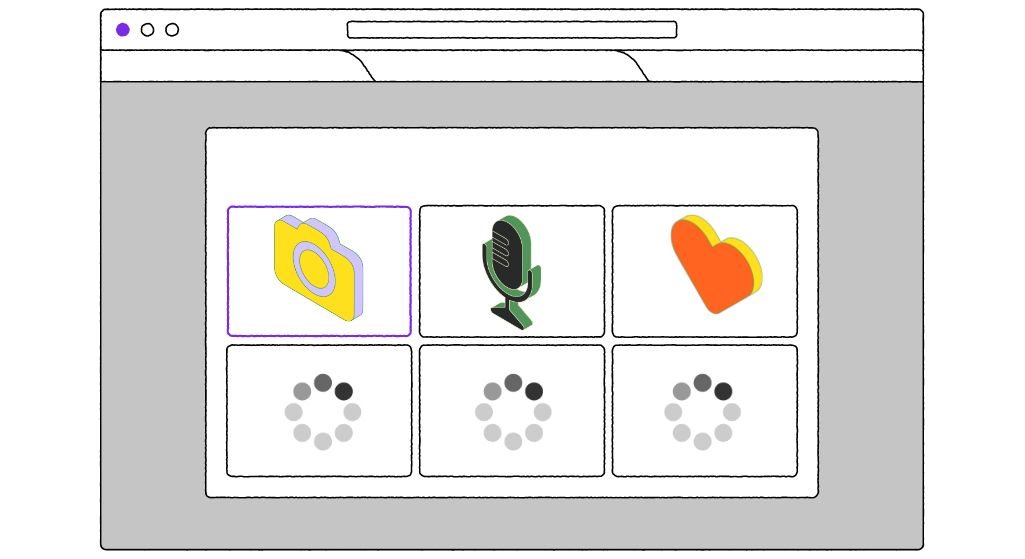
Lazy Loading is gradually loading the web images as the user progresses through the site. In the conventional method, all the data in the site gets loaded as you enter the site.
Lazy Loading prioritizes the loading of content the user is keen to watch. This is nothing less than a wonder for a web loaded with high-quality images.
Bring out the best performance from your website by switching to lazy loading on your web. Lazy Loading fastens the initial loading time and delivers the content quicker than normal image loading.
Step #20: Website Map in Google Search Console
Just as you have a sitemap for all the URLs on the website, it’s important you have an image sitemap for all the images on your eCommerce store. Please note it’s not necessary. Your images and URLs well maybe indexed by other sources, but it has always been recommended for faster indexation.
Now if you’re using plugins like Yoast, it will automatically include images in the sitemap. But you can add images to the sitemap manually as well. Here are the steps:
1: Go to any free image sitemap generator tool
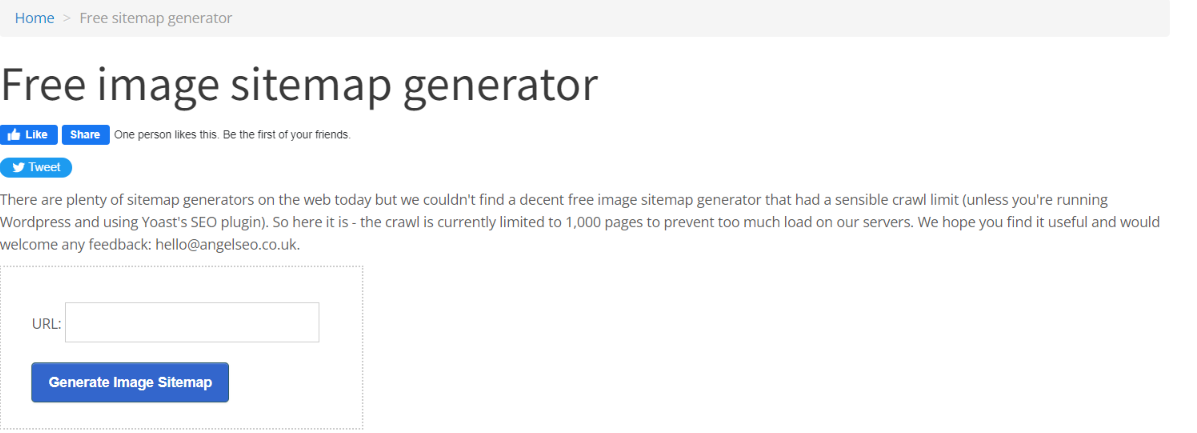
2: Enter the URL of your website and click generate
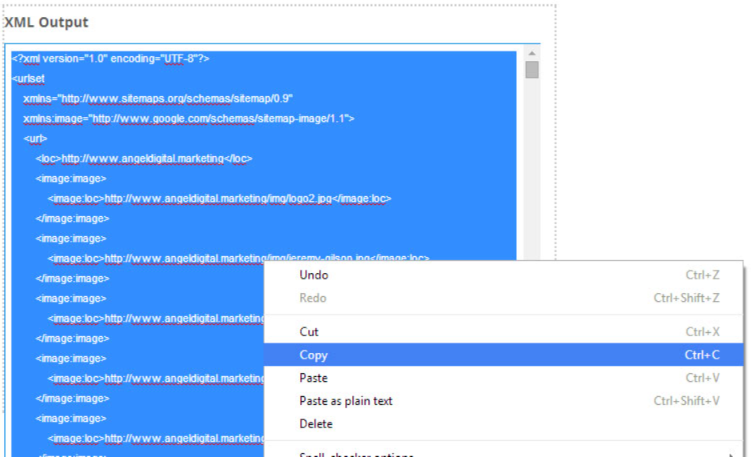
3: Save the file in notepad
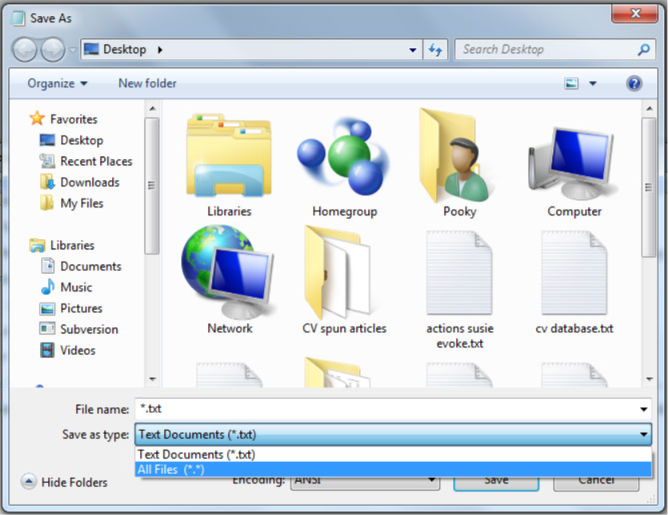
4: Name the image sitemap in .xml format
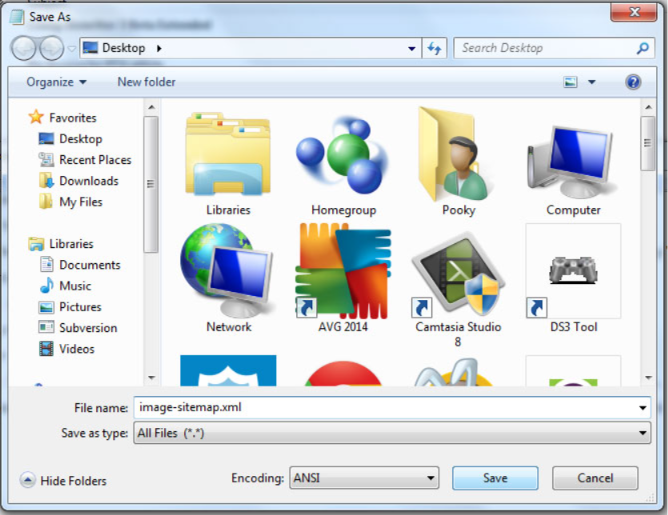
5: Submit the file in the search console
Step #21: Image Alt Tags
Search engines love it knowing how inclusive you’re. Even with the images. For readers with visual incapabilities, it’s always a good practice to add alt texts to your images. But not just for them. Alt text is also a great practice for areas with slow & flaky internet connections.
Instead of seeing a blank image error or an ugly file type name like ‘IMG_20160219.jpeg’, it is better to give an alternative tag to your images which make sense to the buyers. Brown formal shoe in 7 UK.’
Alt tag gives them an idea of what the image is about.
So now, instead of ‘Error Loading the Image,’ the user will read something meaningful when the image won’t load. Moreover, this optimized image will also pop up when someone searches brown formal shoe 7 UK on Google.
You can also put popular keywords to reach out to more audiences. But make sure to use them intuitively and relevantly without stocking all of them irrelevantly.
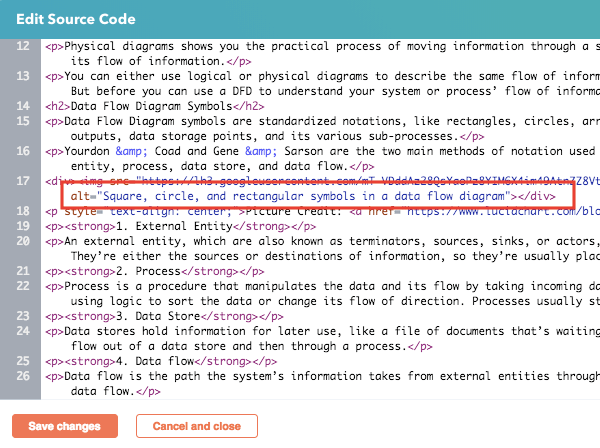
This is how Alt Text is added manually in the Source Code.
Here’s how you can add Alt Tag to any image in WordPress:

1: Go to a page containing the image in WordPress. Select the image.
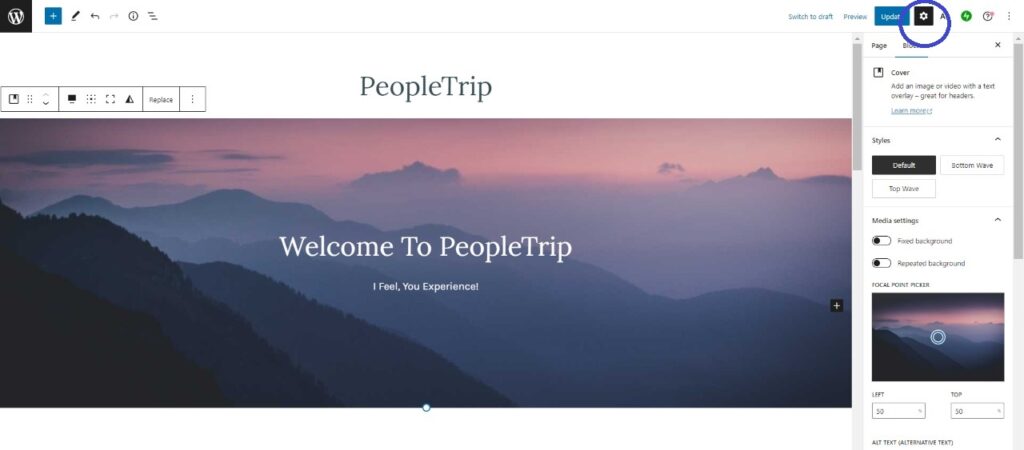
2: Go to the Settings option in it.
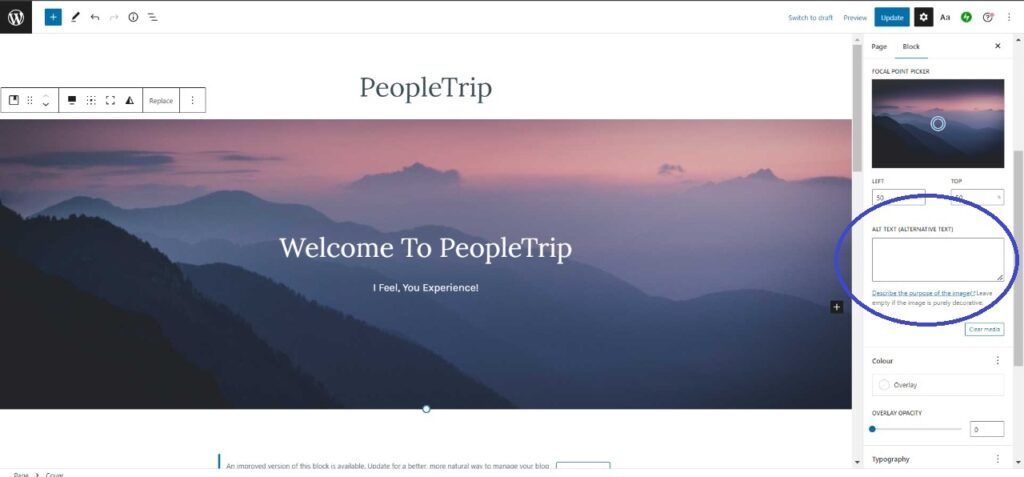
3: Then go to the Alt text option and add the Alt Text for the image.
Step #22: Use Structure Data for Image
Do you see ratings and the number of ratings? It’s the result of structured data of products. Although you can’t create schema markup for images directly, you can include product schema-rich results.
Product schema does wonder when your users make image searches for any specific product. Google prefers eCommerce sites using product schema on the image search results over the ones that don’t use it.
While creating schema markup for any product, you can include various information like
- price,
- availability,
- ratings, etc.
But the most important factor to get included in the search result is giving the image URL and describing it. Here’s how you can create a schema markup generator for your product pages.
1: Go to any free schema markup generator tool

2: Fill in all the important details
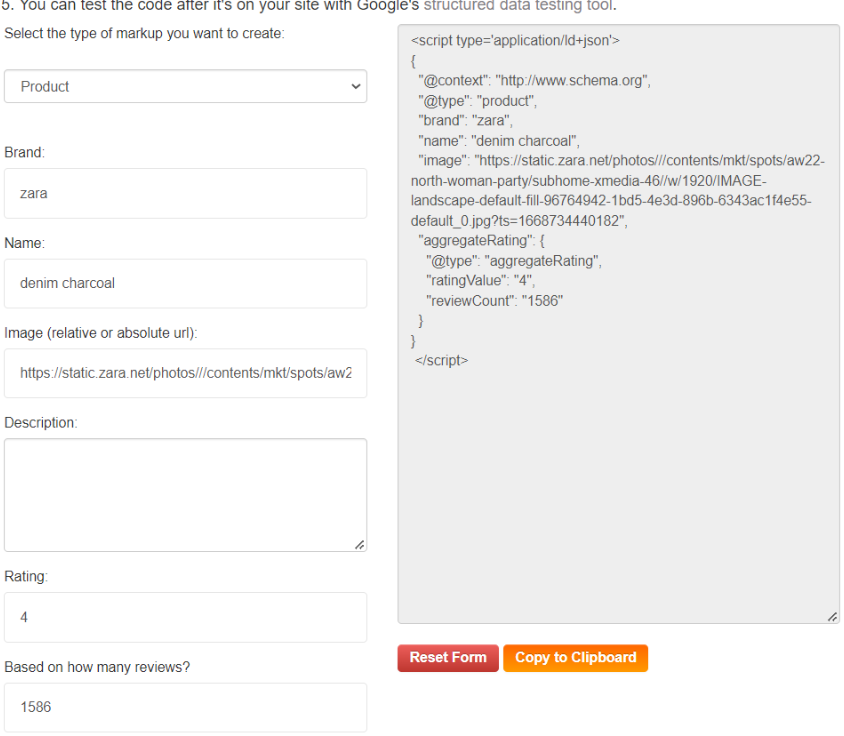
3: Paste the schema in your HTML document’s <head> section. Before the </head> line of code.
Step #23: Use SEO-friendly URLs For Images
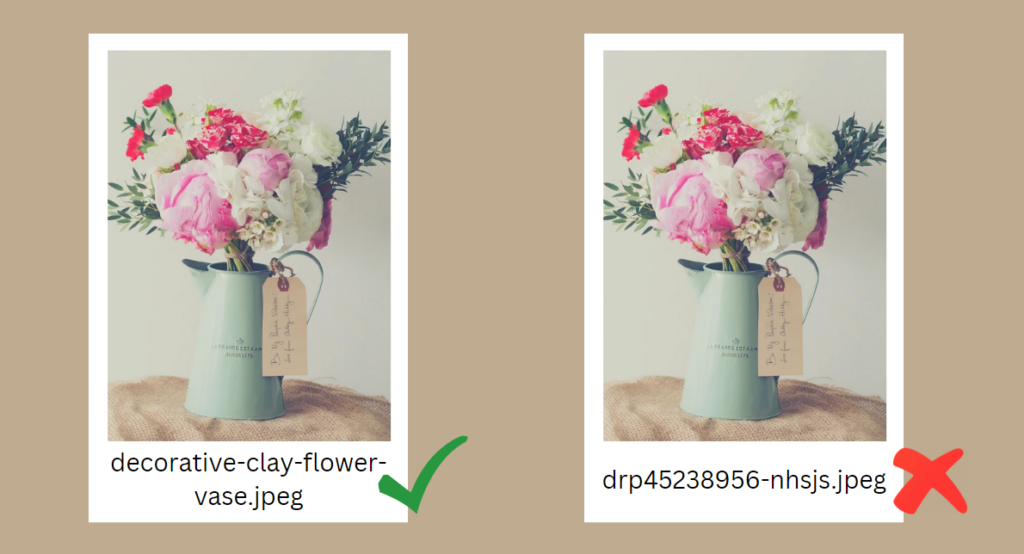
Here are some tips to optimize your image URLs for SEO:
- Make it short and simple.
- Use Hyphen(-) instead of Underscore(_).
For example,
Not optimized: http://www.petshop.com/blog/how_to_bathe_your_dog
Optimized: http://www.petshop.com/blog/how-to-bathe-your-dog
- Use only Lowercase letters in URLs.
- Include Keywords in URLs.
- Describe Your Content.
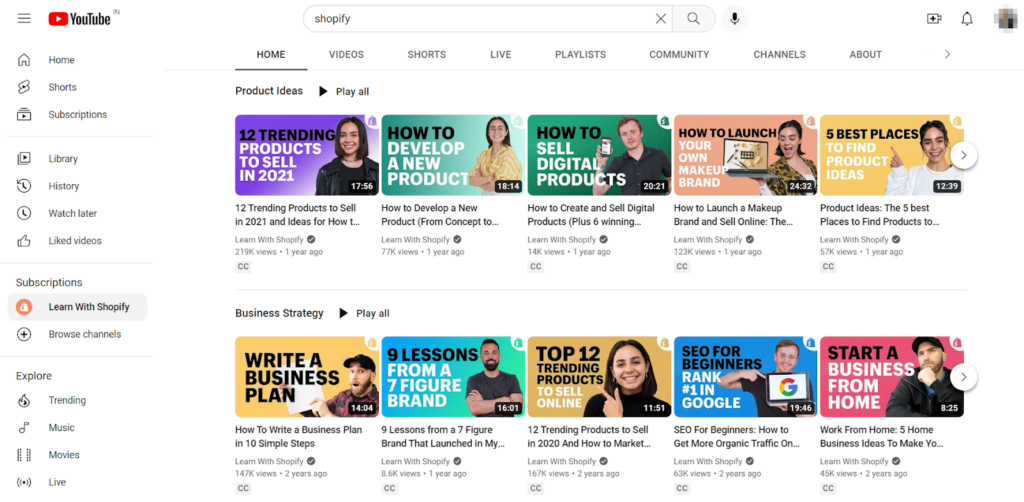
Step #24: Optimize Image Thumbnails For All The Other Marketing Channels As Well
Just like image optimization, it is crucial to optimize your thumbnails, too, for better performance. Specific aspects must be considered when it comes to optimizing thumbnails. Here are those:
For Google Search Engine,
- Aspect Ratio:
Most of the thumbnails shown on Google are square, i.e., 1:1 ratio. Make sure all your thumbnails are in the same ratio.
2. Relevant to URLs:
The content in the thumbnails must be aligned with the URLs the user searches for. This makes your site SEO-friendly too.
Remember to add relevant image names and alt tags in the thumbnails.
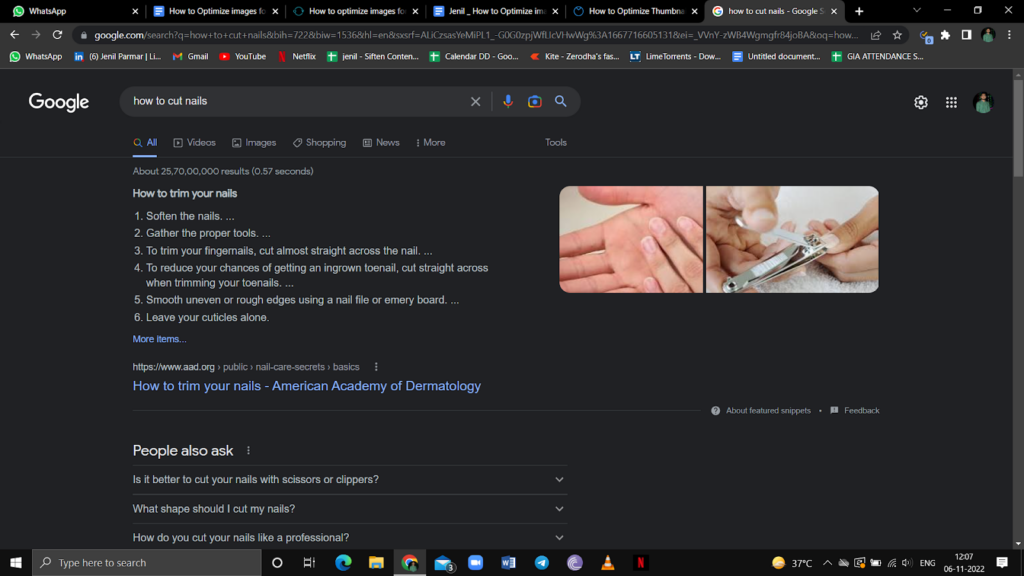
3. Clear and Informative:
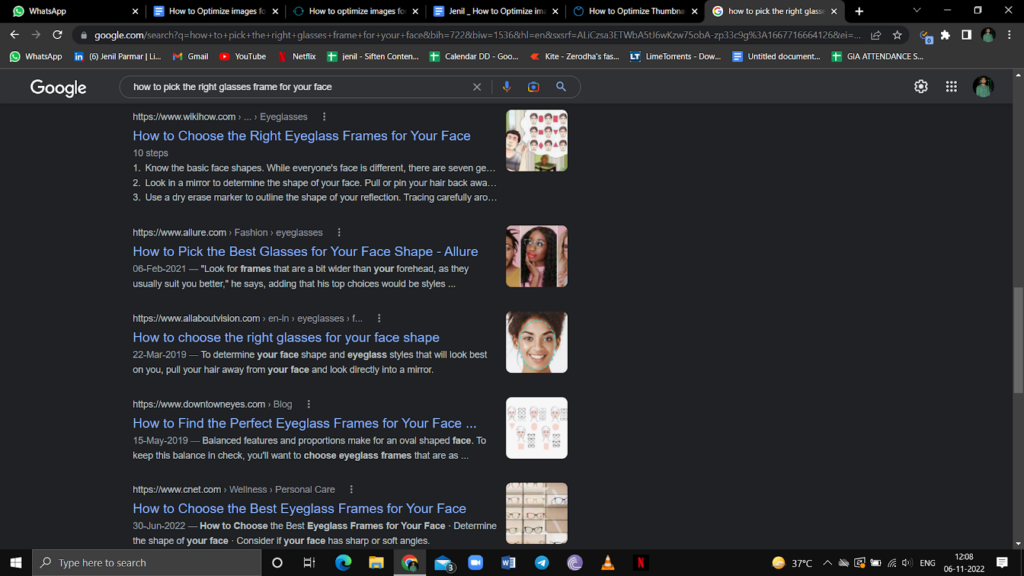
Thumbnails must be designed minimally while also keeping them as informative as possible. In the example, they have given a face type and suitable glasses.
Simply looking at it, one can know what they were looking for. Google can quickly know what you have curated if it is clear and informative.
It must also be minimal to avoid any stack of data. Curated information is the key to attracting customers.
4. Consistent Branding:
Consistent Branding, regarding thumbnails, means using the same color palette with the same fonts in the same style to reach targeted audiences.
You can highlight your thumbnails’ prominent words or topics to catch the user’s attention.
Keep this same across all the platforms – website, social media and company’s logo. This also further supports customer loyalty toward your brand.
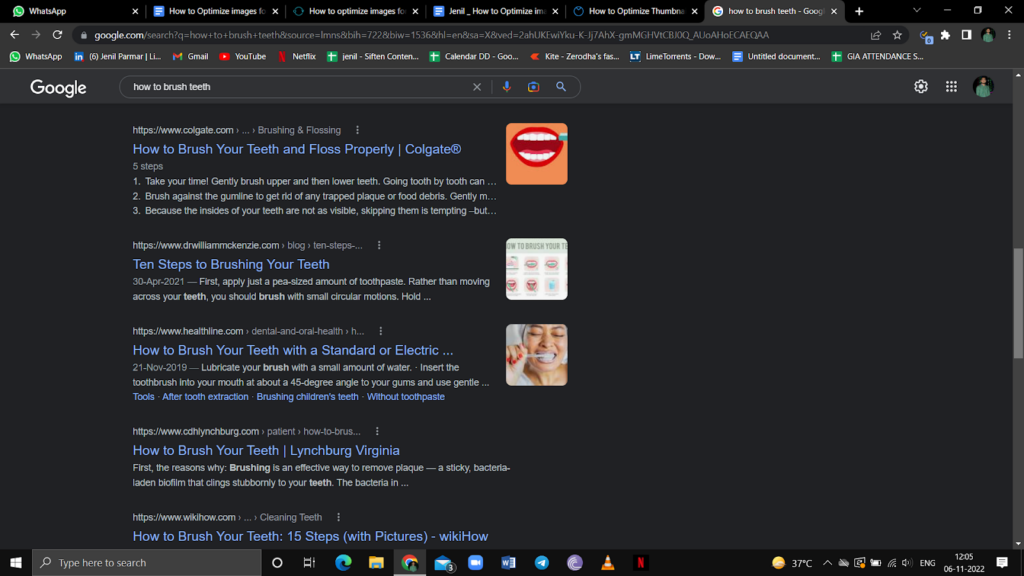
Step #25: Check Out The Image Types In SERP
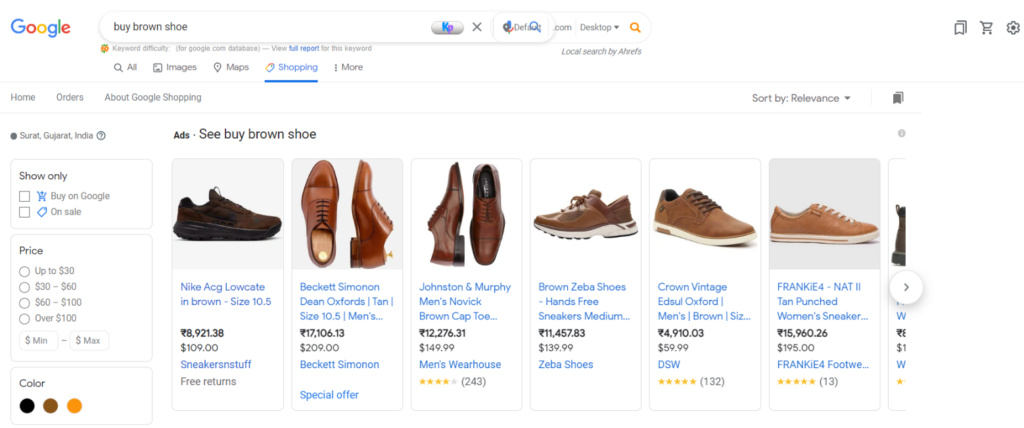
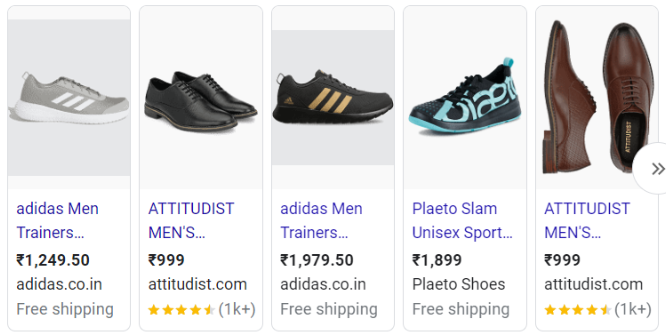
We are in love with this method because it gives us a chance to stay in the competitive space. Let us tell you how. When you search something like “buy brown shoe” and check shopping results on Google, you can actually feel what kind of images Google shopping is promoting.
Benchmark these images for your photography! If most images in your niche have green/grey backgrounds, you know what route to opt for next.
You can also
- observe the angles,
- the background-to-image ratio, and
- many more little details to pull the perfect picture according to SERP.
Step #26: Use Responsive Images
You need to give width property to all the images on your product page to increase image responsiveness. When you assign the width property, the height of the product photo adjusts automatically.
One of the things to take care of while doing it is setting up the width property in percentage rather than Pixel.
The above gif shows how a change in the size of the image changes the size of the file.
Step #27: A/B Testing of Images
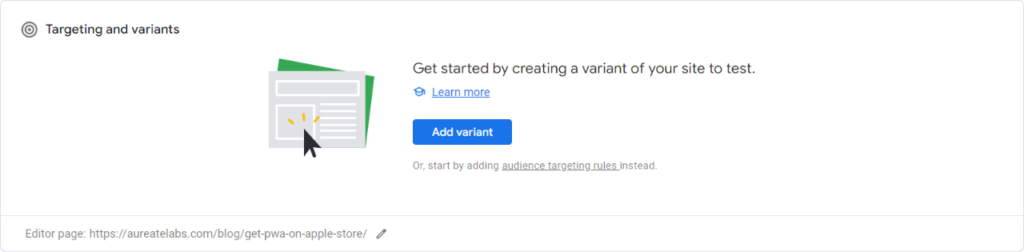
Your image optimization steps should end with a bang. And what’s better than testing? You can A/B test almost any product page with the help of Google Optimize.
Divide equal traffic on both the original and variant pages and notice the goal conversions set by one. Stick with the image with more conversion percentage. Here’s how you can execute it.
1: Log in to your GoogleOptimize account
2: Create experience
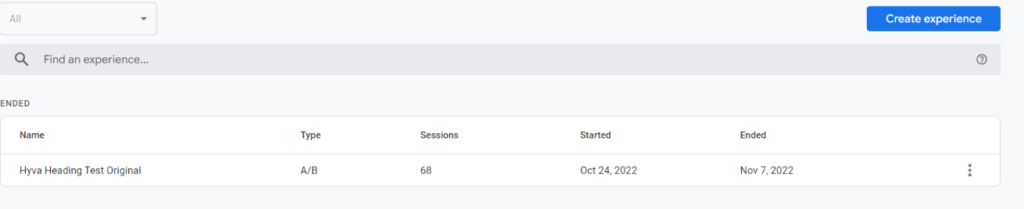
3: Keep the image settings as shown in the picture
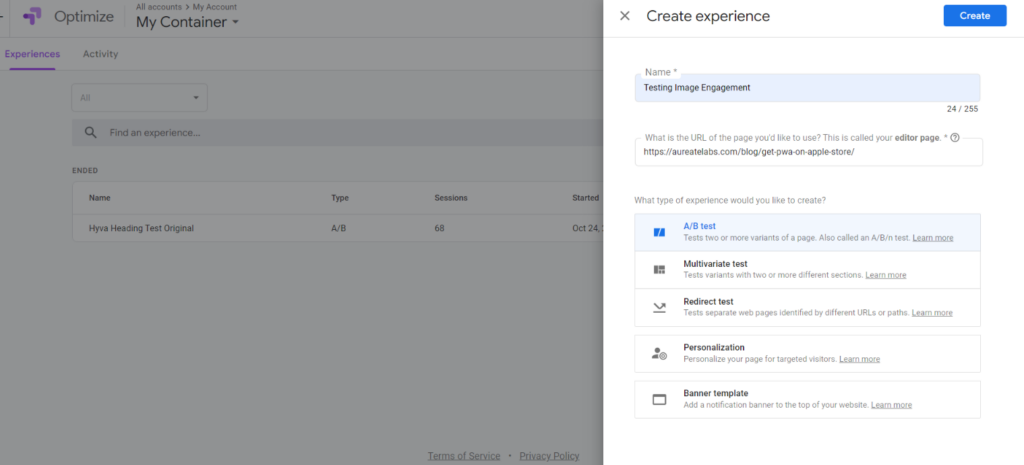
Name the test, select the product page you want to edit, and select the test name. For simplicity, we’ll select A/B testing.
4: Add variant page
5: Edit the variant page
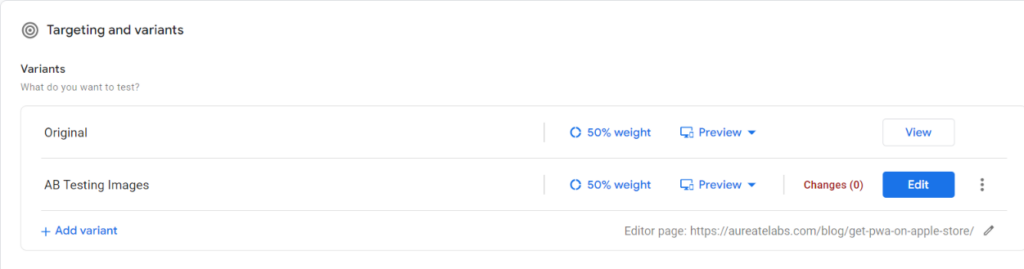
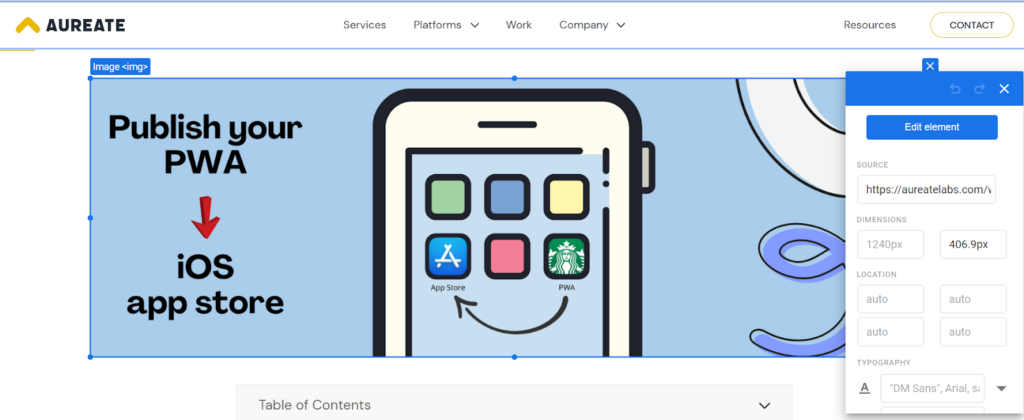
6: Change the product image
7: Set desired goal conversion and publish the test
Now you can track which product image is performing well through three metrics:
- Which product image engages more (more time spent on the page)
- Which product image converts more (more orders on the page)
Conclusion
These were the final steps and tools for optimizing images for your eCommerce site. We have kept it as user-friendly and straightforward as possible while keeping in mind that you will optimize it.
If you still need clarification, research the topics from other sources. These are the best practices to help you optimize your images for the website.
SEO is mainly about experimenting with various tools, tips and tricks. Whichever fits your site works the best! You can take a quick survey from your users about what they want additionally and what needs to be modified on the site.
This way, you can adapt and enhance the overall user experience to improve your conversion rates and traffic to your site. Once you have processed these, it’s time to filter the best eCommerce payment solution, which we have discussed in the next chapter.
