3 Methods to Install Sample Data in Magento 2

Magento sample data is a module that includes a sample store, helping you transform Magento into a demo store. That demo store uses the Luma theme on the storefront and includes over 250 sample products, customers, orders, categories, CMS pages, pricing rules, and more.
The sample data provides a realistic foundation for testing various aspects of your Magento store. Apart from that, installing sample data is optional.
In this article, we’ll learn ways to install sample data in Magento 2 along with that we’ll also look for solutions to potential errors that you may face during installation. Let’s start.
Ways to Install Magento 2 Sample Data
There are 3 methods for installing sample data in Magento 2.
- Using Magento CLI
- By cloning repositories
- With composer.json file
Let’s learn them step-by-step.
1. Install Magento 2 Sample Data using CLI
Before you start the installation process, ensure developer mode is enabled. You can do this by running the following command in your Magento root directory:
php bin/magento deploy:mode:set developerOnce you do that, here are the steps you need to follow.
Step 1: First, you’ll need to set up a path to the Magento CLI tools, if they’re not already in your system’s PATH environment variable. This might be necessary on some server setups and you can use this command to perform it.
Export PATH=$PATH:$(pwd)/binHowever, most modern Magento installation processes automatically configure the CLI path during the installation. This means you don’t need to set it up manually.
If you’re unsure whether the path is already set, you can run the command php bin/magento –version in your terminal. If this command successfully runs and displays the Magento version, it means the path is already configured correctly.
Step 2: Once you do that, change your current directory to Magento’s Webroot and run the following command to initiate the sample data installation:
php bin/magento sampledata:deployStep 3: If you encounter a URL authentication error to repo.magento.com, it means that CLI needs your Magento account credentials to access the sample data repository. In this case, you must run the “Composer Update” command. This command might prompt you for your Magento Connect Account username and password.
Step 4: Once that is done, move to update the database schema and clear the Magento cache after installing sample data. Here’s the command that you can run.
- Update Database Schema: php bin/magento setup:upgrade
- Clear Cache: php bin/magento cache:flush
This step isn’t strictly necessary but is highly recommended as it ensures everything is properly synchronized.
And that’s all about installing sample data using CLI.
2. Install Magento 2 Sample Data By Cloning Repositories
For cloning the Magento 2 sample data repository, you can choose between two protocols: Secure Shell (SSH) or the more widely used Hypertext Transfer Protocol Secure (HTTPS).
I’ll show you the installation process with both of them.
Cloning with SSH Protocol
Step 1: Visit the Magento sample data repository.
Step 2: Locate the branch section and click “SSH” next to the branch matching your Magento version (e.g., “2.4.5-develop” if using Magento 2.4.5).
Step 3: Copy the displayed SSH URL to your clipboard.
Step 4: Use your terminal to switch to your Magento 2 server’s document root directory. This is typically:
- /var/www for Ubuntu
- /var/www/html for CentOS
Step 5: Run the following command, replacing <url> with the copied SSH URL from Step 2. For example,
git clone git@github.com:magento/magento2-sample-data.git
Step 6: Wait until the repository is cloned on your server.
Step 7: Check out the branch of the sample data repository that corresponds with the branch used from the main Magento 2 repository. Follow these steps:
- Navigate to the root directory of the sample data repository using the command line.
- Use the following command to check out the branch:
git checkout <Magento_branch-name>If the branch of the Magento repository is 2.3.3 develop, the sample data branch should be 2.3.3.
To check the correct branch use the command “$git checkout 2.3.3” from the sample data repository’s root directory.
Step 8: Use cd to navigate back to your main Magento installation directory (usually the parent directory of the document root).
Step 9: Change to <magento_root>.
Step 10: Lastly, run the following command to create a symbolic link between the sample data and your Magento installation.
php -f <sample-data_clone_dir>/dev/tools/build-sample-data.php ----ce-source=”<path-to-your-magento-instance>”Cloning with HTTPS Protocol
Step 1: Visit the Magento sample data repository.
Step 2: Locate the HTTP under the clone URL field on the right side.
Step 3: Click the “HTTPS” option to copy the displayed URL to your clipboard.
Step 4: Use your terminal to switch to your Magento 2 server’s document root directory. This is typically:
- /var/www for Ubuntu
- /var/www/html for CentOS
Step 5: Run the following command, replacing <url> with the copied HTTP URL from Step 2. For example, git clone https://github.com/magento/magento2-sample-data.git
Step 6: Wait until the repository is cloned on your server.
Step 7: Check out the branch of the sample data repository that corresponds with the branch used from the main Magento 2 repository. Follow these steps:
- Navigate to the root directory of the sample data repository using the command line.
- Use the following command to check out the branch:
git checkout <Magento_branch-name>If the branch of the Magento repository is 2.3.3 develop, the sample data branch should be 2.3.3.
To check the correct branch use the command “$git checkout 2.3.3” from the sample data repository’s root directory.
Step 8: Use cd to navigate back to your main Magento installation directory (usually the parent directory of the document root).
Step 9: Change to <magento_root>.
Step 10: Lastly, run the following command to create a symbolic link between the sample data and your Magento installation.
Php -f <sample-data_clone_dir>/dev/tools/build-sample-data.php ----ce-source=”<path-to-your-magento-instance”That’s all about installing sample data by cloning repositories. Let’s move further and understand one another method of installing sample data in Magento 2.
3. Install by composer.json file
Here, we’ll learn how to install sample data in your Magento 2 by composer.json.
Step 1: Add the following code into your root composer.json file.
Code for Magento 2.4:
{

    "require": {

        "magento/module-bundle-sample-data": "100.4.*",

        "magento/module-catalog-rule-sample-data": "100.4.*",

        "magento/module-catalog-sample-data": "100.4.*",

        "magento/module-cms-sample-data": "100.4.*",

        "magento/module-configurable-sample-data": "100.4.*",

        "magento/module-customer-sample-data": "100.4.*",

        "magento/module-downloadable-sample-data": "100.4.*",

        "magento/module-grouped-product-sample-data": "100.4.*",

        "magento/module-msrp-sample-data": "100.4.*",

        "magento/module-offline-shipping-sample-data": "100.4.*",

        "magento/module-product-links-sample-data": "100.4.*",

        "magento/module-review-sample-data": "100.4.*",

        "magento/module-sales-rule-sample-data": "100.4.*",

        "magento/module-sales-sample-data": "100.4.*",

        "magento/module-swatches-sample-data": "100.4.*",

        "magento/module-tax-sample-data": "100.4.*",

        "magento/module-theme-sample-data": "100.4.*",

        "magento/module-widget-sample-data": "100.4.*",

        "magento/module-wishlist-sample-data": "100.4.*",

        "magento/sample-data-media": "100.4.*"

    }

}- For Magento 2.3 — Replace “100.4.*” with “100.3.*” in the above code.
- For Magento 2.2 — Replace “100.4.*” with “100.2.*” in the above code.
If prompted for authentication keys (username and password), refer to the Magento documentation on “Get your authentication keys”
So, that was all about installing sample data into Magento.
Let’s move further in the article to understand basic errors you may encounter while following these processes with a solution to them.
Common Magento Sample Data Install Errors: Fixes & Workarounds
Here, I’ve listed three common errors you might encounter during sample data installation and the steps to fix them.
Installing sample data in Magento 2 is very helpful for testing functionalities, but the installation process can sometimes lead to errors. Here are some common errors you may encounter with explanations on how to fix them.
1. File System Permission Errors
One of the most common errors that you may face will be relating to file system permissions.
Magento needs to write new files and folders to fill your store with test products, categories, and other information when installing sample data. If you haven’t set the necessary permissions for web server users (typically, Apache or www-data) to unlock these doors and drawers; the installation will fail.
For example, you might encounter errors like this:
- Can’t create directory
/var/www/html/magento2/generated/code/Magento/CatalogRule/Model/ - Class Magento\CatalogRule\Model\RuleFactory does not exist.
Solution: Check your file system permissions and write access to Magento’s root directory and its subdirectories. Moreover, you can also consult your hosting provider or server administrator for further assistance with setting appropriate permissions.
2. Magento Mode Error
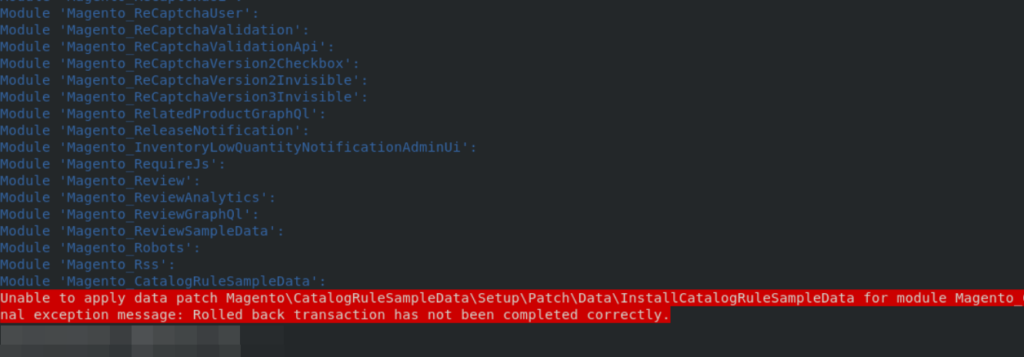
Sample data installation will typically throw an error when working in production mode. This is because the production mode restricts certain actions for security purposes. The installation will cause a PHP Fatal error or the following error when you run the setup:upgrade command:
Solution: Switch to developer mode before installing sample data. You can switch to developers through the Magento admin panel or by modifying the app/etc/env.php file. Once the sample data is successfully installed, remember to switch back to production mode.
3. PHP Max Execution Time Error
Installing sample data demands resources and time. Depending on the capabilities of your server configuration, it can take anywhere from mere seconds to several minutes.
If the max_execution-time in your PHP configuration file is set to low and is inadequate for the sample data script, an error will occur.
Solution: Increase the max_execution-time value in your php.ini file. Oftentimes, you can find it in your hosting provider’s control panel. An ideal value you can set is 600 or more. Aim for a reasonable time that allows the installation to finish comfortably, as a very high limit can impact server performance. Once you set the value, save the file and restart PHP to update its configuration.
Lastly, when the sample data are installed successfully, don’t forget to reset the max_execution-time value back to the original value.
That was all about understanding the common errors and their potential solutions.
Last Words
This article explained 3 methods to install sample data in Magento 2 with a solution for potential errors that may occur. I hope this information helps you carry out the installation process successfully. If you’re still stuck with any doubts or issues, you can always contact our Magento experts to help you out.
Our range of Magento services includes:
- Magento Store Development
- Magento Performance Optimization
- Magento Migration
- Magento Support & Maintenance
Feel free to contact us, we are happy to help. 😀


Post a Comment
Got a question? Have a feedback? Please feel free to leave your ideas, opinions, and questions in the comments section of our post! ❤️