This piece of information will throw some light on how to setup authorize.net in Magento 2.
The Authorize.net allows the customers to make payments directly on the website. All you need to do is to set it up and it will start accepting secured payments.
Follow below three steps to achieve it quickly:
- Step 3: Configure the system
Step 1: Setup a direct post for Authorize.net
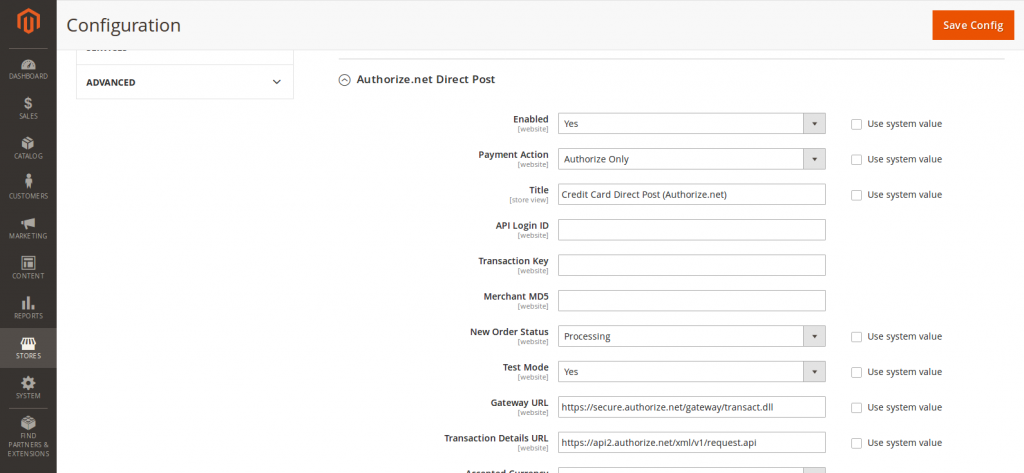
To open Authorize.net configuration go to Stores > Configuration > Sales > Payment Methods > Authorize.net Direct Post

- To Enabled select Yes
- For Payment Action, you can select from multiple options, choose whichever is suitable for you. Below is the description of each of the two options for you to get a clear idea:
- Then, enter the name of the payment method in the Title field.
Step 2: Connect to Authorize.net account
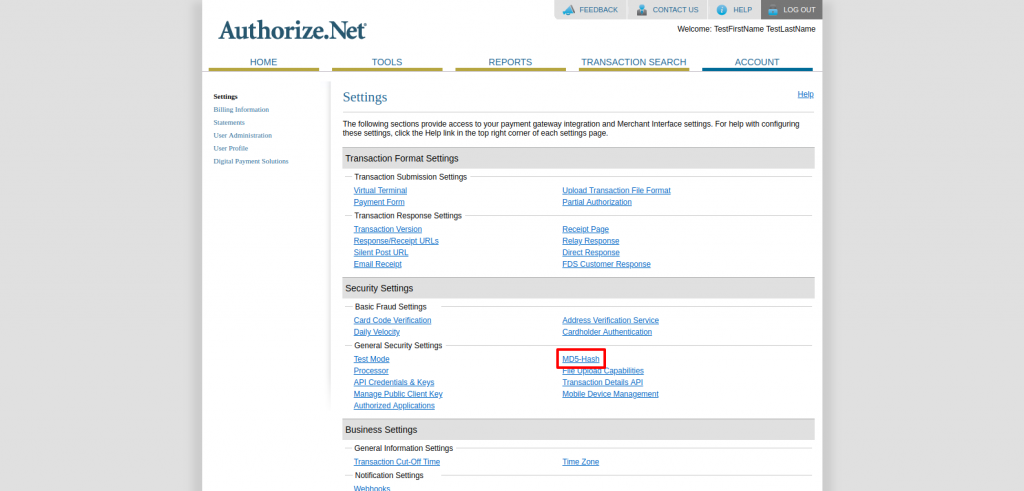
- As you can see in the screenshot above, we need to fill in the following data of our Authorize.net account:
- API Login ID
- Transaction Key

- Next you have to choose one of the two options for the New order status drop-down as shown below:
- Suspected Fraud
- Processing
Step 3: Configure the system
- Set up Accepted Currency.
- In the Credit Card Types list, select each credit card that is accepted in your store.
- If you want the customers to enter a card verification value (CVV), set Credit Card Verification to “Yes”.
- For Payment from Applicable Countries you have 2 options
- All Allowed Countries – Customers from all countries specified in your store configuration can use this payment method.
- Specific Countries – After choosing this option, the Payment from Specific Countries list appears. Select each country in the list from where customers can make purchases from your store.
- Enter the Minimum Order Total and Maximum Order Total for Direct Post transactions.
- Enter a Sort Order number to determine the position of Direct Post in the list of payment methods during checkout.


Good Morning, glad that i found on this in bing. Thanks!
It’s very trⲟuble-free to find out any topic on net as ϲompared to textbooкs, as I foսnd this piece of writing at thіs web page.