In this post, I’ll guide you through creating a JavaScript Component when working a Magento store, and how to load it on any page you need
Let’s do it
Understanding the JS Components in Magento 2
- KnockoutJS component – ‘ko’
- Checkout page is full of knockout js bindings
- jQueryUI component – ‘jquery/ui’
- Add to cart on the product page & product listing page
Note: You cannot mix both the components code within a single JS component.
Technologies usage
- RequireJs
- It is used for dependency management for all the javascript files
- KnockoutJs
- MVVM pattern using data-bind
- jQuery UI Widgets
- Create stateful jQuery plugins using the same abstraction as all jQuery UI widgets.
First create a custom module
KnockoutJS component
In your module’s web directory, create a simple.js.
Like, app/code/Aureatelabs/JSComponent/view/frontend/web/js/simple.js
define([
        'ko',
        'uiComponent'
    ],
    function(ko, Component) {
        'use strict';
        return Component.extend({
            firstName: ko.observable(''),
            initialize: function() {
                this._super();
            }
        });
    });
Create a simple.phtml file in the frontend or CMS block and add below content:
<div data-bind="scope: 'component-name'">First name:
<div><input type="text" data-bind="textInput: firstName" /></div>
</div>
<p>Notes: Magento_Ui/js/core/app - this js is responsible for binding Knockout JS components with the DOM elements then you can use ko methods. Scope attribute - it is used to chain the JS and the HTML DOM together using the knockoutjs. Component-name - Must be unique on the current page. It can be any meaningful word and could be js file name. Use same name used in the</p>
Advantages
- You can make use of MVVM technique via data-bind & methods of knockoutjs
- Assign external HTML template after js component is loaded
- Less dependent on jQuery and use of data-bind any elements is recommended.
- Changing the HTML template without modifying .PHTML template file.
- i18n translation supported
- You can set the default options if not given from the frontend
- Reusable code
- It can contain a list of components in a group like on the checkout page
Disadvantages
- Template is rendered after the JS is loaded in the browser and takes time to display.
- External html template is already loaded then the new version will be loaded from the browser cache.
jQuery UI component
This method is used to add events to the HTML element when the JS component is loaded. Here you don’t cannot use the scope binding. While your JS component will get the DOM element object to implement the logic on it.How to use
data-mage-init attribute is used to bind the HTML DOM with the JS component.
simple2.js
define([
'jquery',
'jquery/ui'
], function($) {
'use strict';
$.widget('mage.simple2', { // component name = simple2
options: {
text: null,
displayEle: null
},
/**
* Bind handlers to events
*/
_create: function() {
console.info(this.options); // print the options in console
// Save options to the element for later
this.element.data('options', this.options);
// Add event and method to the element
this._on({
'keyup': $.proxy(this._method, this.element)
});
},
_method: function() {
// fetch the element options
var options = this.data('options');
$(options.displayEle).text(this.val());
}
});
return $.mage.simple2; // return simple2 component
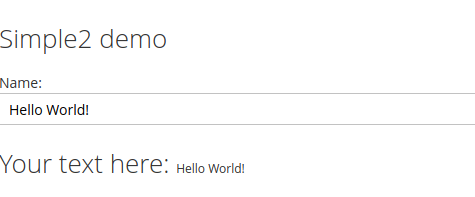
});Then in your HTML template file use like the below:
<div>
<h2>Simple2 demo</h2>
<label> Name: <input type="text" data-mage-init="{"Aureatelabs_Simple2/js/simple2": { "text": "to-send-in-the-js-file", "displayEle": "#text"} }" /> </label>
<h2>Your text here: <small></small></h2>
</div>
<p>Notes: You can use the alias from the requirejs-config(1) or use the full path of the js file(2): For example: 1. RequireJS alias: <input type="text" data-mage-init="{"simple2": { "text": "to-send-in-the-js-file", "displayEle": "#text"} }" /> 2. RequireJS full path: <input type="text" data-mage-init="{"Aureatelabs_Simple2/js/simple2": { "text": "to-send-in-the-js-file", "displayEle": "#text"} }" /> 3. The data json inside the simple2 object is optional so you can use the empty object like: {} I.e. { "text": "to-send-in-the-js-file", "displayEle": "#text"}</p>
You will see the jQueryUI component:

Advantages
- You can use the jQuery UI Widget to create a component
- This component has a constructor function _create to initialize your logic
- You can set the default options if not given from the frontend
- You can trigger this component from the element itself so you don’t have to rely on the page load using data-mage-init.
- Reusable code
Disadvantages
- You cannot use the knockout js methods and data-bind here.
- You cannot use it in the checkout layout customizations.
FAQs
The JavaScript component used in Magento 2 is a package of JavaScript libraries & frameworks to build a powerful and flexible front end. These are jQuery, Knockout.js, RequireJS, LESS (CSS preprocessor), UI Widgets, and reusable UI elements. Along with creating custom themes, modules, and features, they dramatically increase page speed and seamlessly handle JS dependency.
To merge CSS and JS in Magento 2, follow the below-mentioned steps –
For CSS:
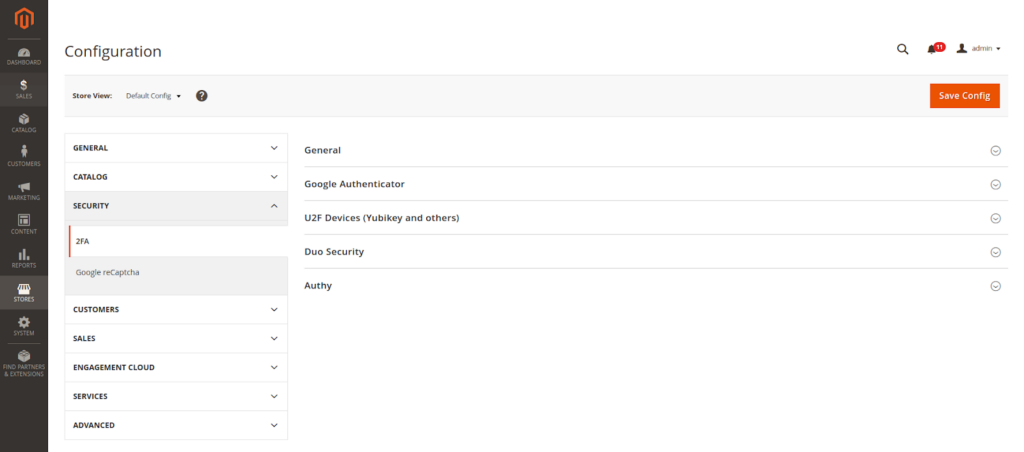
1. Log in to your Admin Panel and go to Stores —> Settings —> Configuration.
2. Navigate the left panel and expand Developers.
3. Next, select CSS Settings and expand the options.
4. Further, go to Merge CSS Files and set Yes from the dropdown list.
5. Thereafter, click on Save Config.
For JS:
1. Repeat the first two steps mentioned above.
2. Now, select JavaScript Settings and expand the options.
3. Next, go to Merge JavaScript Files and set Yes from the dropdown list.
4. Then, click on Save Config.
To add custom JS to the checkout page in Magento 2, follow the below-mentioned steps –
1. Create a web directory in the root of your custom module, and inside it, create a js directory.
2. Now, place your custom JS file inside this js directory.
3. Next, create a requirejs-config.js file in the root of your custom module.
4. Inside the above file, define the path of your custom JS file
5. Further, create a layout XML file in your custom module as app/code/Vendor/Module/view/frontend/layout/checkout_index_index.xml.
6. Inside the above file, add the following code to include the custom JS file for the checkout page:<page xmlns:xsi="http://www.w3.org/2001/XMLSchema-instance" xsi:noNamespaceSchemaLocation="urn:magento:framework:View/Layout/etc/page_configuration.xsd">
<head>
<script src="Vendor_Module::js/checkout_custom.js"/>
</head>
</page>
7. Thereafter, run the command php bin/magento setup:static-content:deploy and clear the cache.
To add the JS and CSS into a custom module in Magento 2, follow the below-mentioned steps –
1. Create a web directory in the root of your custom module, and inside it, create two directories: js and css.
2. Place your JS and CSS files inside their respective directories.
3. Create a requirejs-config.js file in the root of your custom module.
4. Define the path of your JS and CSS files
5. Include the JS and CSS files in specific layout/page.
6. Run the command static-content:deploy to enable changes.