
We have another hack to Magento web development queries. And it’s about adding a view button in the admin grid. Follow the steps given below to add a view button in the admin grid:
1. Add the <actionColumn> tag in your admin grid UI component file as given below:
<?xml version="1.0" encoding="UTF-8"?>
<listing xmlns:xsi="http://www.w3.org/2001/XMLSchema-instance" xsi:noNamespaceSchemaLocation="urn:magento:module:Magento_Ui:etc/ui_configuration.xsd">
   <columns name="aureatelabs_grid_columns">
      <actionsColumn name="entity_id" class="Aureatelabs\Grid\Ui\Component\Listing\Column\ViewAction">
         <argument name="data" xsi:type="array">
            <item name="config" xsi:type="array">
               <item name="bodyTmpl" xsi:type="string">ui/grid/cells/html</item>
               <item name="viewUrlPath" xsi:type="string">aureatelabs/grid/view</item>
               <item name="urlEntityParamName" xsi:type="string">id</item>
            </item>
         </argument>
      </actionsColumn>
   </columns>
</listing>
2. Next, we need to create is a UI component class: Aureatelabs\Grid\Ui\Component\Listing\Column\ViewAction.php
<?php
namespace Aureatelabs\Grid\Ui\Component\Listing\Column;

use Magento\Framework\UrlInterface;
use Magento\Framework\View\Element\UiComponent\ContextInterface;
use Magento\Framework\View\Element\UiComponentFactory;
use Magento\Ui\Component\Listing\Columns\Column;

class ViewAction extends Column
{
   public $urlBuilder;

   public $layout;

   public function __construct(
       ContextInterface $context,
       UiComponentFactory $uiComponentFactory,
       UrlInterface $urlBuilder,
       \Magento\Framework\View\LayoutInterface $layout,
       array $components = [],
       array $data = []
   ) {
       	$this->urlBuilder = $urlBuilder;
      	 $this->layout = $layout;
       	parent::__construct($context, $uiComponentFactory, $components, $data);
   }

   public function getViewUrl()
   {
       return $this->urlBuilder->getUrl(
           $this->getData('config/viewUrlPath')
       );
   }

   public function prepareDataSource(array $dataSource)
   {
       if (isset($dataSource['data']['items'])) {
           foreach ($dataSource['data']['items'] as & $item) {
               if (isset($item['entity_id'])) {
                   $item[$this->getData('name')] = $this->layout->createBlock(
                       \Magento\Backend\Block\Widget\Button::class,
                       '',
                       [
                           'data' => [
                               'label' => __('View'),
                               'type' => 'button',
                               'disabled' => false,
                               'class' => 'aureatelabs-grid-view',
                               'onclick' => 'aureatelabsView.open(\''. $this->getViewUrl().'\', \''.$item['entity_id'].'\')',
                           ]
                       ]
                   )->toHtml();
               }
           }
       }

       return $dataSource;
   }
}
3. Add the code given below in Aureatelabs/Grid/view/adminhtml/layout/aureatelabs_grid_index.xml file.
<?xml version="1.0" encoding="UTF-8"?>
<page xmlns:xsi="http://www.w3.org/2001/XMLSchema-instance" xsi:noNamespaceSchemaLocation="urn:magento:framework:View/Layout/etc/page_configuration.xsd">
   <body>
      <referenceContainer name="js">
         <block class="Aureatelabs\Grid\Block\Adminhtml\Selector" template="Aureatelabs_Grid::view/js.phtml" name="aureatelabs.view.model.js" />
      </referenceContainer>
   </body>
</page>
4. Create a template file js.phtml in path Aureatelabs/Grid/view/adminhtml/templates/view/js.phtml
<script>
   require([
       "jquery",
       "Magento_Ui/js/modal/modal",
       'mage/backend/notification',
       "prototype"
   ], function(jQuery, modal, notification) {

//<![CDATA[
       Window.keepMultiModalWindow = true;
       var aureatelabsView = {
           overlayShowEffectOptions : null,
           overlayHideEffectOptions : null,
           modal: null,
           open : function(viewUrl, elementId) {
               if (viewUrl && elementId) {
                   jQuery.ajax({
                       url: viewUrl,
                       data: {
                           id: elementId
                       },
                       showLoader: true,
                       dataType: 'html',
                       success: function(data, textStatus, transport) {
                           this.openDialogWindow(data, elementId);
                       }.bind(this)
                   });
               }
           },
           openDialogWindow : function(data, elementId) {
               var self = this;
               if (this.modal) {
                   this.modal.html(jQuery(data).html());
               } else {
                   this.modal = jQuery(data).modal({
                       title: '<?= /* @escapeNotVerified */ __('Grid View'); ?>',
                       modalClass: 'magento',
                       type: 'slide',
                       firedElementId: elementId,
                       buttons: [{
                           text: jQuery.mage.__('Close'),
                           class: 'action- scalable back',
                           click: function () {
                               self.closeDialogWindow(this);
                           }
                       }],
                       close: function () {
                           self.closeDialogWindow(this);
                       }
                   });
               }
               this.modal.modal('openModal');
           },
           closeDialogWindow : function(dialogWindow) {

               jQuery('body').trigger('processStop');
               dialogWindow.closeModal();
               Windows.overlayShowEffectOptions = this.overlayShowEffectOptions;
               Windows.overlayHideEffectOptions = this.overlayHideEffectOptions;
           }
       };

       window.aureatelabsView = aureatelabsView;
//]]>
   });
</script>
5. Create a block class:Aureatelabs\Grid\Block\Adminhtml\Selector.php
<?php
namespace Aureatelabs\Grid\Block\Adminhtml;

class Selector extends \Magento\Backend\Block\Template
{
}
6. Create controller’s action class:Aureatelabs/Grid/Controller/Adminhtml/Grid/View.php
<?php
namespace Aureatelabs\Grid\Controller\Adminhtml\Grid;

use Magento\Backend\App\Action\Context;
use Magento\Backend\App\Action;

class View extends Action
{
   protected $resultRawFactory;
   protected $layoutFactory;

   public function __construct(
       Context $context,
       \Magento\Framework\Controller\Result\RawFactory $resultRawFactory,
       \Magento\Framework\View\LayoutFactory $layoutFactory
   ) {
       $this->resultRawFactory = $resultRawFactory;
       $this->layoutFactory = $layoutFactory;
       parent::__construct($context);
   }

   public function execute()
   {
       $content = $this->layoutFactory->create()
           ->createBlock(
               \Aureatelabs\Grid\Block\Adminhtml\View::class
           );

       /** @var \Magento\Framework\Controller\Result\Raw $resultRaw */
       $resultRaw = $this->resultRawFactory->create();
       return $resultRaw->setContents($content->toHtml());
   }
}
7. Lastly, you need to create a block class and it’s template file:Aureatelabs/Grid/Block/Adminhtml/View.php
<?php
namespace Aureatelabs\Grid\Block\Adminhtml;

use Magento\Backend\Block\Template;

class View extends Template
{
   public $_template = 'Aureatelabs_Grid::view.phtml';

     public function __construct(
       \Magento\Backend\Block\Template\Context $context
   ) {
       parent::__construct($context);
   }
}
8. Create a template file as shown below:Aureatelabs/Grid/view/adminhtml/templates/view.phtml
<h1>I’m your view page</h1>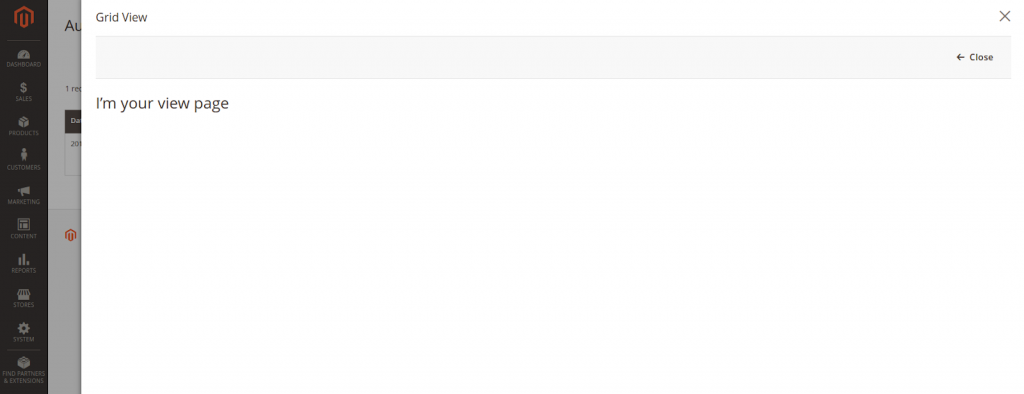
Also read: How to file upload in admin form in Magento 2
FAQs
To get data in the admin grid in Magento 2, use a Collection class. Follow these steps:
1. Create a new collection class in your module’s Model\ResourceModel directory as Magento\Framework\Model\ResourceModel\Db\Collection\AbstractCollection.
2. Now, define the _init method in your module’s Model\Items class. It will set the primary key, entity table name, and resource model class name.
3. Next, define the _prepareCollection method in your Grid class to load the data from the Collection class.
4. At last, define the _prepareColumns method to define the columns and display them in the grid.
To create a tab and load a grid in the Magento 2 customer admin edit page, follow these steps –
1. Create a new module in the app/code directory of your Magento installation.
2. Next, create a new module.xml file in the module’s etc directory.
3. Now, in the above file, add the following code to register the module with Magento –<?xml version="1.0"?>
<config xmlns:xsi="http://www.w3.org/2001/XMLSchema-instance" xsi:noNamespaceSchemaLocation="urn:magento:framework:Module/etc/module.xsd">
<module name="Vendor_Module" setup_version="1.0.0"/>
</config>
4. Further, create a new layout file in view/adminhtml/layout directory, and name it as customer_edit.xml.
5. In the above file, use the following code to create a new tab in the customer edit page:<page xmlns:xsi="http://www.w3.org/2001/XMLSchema-instance" xsi:noNamespaceSchemaLocation="urn:magento:framework:View/Layout/etc/page_configuration.xsd">
<update handle="customer_edit"/>
<body>
<referenceBlock name="customer_edit_tabs">
<block class="Vendor\Module\Block\Adminhtml\Tab\Grid" name="customer_edit_tab_grid">
<arguments>
<argument name="config_grid_id" xsi:type="string">customer_edit_tab_grid</argument>
<argument name="config_grid_url" xsi:type="string">customer/index/grid</argument>
</arguments>
</block>
<action method="addTab">
<argument name="name" xsi:type="string">customer_edit_tab_grid</argument>
<argument name="block" xsi:type="string">customer_edit_tab_grid</argument>
</action>
</referenceBlock>
</body>
</page>
6. Thereafter, create a new block file in Block/Adminhtml/Tab directory, and name it Grid.php. Inside it, define the _prepareCollection and _prepareColumns methods.
7. Then, create a new controller file in Controller/Adminhtml/Index directory, and name it Grid.php. Inside it, define the execute method.
8. At last, run the command php bin/magento setup:upgrade in your Magento root directory to enable the module.
To access your Magento 2 admin panel, you need to use the command php bin/magento info:adminuri. Then, add the result to your main URL and you will get the admin login page. After entering your Magento admin username and password you will login to the admin panel and will be able to access the admin dashboard.
To add an edit action in the admin grid in Magento 2, use the following steps:
1. Change the admin grid with XML file.
2. Add an edit action column in the UI.
3. Write the code for the edit action class.
4. Implement the code and verify it by flushing cache and reloading the page.
Related Resources:


Hi when I copy your code it gives me an error in console when I click on the button `Uncaught ReferenceError: aureatelabsView is not defined
at HTMLButtonElement.onclick ` how to sort this thanks
error in colsole,
aureatelabsView is not defined.
Hii. I want to know that why you made layout file (aureatelabs_grid_index.xml) in step 3 when there is no controller action class index.php. And what is the purpose of this layout Please help.
Add the given reference block in the existing layout file you don’t need to create any additional layout file or controller for that matter!!