
Creating an Admin grid using the Magento 2 UI component is too lengthy and complex. To overcome these issues Hyva team has launched the Hyva admin Grid module. It is open source now.
Hyva Admin is a Magento 2 module that offers a new way to create admin grids. It improves the developer experience while creating new grids. Existing grids and forms are not affected by installing this module they remain unchanged.
Requirements
- Magento Community Edition: 2.4.0 or higher version
- PHP >= 7.3
Installation of Hyva Admin Module
To create a custom Hyva admin grid, you have to install the Hyva admin module using the following command:
composer require hyva-themes/module-magento2-admin

You can also install the Hyva Admin test module to check the demo of the Hyva admin grid using the following command:
composer require hyva-themes/module-magento2-admin-test

Please perform deployment after installing the packages.
New to Hyvä?? Learn about the Hyvä Theme from scratch!
Prerequisites for a Grid
Please create a new Magento 2 module or use the existing one. Make sure you have a custom admin route available. For creating the admin route you can check this blog.
Please create the admin layout XML file. I have created this one: app/code/Aureatelabs/HyvaAdminGrid/view/adminhtml/layout/aureatelabs_product_grid.xml file, where
- aureatelabs is my admin router
- product is my controller name and
- grid is my action name.
To load alpine.js and tailwind you need to add the layout update handle hyva_admin_grid.

Please add the block for the custom Hyva Grid with the Hyva\Admin\Block\Adminhtml\HyvaGrid class and their name should be the name of the grid in the content area using referenceContaine as per the below screenshot.

Grid Block
Please create the Grid XML file in this location: app/code/Aureatelabs/HyvaAdminGrid/view/adminhtml/hyva-grid/aureatelabs-products-grid.xml. The grid file name should be the name of the block that we specified in the aureatelabs_product_grid.xml.
The XML file is declared with the <grid> root element with the hyva-grid.xsd for more references please check the following code.
<?xml version="1.0"?>
<grid xmlns:xsi="http://www.w3.org/2001/XMLSchema-instance" xsi:noNamespaceSchemaLocation="urn:magento:module:Hyva_Admin:etc/hyva-grid.xsd">
</grid>
Grid Data Source Processors
Now grid needs to fetch data for displaying. Hyva admin grids support the following grid source types. For more references, you can check here.
- Array Grid Source Type: To set an array provider, use the <arrayProvider> element
- Repository Grid Source Type: To set a repository source type, use the <repositoryListMethod> element
- Collection Grid Source Type: collection source type specified using the <collection> element
- Query Grid Source Type: The query source type allows configuring a SQL select query in the grid XML using the <query> element
I have gone with the Repository Grid Source Type so I have declared the source with the repository list method. For more references please check the following code.
I am creating the grid of the product data so I am fetching the data from the \Magento\Catalog\Api\ProductRepositoryInterface::getList method like the below example.
Need to put this code into the app/code/Aureatelabs/HyvaAdminGrid/view/adminhtml/hyva-grid/aureatelabs-products-grid.xml
<source>
<repositoryListMethod>\Magento\Catalog\Api\ProductRepositoryInterface::getList</repositoryListMethod>
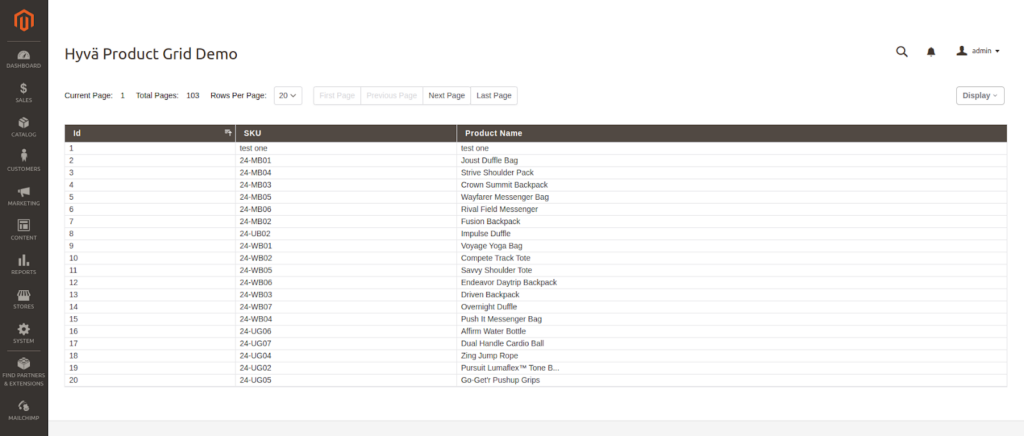
</source>And finally, after following all of the above steps, the grid output looks like this:

If you want to create a grid for a custom table then you need to create a custom repository to use the Search Criteria in the custom module. For more references please check this blog.
Columns
Hyva admin tries to extract the available columns from the Grid source. Without any configuration, all columns are shown. But it is good to configure the grid column order-wise.
To specify which columns to display, use the <columns><include/></columns> tags. For more references please check the following code:
<columns>
       <include>
           <column name="id"/>
           <column name="sku"/>
           <column name="name"/>
       </include>
</columns>
Please put the below code into the app/code/Aureatelabs/HyvaAdminGrid/view/adminhtml/hyva-grid/aureatelabs-products-grid.xml inside the <grid> root element
It will display only the id and SKU and Name columns on the grid. For more references please check the following screenshot:
To hide columns, use the <columns><exclude/><columns> branch. For more references please check the following code:
<columns>
    <exclude>
        <column name="category_gear"/>
    </exclude>
</columns>
There are the following attributes that can be used in the include column. For more references, you can check this blog.
- initiallyHidden
- label
- name
- renderAsUnsecureHtml
- rendererBlockName
- sortable
- sortOrder
- source
- template
- type
Configuring Row Action
Each row has more than one action like delete row or edit row. We need to configure it.
Actions are configured in a <actions> tag. For more references please check the following code or this blog:
<actions idColumn="id">
<action id="edit" label="Edit" url="catalog/product/edit"/>
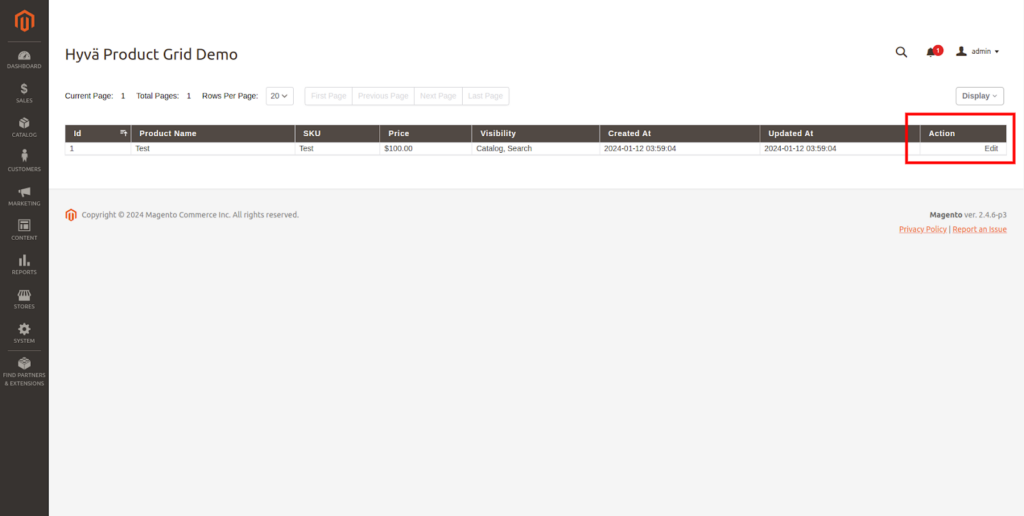
</actions>idColumn will pass the id with the action URL. You have to add the id column’s field name there.
All actions are displayed in the action column with the action links. Here in edit action, I have added the catalog/product/edit URL it will redirect that particular product edit form.
To make grid rows clickable, You can assign the rowAction=”edit” to the columns tag.
Configuring Mass Action
Mass action allows the user to select multiple records and perform operations like deleting records, updating records, etc. Mass Action is configured in a <massActions> tag.
For more references please check the following code or this blog:
<massActions idColumn="id" idsParam="ids">
<action id="delete" label="Delete" url="*/massAction/delete" requireConfirmation="true"/>
</massActions>- In idColumn attribute, you have to pass your id selector field.
- You have to create the controller for deleting the records with the aureatelabs/massAction/delete path.
- The requireConfirmation attribute will take the confirmation regarding whether the mentioned operation is performed or not.
For more references please check the following screenshot:

Pagination
Hyva admin grids use a default page size but we can change it to as per our requirements using the <navigation><pager/></navigation> branch.
For more references please check the following code:
<navigation>
    <pager>
        <defaultPageSize>5</defaultPageSize>
        <pageSizes>2,5,10</pageSizes>
    </pager>
</navigation>
Where,
- defaultPageSize attribute will take input for how many records you want to display in the grid when the page is loaded.
- pageSizes attribute will take input for how many records you want to show in the grid.
Sort Order
The default sort order can be configured in the <navigation><sorting/></navigation> part of a grid XML file.
For more references please check the following code:
<sorting>
    <defaultSortByColumn>created_at</defaultSortByColumn>
    <defaultSortDirection>desc</defaultSortDirection>
</sorting>- The above code will fetch the latest products.
- Users can update the sort order by clicking on the column titles.
Filtering
Filtering is used to get the searched data. It is the main part of the Grid.
In Hyva Admin Grid, By default columns are not filterable. We need to make the column filterable. Using <navigation><filters/></navigation> section of a grid XML file.
For more references please check the following code:
<filters>
            <filter column="sku"/>
            <filter column="name"/>
            <filter column="id"/>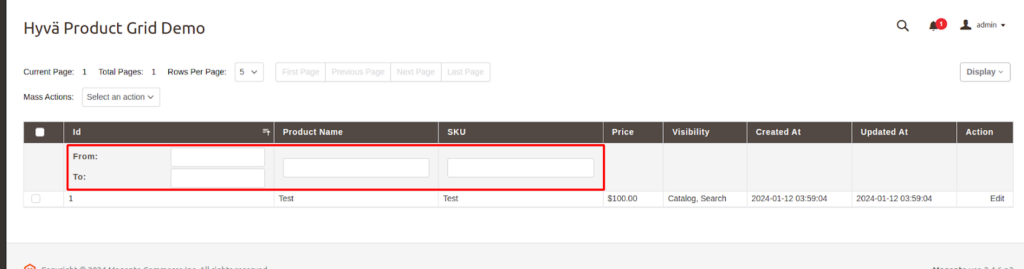
</filters>- The above code enabled filtering for the SKU, name, and id fields. For more references please check the following screenshot.
- The filter is applied depending on the type of column. For the int column, it will apply from and to.
Buttons
To add buttons above the grid, The Buttons tag will be used. It is added by the <navigation><buttons/></navigation> section of a grid XML file.
For more references please check the following code:
<buttons>
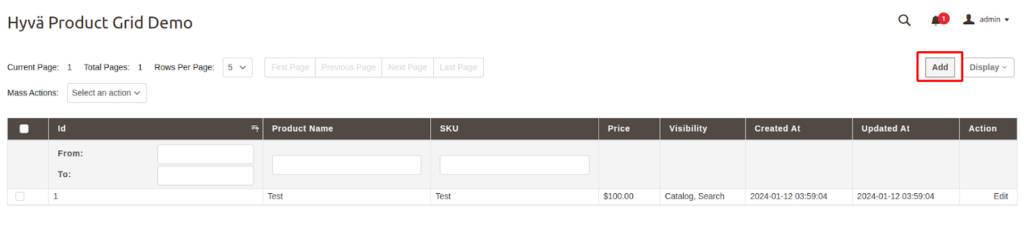
<button id="add" label="Add" url="catalog/product/new/set/4/type/simple"/>
</buttons>The above code is for creating a new product. For more references please check the following screenshot:
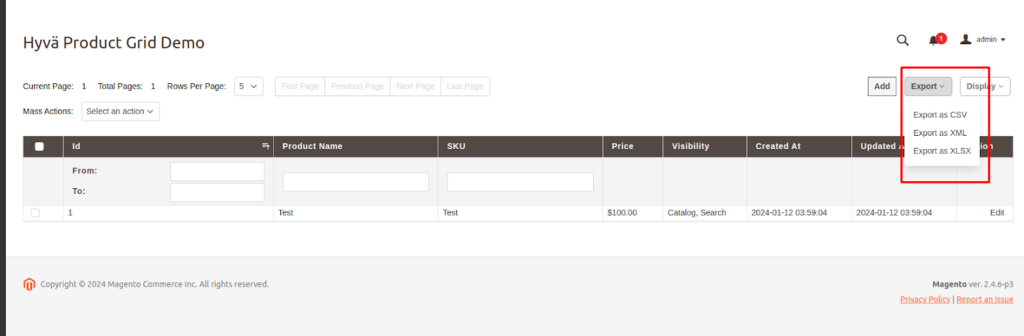
Exports
Export functionality allows admin users to export the grid data. It can be filtered/sorted data.
Hyva admin grid supports the following export formats:
- CSV
- XML
- XLSX
It is added by the <navigation><exports/></navigation> section of a grid XML file. For more references please check the following code:
<exports>
        <export type=”csv” label=”Export as CSV”/>
        <export type=”xml” label=”Export as XML” />
        <export type=”xlsx” label=”Export as XLSX”/>
</exports>
For more references please check the following screenshot:
In conclusion, you can use the Hyva admin grid to create admin grids easily and quickly.
Read more resources on Hyva themes:
- Check out the InstaBuild for Hyvä Themes: Ready-made Hyva theme templates for faster storefront development!
- Hyva Themes Development – For Online Merchants
- Hyvä Theme Benefits that your store needs
- 10 Best Hyva Compatibility Extension Providers For Magento 2 Stores
- Hyvä VS PWA: Where to Invest?
- How a Slow Magento Website Can Cost You Advertising Dollars
- Mobile Commerce: How Hyva Themes Boost Mobile Conversions


Post a Comment
Got a question? Have a feedback? Please feel free to leave your ideas, opinions, and questions in the comments section of our post! ❤️