
In the realm of Hyva theme development, efficient data retrieval from the server is paramount for creating dynamic and responsive web applications. The fetch API in JavaScript provides a powerful and modern way to make HTTP requests.
In this blog post, we’ll delve into how to use fetch in the Hyva theme with illustrative examples to demonstrate its versatility. We’ll cover obtaining the base URL, constructing custom URLs, handling parameters, and integrating these techniques into your Hyva theme.
Introduction to Fetch
In Luma, the jQuery functions $.ajax, $.get, and $.post are often used to exchange data with server-side Magento. In Hyvä, the native browser function window.fetch is used instead.
The fetch is a modern replacement for the older XMLHttpRequest, offering a simpler and more flexible interface for making HTTP requests. It returns a Promise that resolves the Response to that request, whether it is successful or not.
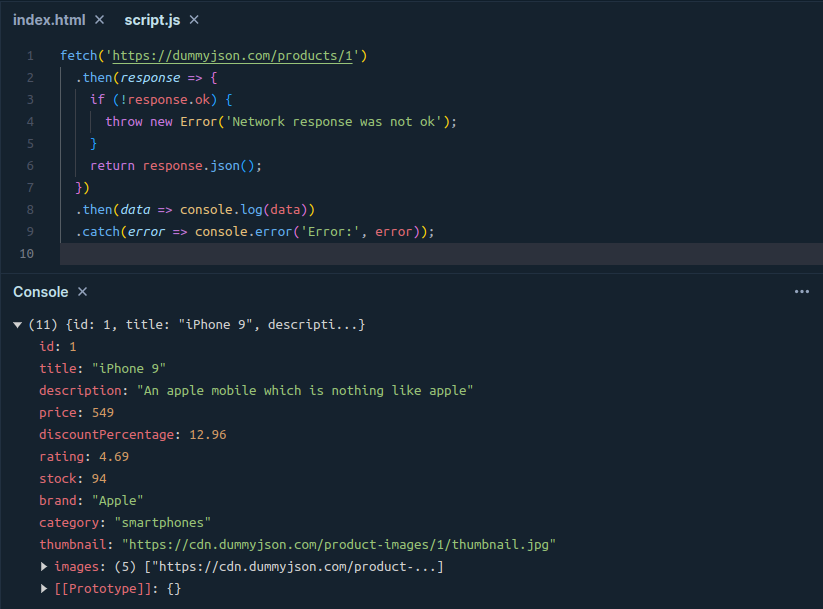
A simple request to a controller returning JSON content might look like this:
fetch('https://dummyjson.com/products/1')
  .then(response => {
    if (!response.ok) {
      throw new Error('Network response was not ok');
    }
    return response.json();
  })
  .then(data => console.log(data))
  .catch(error => console.error('Error:', error));
In this example, we make a basic GET request to retrieve data from the server.
As a quick reminder, GET requests do not have request bodies, so any parameters need to be added to the requested URL before calling fetch.
We can perform this code online (https://playcode.io/javascript) or using javascript.
Please find the following screenshot of the output.
New to Hyvä?? Learn about the Hyvä Theme from scratch!
Basic Fetch Request with handling JSON Data
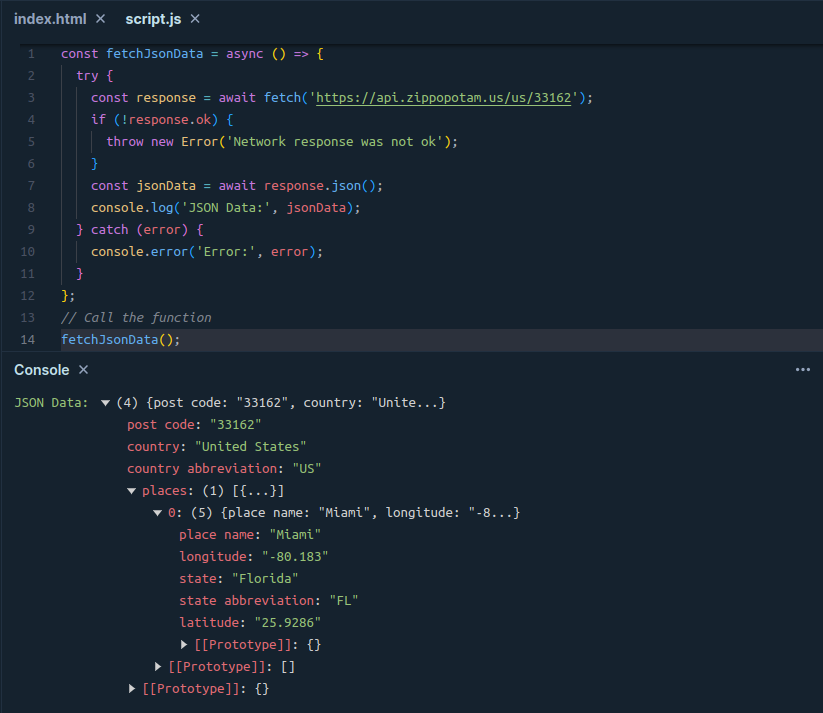
Let’s start with a simple example of making a GET request using fetch:
const fetchJsonData = async () => {
  try {
    const response = await fetch('https://api.zippopotam.us/us/33162');
    if (!response.ok) {
      throw new Error('Network response was not ok');
    }
    const jsonData = await response.json();
    console.log('JSON Data:', jsonData);
  } catch (error) {
    console.error('Error:', error);
  }
};

// call the function
fetchJsonData();
We can perform this code online (https://playcode.io/javascript) or using javascript.
Please find the following screenshot of the output.
POST Requests
If we need to tell the server we expect a JSON response, we can pass an Accept header:
fetch(url, {headers: {accept: 'application/json'}})With fetch() HTTP Header names can be specified in camelCase or ‘Kebab-Case’ notation. For example:
{
"Content-Type": "application/json", // Kebab-Case
contentType: "application/json" // camelCase
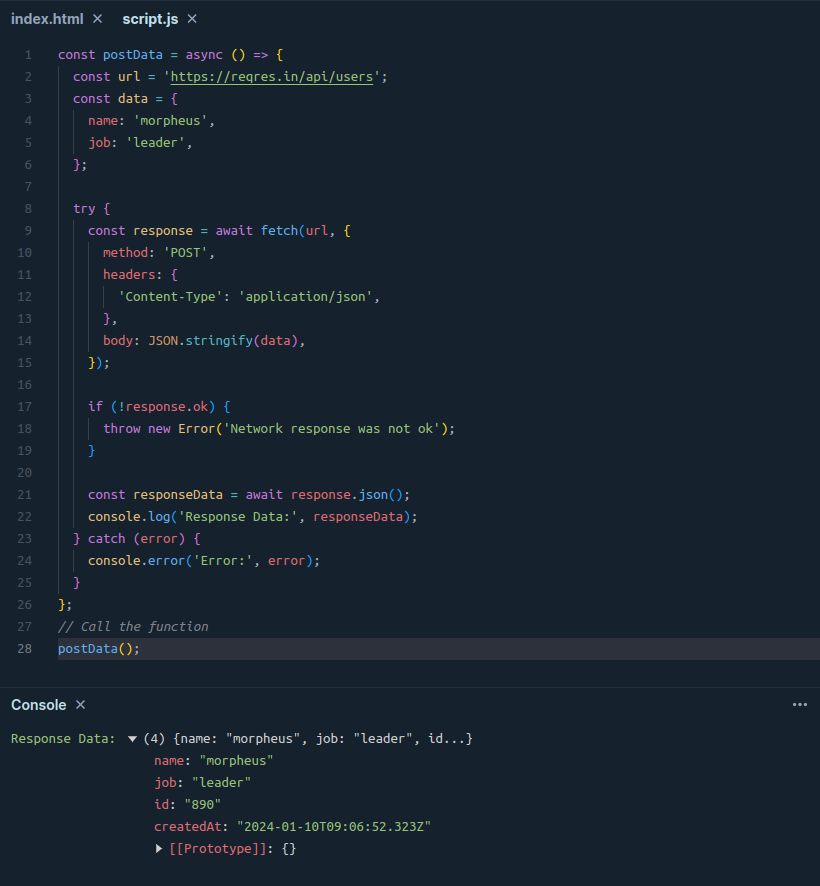
}Making a POST request is a common requirement for sending data to the server. Here’s an example:
const postData = async () => {
  const url = 'https://api.example.com/post-endpoint';
  const data = {
    key1: 'value1',
    key2: 'value2',
  };

  try {
    const response = await fetch(url, {
      method: 'POST',
      headers: {
        'Content-Type': 'application/json',
      },
      body: JSON.stringify(data),
    });

    if (!response.ok) {
      throw new Error('Network response was not ok');
    }

    const responseData = await response.json();
    console.log('Response Data:', responseData);
  } catch (error) {
    console.error('Error:', error);
  }
};

// Call the function
postData();
In this example, we demonstrate making a POST request with JSON data.
We can perform this code online (https://playcode.io/javascript) or using javascript.
Please find the following screenshot of the output.
A simple Ajax POST fetch request with JSON data
For POST requests we can specify a request body. Because we send a body, we also need to set the Content-Type header.
fetch(
  url + '?form_key=' + hyva.getFormKey(),
  {
    method: 'post',
    body: JSON.stringify(data),
    headers: {contentType: 'application/json'}
  }
)Similarly, we can make a simple Ajax form POST request by adding the form key as a parameter to the POST body.
const body = new URLSearchParams({form_key: hyva.getFormKey(), foo: 'bar'});
const contentType = 'application/x-www-form-urlencoded; charset=UTF-8';
fetch(url, {method: 'post', body, headers: {'Content-Type': contentType}})
Form Ajax POST Ajax request with AlpineJS
This example showcases an Ajax POST request that is triggered from Alpine.js.
The result is displayed in a message.
<div x-data="initSomeComponent()">
    <button @click="doPostRequest(1)">Do Post</button>
</div>

<script>
  function initSomeComponent() {
    return {
      dispatchMessage(type, message, timeout) {
        typeof window.dispatchMessages && window.dispatchMessages(
          [{
              type: type,
              text: message,
          }],
          timeout
        );
      },
      doPostRequest(someId) {
        const postUrl = `${BASE_URL}path/to/ajax/call/`;
        fetch(postUrl, {
          headers: {
            contentType: "application/x-www-form-urlencoded; charset=UTF-8",
          },
          body: new URLSearchParams({
            form_key: hyva.getFormKey(),
            someId: someId
          }),
          method: "POST",
          mode: "cors",
          credentials: "include",
        })
          .then(response => {
            if (response.redirected) {
              window.location.href = response.url;
            } else if (response.ok) {
              return response.json();
            } else {
              this.dispatchMessage("warning", "Post request failed", 5000);
            }
          })
          .then(response => {
            if (!response) {
              return;
            }
            this.dispatchMessage(
              response.success ? "success" : "error",
              response.success
                ? "Post request was successful."
                : response.error_message,
              5000
            );

          })
          .catch(error => {
            this.dispatchMessage("error", error, 5000);
          });
      }
   };
  }
</script>
Conclusion
Incorporating the fetch API into your Hyva theme empowers you to create dynamic and interactive web applications. Whether you need to retrieve data from the server, handle JSON responses, make POST requests, or seamlessly integrate with your theme, the fetch API provides a flexible and modern solution for your data retrieval needs.
By understanding its intricacies and leveraging its capabilities, you can enhance the user experience in your Hyva theme.
Read more resources on Hyva themes:
- Check out the InstaBuild for Hyvä Themes: Ready-made Hyva theme templates for faster storefront development!
- Hyva Themes Development – For Online Merchants
- Hyvä Theme Benefits that your store needs
- 10 Best Hyva Compatibility Extension Providers For Magento 2 Stores
- Hyvä VS PWA: Where to Invest?
- How a Slow Magento Website Can Cost You Advertising Dollars
- Mobile Commerce: How Hyva Themes Boost Mobile Conversions


Post a Comment
Got a question? Have a feedback? Please feel free to leave your ideas, opinions, and questions in the comments section of our post! ❤️