How to Build a Magento Website from Scratch —11 Steps

Building a Magento website is not a weekend project. It’s a significant technical undertaking that involves server setup, database configuration, custom development, and ongoing maintenance.
If done right, it gives you one of the most powerful and flexible e-commerce platforms available. Done wrong, it’s an expensive rebuild.
This guide walks you through every phase of a Magento build so you understand what’s actually involved before committing time and money. Whether you’re a business owner evaluating Magento or a developer planning a new project, you’ll come away with a realistic picture of the effort, costs, and decisions at each stage.
Some steps are manageable with the right technical knowledge. Others almost always require professional help. We’ll flag both clearly throughout.
I’ll go through the updated blog systematically and give you precise, copy-paste-ready changes for all three tasks.
Before You Start: When Do You Need a Magento Expert?
Magento is not a platform you can figure out as you go. Here’s an honest breakdown of what requires professional help and what doesn’t.
Handle Yourself:
- Choosing a domain name
- Registering hosting
- Adding products and categories (small catalogs)
- Writing product descriptions and meta tags
Needs a Developer:
- Server setup, PHP configuration, and Magento installation
- Theme customization beyond surface-level settings
- Any custom functionality or third-party integrations
- Payment gateway and tax configuration
- Performance optimization and caching setup
- Security hardening and ongoing updates
Budget Reality Check Before you Proceed:
- Magento Open Source: Free to download, but expect $5,000–$15,000 in development costs for a properly built store
- Adobe Commerce: Licensing starts at $24,000/year, plus development
- Hosting: $50–$300/month for a properly configured Magento environment
- Ongoing maintenance: Budget for it from day one. Magento requires regular security patches and updates.
If your budget or technical resources don’t match the above, Shopify or WooCommerce may be a more practical starting point.
What is Magento?
Magento is a popular open-source eCommerce platform that enables businesses to create, manage, and scale their online stores effectively. Developed with PHP, Magento offers a broad array of features and customization options, making it a preferred choice for businesses of all sizes.
Officially released in March 2008, Magento was acquired by Adobe in 2018, further solidifying its position as a leading eCommerce platform. Over the years, Magento has released several versions, with the most recent being Magento 2.4.7.
Magento Editions
Magento offers three different editions to accommodate the diverse needs of businesses:
1. Magento Open Source (Formerly Magento Community Edition):
This is a free edition, suitable for small-to-medium businesses. It offers:
- Basic eCommerce features
- High customization flexibility
- Self-hosted edition
- Basic scalability
- Active community support
2. Adobe Commerce (Formerly Magento Enterprise Edition):
Also known as Magento Commerce, this is a paid solution designed for large businesses. It offers:
- Advanced features with added benefits related to B2B ecommerce, marketing, and the use of AI
- Self-hosted edition
- Automatic updates and security patches
- Personalized customer experiences
- Direct support from Adobe
3. Adobe Commerce Cloud:
This is a cloud-based version of Adobe Commerce and is ideal for businesses dealing with substantial data and website traffic. It offers all the benefits of modern cloud computing:
- Global availability
- Elastic scalability
- High resilience
- PCI compliance
- Automated Hosting on Adobe’s architecture
- Enterprise-level commercial modules included
- Integrates with Adobe tools such as Advertising Cloud and Analytics Cloud
- Automatic security patching
- Official support directly from Adobe
11 Steps to Build a Magento Site from Scratch
Building a Magento website from scratch involves a series of steps that require careful planning and execution. Here’s the step-by-step process:
Step 1. Plan Your Magento Site
Every serious Magento project starts with a scoping phase, and skipping it is one of the most common reasons builds go over budget. Before any development begins, the business needs to document its goals, audience, and requirements clearly.
This is what any good Magento agency will ask you to define before writing a single line of code. Your purpose could be selling products, building a brand, or providing information. Be clear and focused.
A proper scoping exercise should cover:
- Business Model: Are you B2B or B2C? Brick-and-mortar or online only?
- Industry: Identify your industry and how it influences your business goals.
- Product/Service Offerings: Clearly define the products or services you offer.
- Unique Selling Proposition (USP): Find out what makes your brand unique.
If you’re a business owner working with a development agency, bring documented answers to all of the above to your first meeting. The more clearly you’ve defined these, the faster and cheaper the build will be. Vague requirements are the single biggest cause of Magento projects going over budget.
Next, conduct thorough market research. Know your competition and understand who your customers are and what they need. Look at other Magento stores. See what works and what doesn’t. This research will help you develop your brand voice and design your Magento website.
The more you understand your target audience, the better you can tailor your Magento website to meet their needs. Here are some factors to consider while defining your target audience:
- Understand the age, gender, location, and other demographic details of your potential customers.
- Research the buying habits of your target audience.
- Use tools like Google Trends to understand customer interests.
Step 2. Choose the right Magento Edition
Edition selection is one of the earliest and most consequential decisions in a Magento project. The wrong choice is expensive to undo.
Here’s how the three editions compare, and what each one actually demands from your team and budget:
Assess Your Business Size and Budget
- Magento Open Source: Ideal for small to medium-sized businesses operating on a limited budget.
- Adobe Commerce: Best for large businesses with the financial capacity to invest in advanced features and support.
- Adobe Commerce Cloud: Suitable for enterprises that prefer a cloud-hosted solution with comprehensive support.
Evaluate Your Technical Resources
- Magento Open Source requires technical expertise for hosting, security, and updates.
- Adobe Commerce & Cloud offers official support and automatic updates, reducing the need for in-house technical skills.
Consider Required Features and Scalability
- Magento Open Source provides essential features with the option to add more via extensions.
- Adobe Commerce includes advanced features like customer segmentation and rewards programs suitable for scaling businesses.
- Adobe Commerce Cloud delivers high scalability and performance optimization for rapidly growing businesses.
Understand the Level of Support You Need
- Magento Open Source relies on community forums and third-party support.
- Adobe Commerce & Cloud comes with official technical support, providing peace of mind for businesses that require reliable assistance.
Factor in Security and Compliance
- Magento Open Source offers decent protection but requires proactive security management.
- Adobe Commerce & Cloud provides enhanced security features and compliance with standards like PCI-DSS.
Look at Total Cost of Ownership
- Magento Open Source is free to download, but consider additional development, hosting, and maintenance costs.
- Adobe Commerce & Cloud requires a larger upfront investment but may offer better value in the long run due to comprehensive features and support.
If you’re unsure which edition fits your situation, this is worth a conversation with a Magento developer before you commit. The licensing and infrastructure costs vary enormously between editions.
Choosing the wrong edition costs more to fix than getting it right the first time. Open Source to Commerce migrations involve significant development work and data migration risk. If you’re evaluating editions for a new build or considering an upgrade, we can walk you through the right fit for your business size and roadmap.
Step 3. Choose a Domain Name
Domain selection happens early in the project and is typically handled by the business owner, not the development team. It’s a low-complexity step, but a few decisions here have long-term SEO and branding implications. Here’s what to keep in mind:
- Opt for a domain that aligns with your brand name for easy recognition.
- A domain under 15 characters, without hyphens or numbers, is ideal for memorability and ease of typing.
- Including relevant keywords in your domain can boost your SEO, making it easier for customers to find you.
- Consider a local domain extension like .us or .uk if your business is region-specific.
- A memorable domain name helps ensure customers remember your site and return.
- While .com is the most recognized, other extensions like .net or .store can also be suitable.
- Before finalizing, check the availability of your chosen domain name.
- Once you’ve decided on a domain name, secure it quickly to prevent others from registering it.
The cost of a domain name can vary significantly, depending on the domain extension (TLD) and the registrar you choose. It costs around $10-15 annually to purchase and hold a domain name. However, premium domain names sometimes cost thousands or even millions of dollars.
Popular Domain Providers
For domain registration, consider reputable providers such as:
- GoDaddy: Known for a wide range of services and frequent promotions
- Namecheap: Offers competitive pricing and user-friendly services.
- Bluehost: Provides free domain registration with hosting packages.
- HostGator: Another option that bundles domain registration with hosting services.
- Google Domains: A straightforward service from a well-known brand.
Read More: The Best Domain Extension for eCommerce – 11 Extensions to Choose From
Step 4. Select a web hosting provider
Hosting is a technical decision that significantly affects performance, security, and cost. Magento is resource-intensive, and budget shared hosting will not work.
If your developer or agency isn’t handling this for you, here’s what the hosting environment needs to support:
- Choose a host with high uptime, ideally above 99%, to ensure your site is always available.
- Look for fast servers with sufficient memory and processing power to handle Magento’s demands.
- Ensure robust security measures like SSL certificates, firewalls, and regular backups are in place.
- Responsive 24/7 customer support is essential for addressing technical issues.
- Your host should accommodate growth in traffic and content.
- Understand the costs, including any potential increases after introductory offers.
- A user-friendly control panel and interface will simplify site management.
A note on hosting budget: properly configured Magento hosting typically runs $50–$300/month, depending on catalog size and traffic. Managed Magento hosts like Nexcess and Cloudways handle server-level configuration for you, which is worth the premium if you don’t have a dedicated DevOps resource. If your developer is recommending a $5/month shared hosting plan, that’s a red flag.
Magento Hosting Requirements
Magento is a resource-intensive platform, and your hosting needs to meet specific requirements for optimal performance. Here are the hosting requirements for Magento:
- Operating System: Magento is supported on Linux x86-64 distributions, such as Red Hat Enterprise Linux (RHEL), CentOS, Ubuntu, Debian, etc. Magento is not supported on Windows and MAC OS.
- Memory Requirement: A minimum of 2 GB of RAM is necessary for Magento stores to function properly. Creating a swap file is recommended if you use a system with less than 2GB of RAM.
- Web Servers: Magento supports Apache 2.4 and NGINX 1.x.
- Database: Magento is compatible with MySQL 5.6, 5.7, MariaDB 10.0, 10.1, 10.2, 10.4, 10.6, Percona 5.7, and other binary-compatible MySQL technologies.
- PHP: Magento supports PHP 8.1, 8.2, and 8.3.
- Elasticsearch: Magento supports Elasticsearch 7.9 and OpenSearch 1.2, 2.
- Other Requirements: Magento also requires Composer 2.2, 2.7, RabbitMQ 3.9, 3.11, 3.12, and Redis 6.0, 6.2, 7.0, 7.2.
These requirements can change with each new release of Magento, so it’s always a good idea to check the official Magento documentation.
Top Magento Hosting Providers
Here are some top web hosts that are known for providing Magento-friendly services:
- Hostinger
- HostGator
- A2 Hosting
- Cloudways
- Nexcess
Read more: 10 Best Magento Hosting Providers
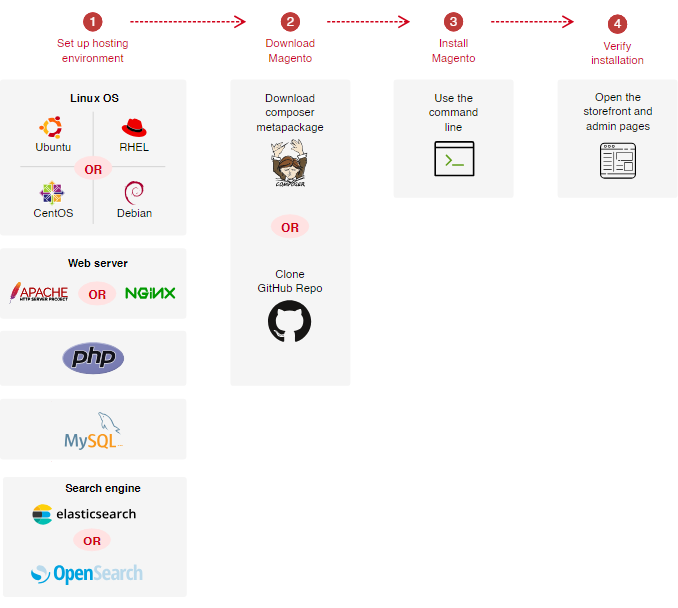
Step 5. Download and Install Magento Software
Installation is almost always handled by a developer. The process involves server-level access, database configuration, and command-line operations. What follows is an overview of both installation methods so you understand what your developer is doing and what decisions are made at this stage.
As a business owner, you don’t need to understand every command in this process. What you should confirm with your developer: which version of Magento is being installed, that they’re using Composer (Method 2) and not a manual FTP upload for a production build, and that the admin URL has been changed from the default before the site goes live.
But before you begin, ensure your hosting environment meets Magento’s system requirements.
Method 1: Using an FTP Client
This method is often preferred by beginners or those who are not comfortable with command-line operations. In this method, you download the Magento software from the official website, extract the files, and then upload these files to your server using an FTP client. Once the files are uploaded, you can run the installation wizard by navigating to your website’s URL.
Here’s a step-by-step guide for installing Magento via FTP client:
Step 1: Download Magento:
- You can download the latest version of Magento from the official source.
- Choose the latest version of Magento (Magento 2.4.7 or higher) to download.
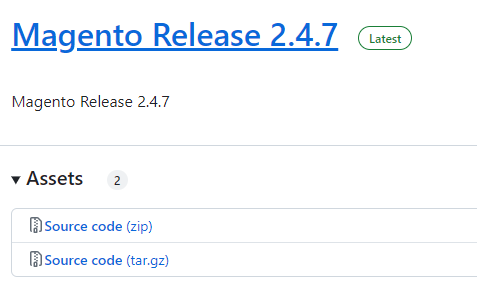
- Select the format that suits your needs (e.g., .zip, .tar.gz).
Step 2: Upload Magento to Your Server:
- Use an FTP client or your hosting control panel’s file manager to upload the Magento archive to your server.
- Extract the files into the desired directory, typically a public_html or a subdirectory within it.
- Set the correct read-write permissions for the Magento files on your server. Directories should typically have permissions set to 755, while files should have permissions set to 644.
Step 3: Create a Database:
- Log into your hosting control panel and open the database management tool, usually phpMyAdmin.
- Create a new database for Magento.
- Note down the database name, username, and password, as you will need them during the installation.
Step 4: Run the Installation Wizard:
- In your web browser, navigate to your website’s URL where Magento was uploaded.
- The Magento Setup Wizard will launch automatically.
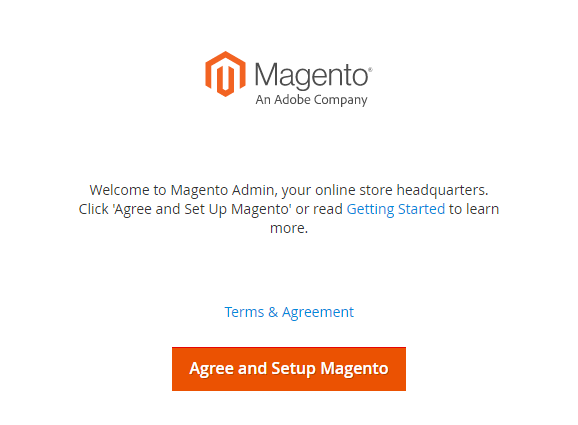
- Agree to the terms and conditions and proceed.
- Follow the on-screen instructions.
Step 5: Server Readiness Check:
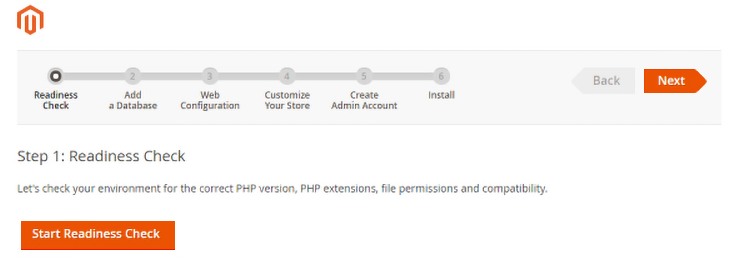
- The wizard will perform a readiness check to confirm your server meets all requirements.
- If any issues are detected, resolve them before continuing.
Step 6: Add a Database:
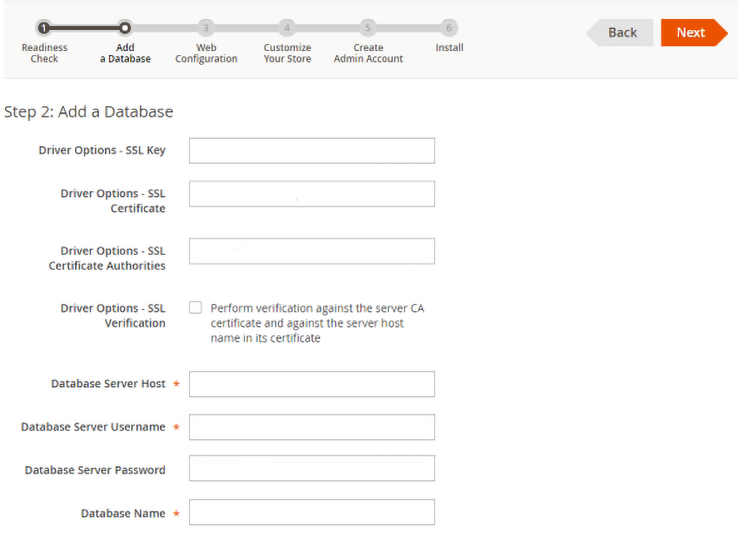
- Enter the database details (name, username, password) you created earlier when prompted during installation.
- Configure SSL if available.
- Proceed with the installation.
Step 7: Web Configuration:
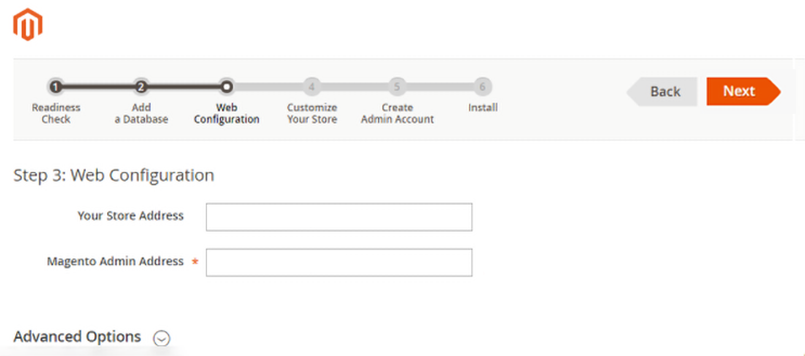
- Set your store’s URL and the path to Magento’s admin panel.
Step 8: Customize Your Store:
- Select the time zone, currency, and language for your store.
Step 9: Create Admin Account:
- Fill in the required fields, such as username, password, and email address, to create your Magento admin account.
- Keep these credentials secure.
Step 10: Complete Installation:
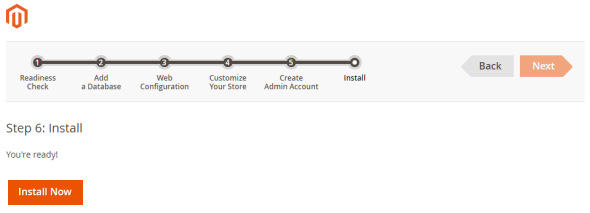
- Once you’ve filled in all the required information, click on the “Install” button to complete the Magento installation process.
After installation, Magento may prompt you to clear the cache and reindex data. Follow any additional steps as instructed to finalize the setup.
Method 2: Using Command-Line Interface (CLI)
This method is often used by developers or those who are comfortable with command-line operations. In this method, you use Composer, a dependency manager for PHP, to download Magento. Once downloaded, you can use command-line commands to install Magento.
(Overview of on-premises Magento installations by Adobe)
For a detailed guide on how to install Magento using the command-line interface, you can refer to the official Magento documentation.
Installation issues are one of the most common reasons Magento projects stall. Misconfigured servers, wrong PHP versions, or permission errors can take days to debug without experience. Our team handles Magento web development as part of every build project, and can also rescue stalled installs.
Step 6. Configure The Store’s Basic Settings
Post-installation configuration covers security, URLs, admin access, and store identity. Most of these settings are configured by the developer during the build, but business owners should know what’s being set and why. Here are the most critical ones:
Update Store Information:
- Access Stores > Configuration > General > Store Information to update your store’s name, phone number, and hours of operation.
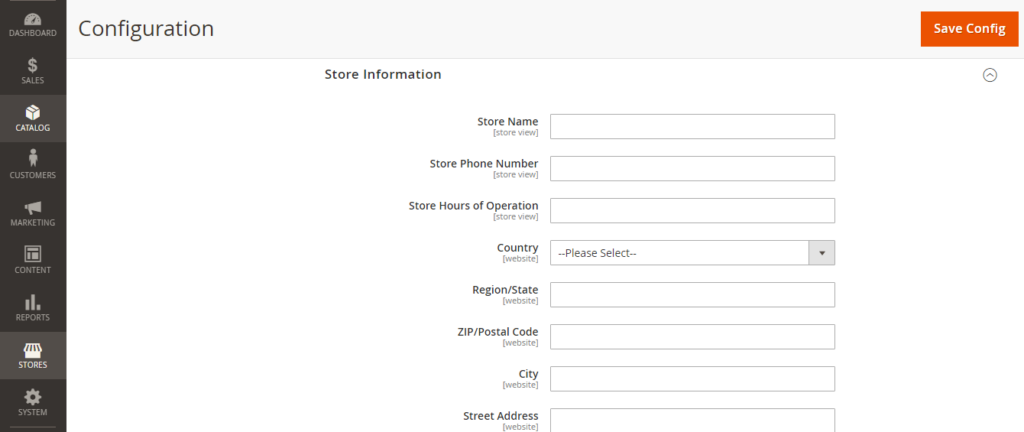
- Ensure that the admin user name and contact details are correctly set to maintain customer transparency and trust.
Configure Web Settings:
- Navigate to Stores > Configuration > Web to set your store’s base URLs and secure base URLs using the HTTPS protocol for enhanced security.
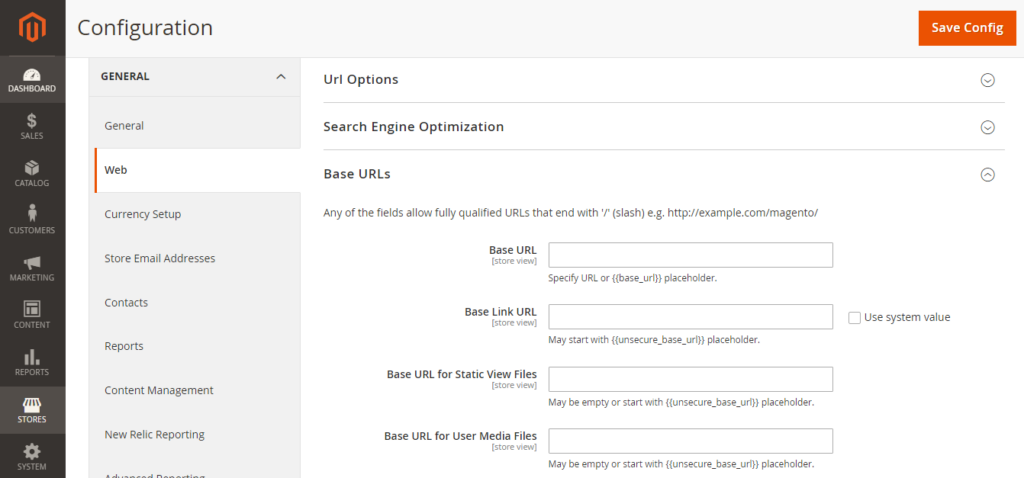
- Configure default web options such as cookie and session settings to optimize user interactions on your website.
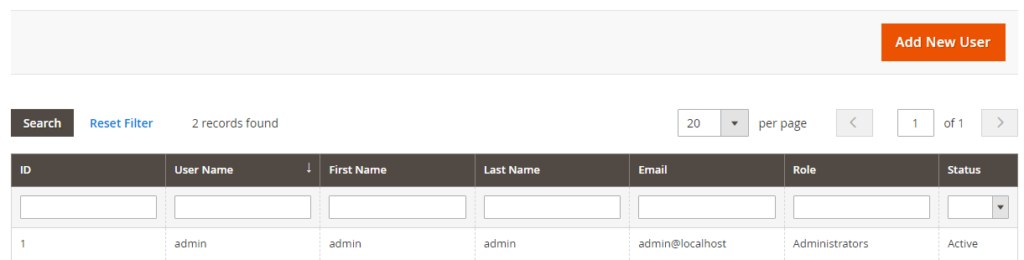
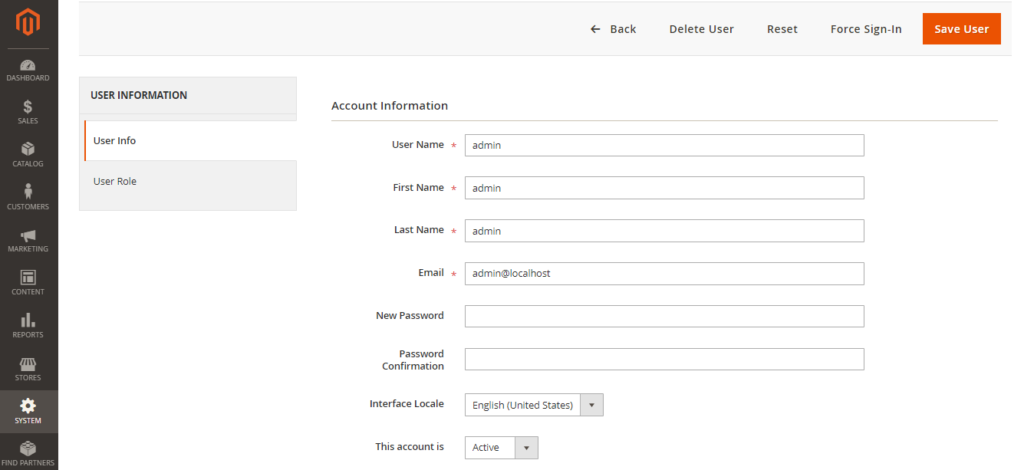
Admin Username and Security:
- Log in to your Magento Admin Panel and navigate to System > Permissions > All Users.
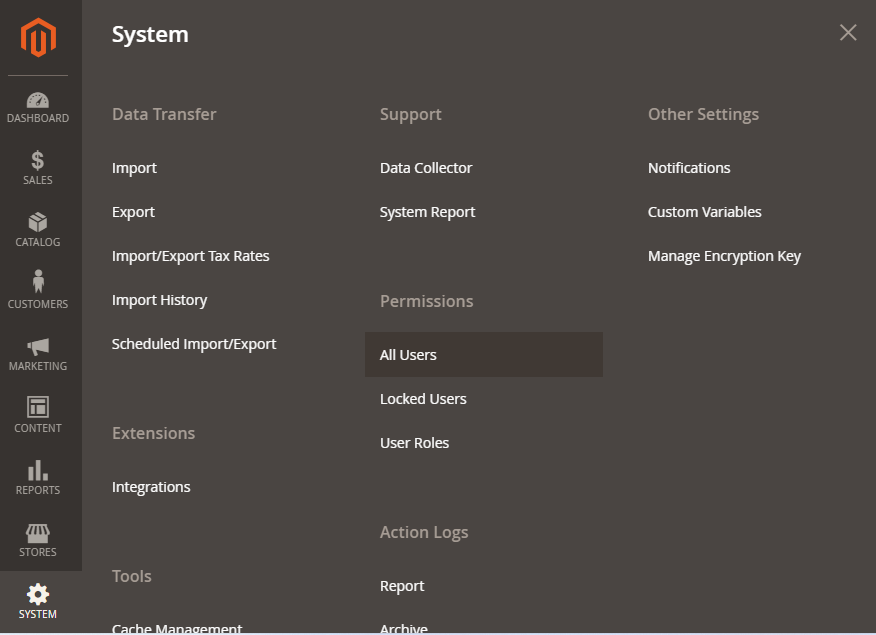
- Click on the user you want to modify.
- Update the details as needed to enhance security.
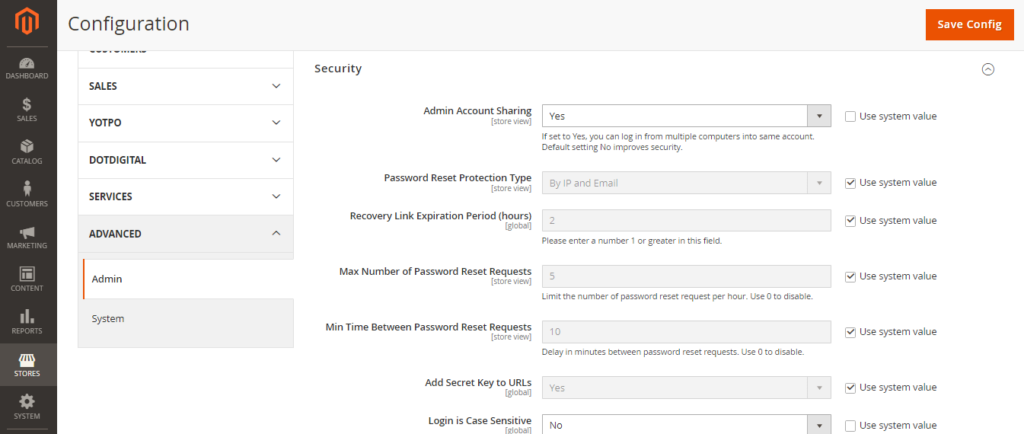
- To reinforce your admin login security and enable stronger password protection, navigate to Stores > Settings > Configuration. From there, select Advanced > Admin and expand the Security section to configure the parameters of your login security.
Admin Endpoint Customization:
- Attackers often target the default administrative endpoint in Magento. Modifying this URL to a less predictable one is imperative to prevent unauthorized access.
- This can be done through the Magento Admin Panel under Stores > Configuration > Advanced > Admin > Admin Base URL.
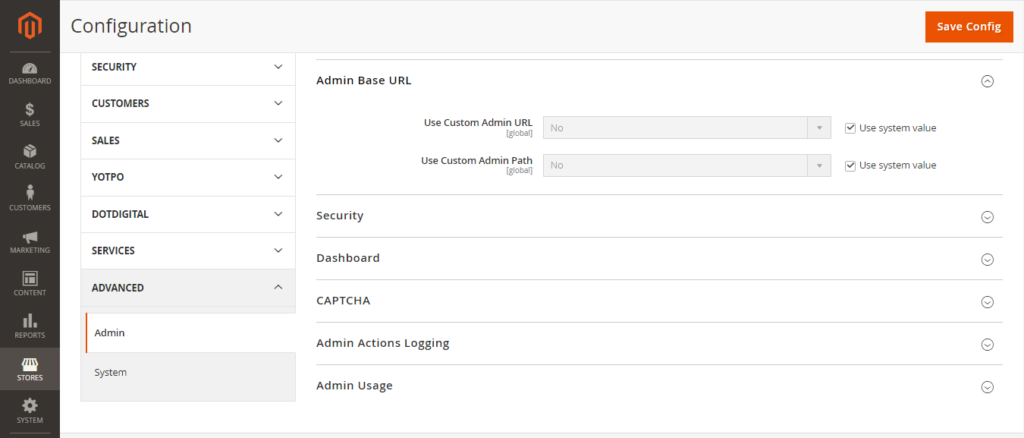
From a business owner’s perspective, the most important thing to verify after your developer completes this step: confirm that the default /admin URL has been changed, that two-factor authentication is enabled for all admin users, and that you personally hold the master admin credentials, not just your developer.
Read more: How to Install Magento 2 Via GitHub?
Step 7. Choose a Theme and Design
Theme selection is a decision that involves both the business and the development team. The business owns the brand direction and design requirements. The developer evaluates theme quality, performance, and compatibility with required extensions. Here’s what that evaluation should cover:
Adobe Commerce Marketplace is the official Magento theme store. You can find themes here that are guaranteed to be compatible.
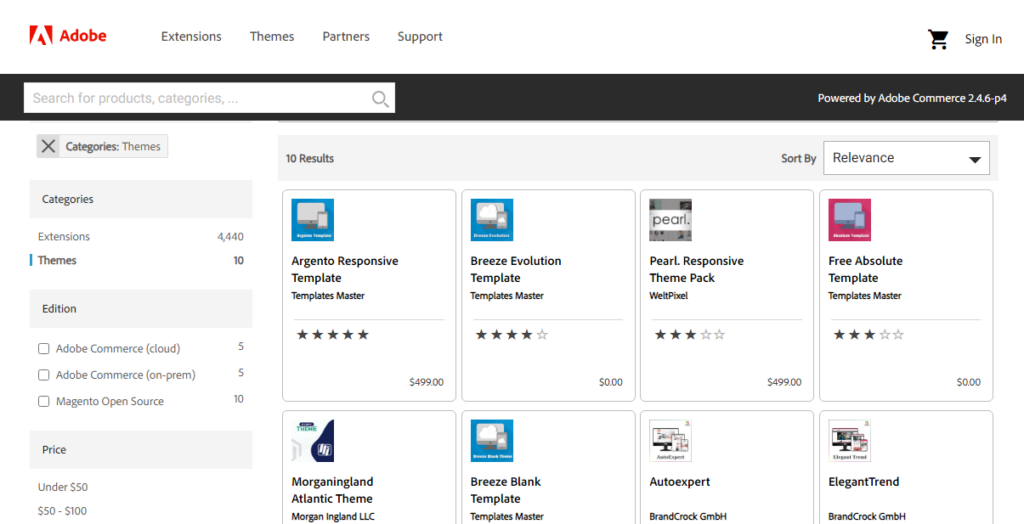
Other reputable theme stores are ThemeForest and TemplateMonster, which offer many options. Here’s how you can choose a Magento theme that aligns with your brand and industry standards:
- Look for a theme that aligns with your brand’s aesthetics and offers a visually appealing layout.
- Select a theme that provides flexible customization options.
- Ensure that the theme is mobile-friendly.
- The theme should enhance navigation, product discovery, and overall ease of use.
- Choose a theme that is optimized for performance to ensure smooth browsing and efficient page loading.
- Look for an SEO-friendly theme that allows search engines to crawl and index your site effectively.
- Choose a theme that integrates well with popular Magento extensions and modules.
- Check these before selecting the theme.
- Make sure the theme fits your budget.
Popular Magento Themes
- Porto
- Ultimo
- Argento
- Outstock
- ALO Market
After choosing your theme, buy it and follow the installation instructions provided by the theme developer. Once installed, customize it to fit your brand’s identity and ensure all functions work.
A poorly chosen theme can slow your store down significantly and create problems with extensions later. Theme selection and customization is one of the areas where experienced Magento developers save businesses the most money in the long run.
Read more: Why Top Magento Stores Are Choosing Hyvä Theme?
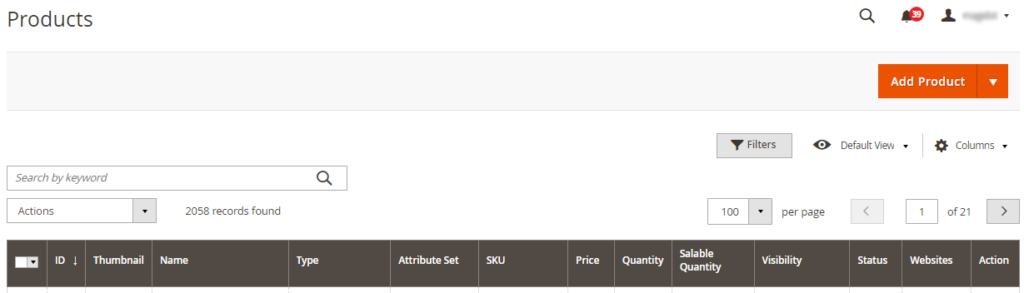
Step 8. Add Products and Categories
Catalog setup is one of the more operational parts of a Magento build. For small catalogs, a business owner can handle this directly through the admin panel. For large catalogs, this is typically handled via bulk import using CSV files or a PIM integration.
Here’s how both categories and products are structured in Magento:
Adding Categories
Category structure should be planned before any products are added. A logical hierarchy that mirrors how customers think about your products makes navigation easier and supports better SEO. The structure is also hard to change cleanly after products are assigned, so it’s worth getting right early.
Here are the steps to create a new category in Magento:
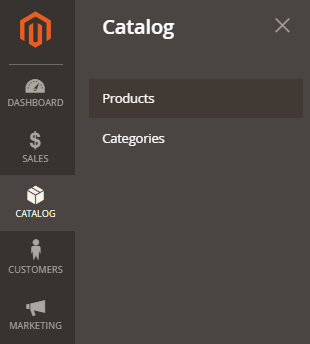
- Log in to the admin panel and navigate to the Catalog tab. Choose Categories from the list.

- Click on the “Add Subcategory” button. A form will appear requiring you to input specific details for your new category.
- Enable the category and include it in the menu option. Give a category name for the store view.
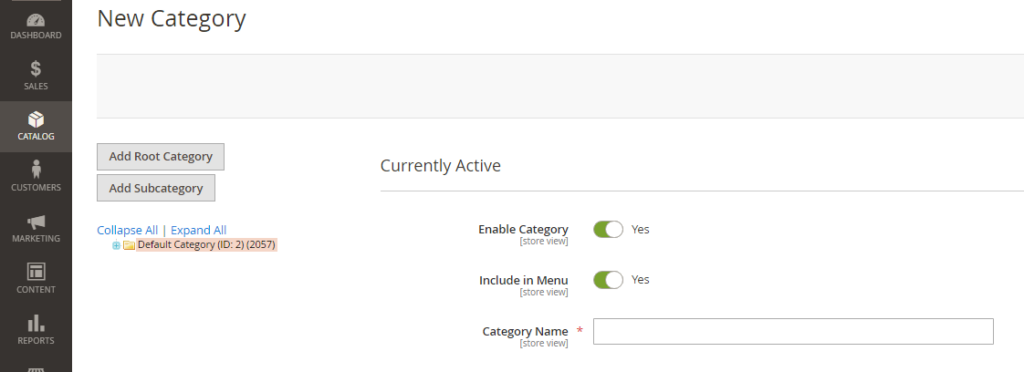
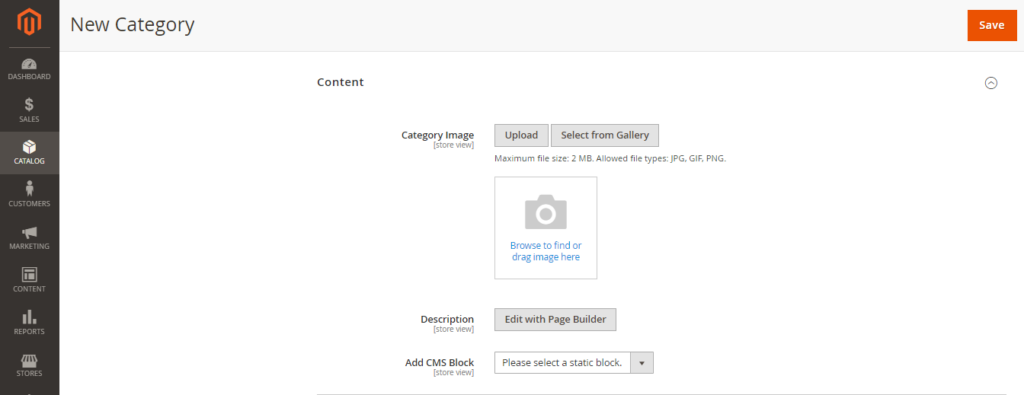
- Upload the image for the category, provide the store view description, and choose a CMS Block from the drop-down menu to display a content block on the category landing page.
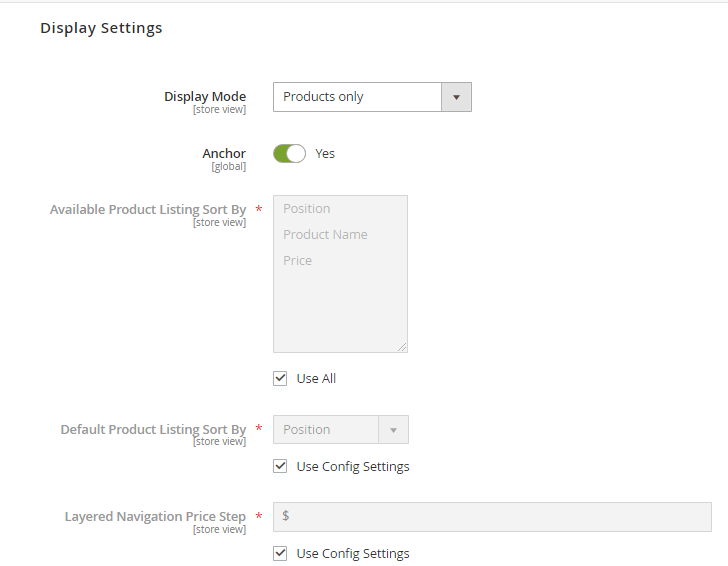
- Configure options such as Display Mode, Anchor, Available Product Listing Sort By, Default Product Listing Sort By, and Layered Navigation Price Step.
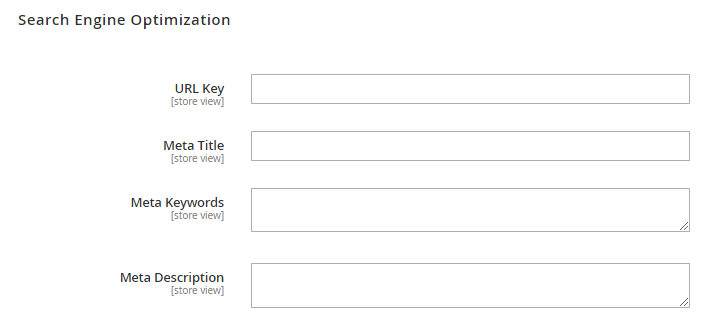
- Complete the Meta Title and Meta Keywords to boost your search rankings.
Adding Products
Here are the steps to add a new product in Magento:
- Go to Catalog > Products.
- Click “Add Product”.
- Enter the details of the product and select its category.
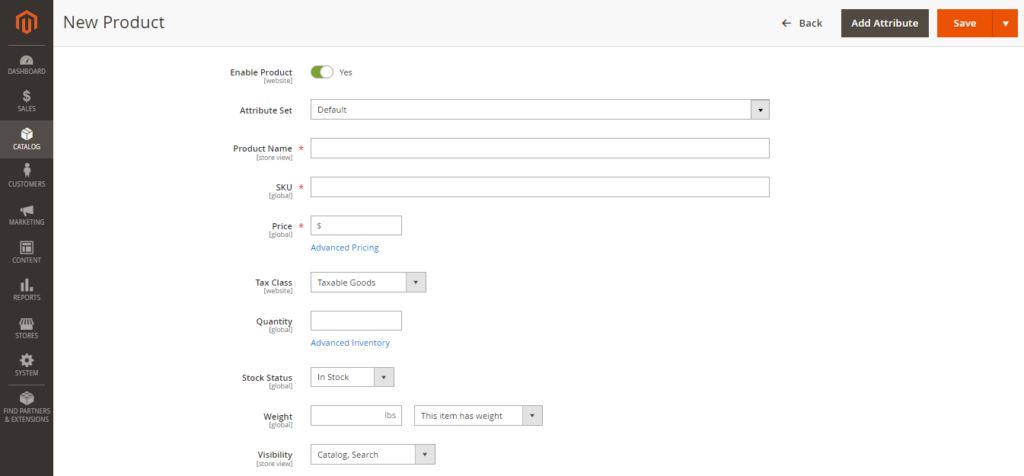
- Ensure that the product is in stock and the quantity is defined to be displayed in the frontend.
- After entering all the necessary details, save the product.
You can create categories while adding or editing products, but it’s not recommended because you won’t be able to customize them completely. Therefore, it’s best to create categories first before adding products.
Step 9. SEO and Performance Optimization
Magento has solid built-in SEO capabilities, but they require proper configuration to be effective. This is typically handled by a developer working alongside an SEO specialist. Here’s what that configuration covers:
Go to Stores> Configuration > Catalog > Catalog > Search Engine Optimization.
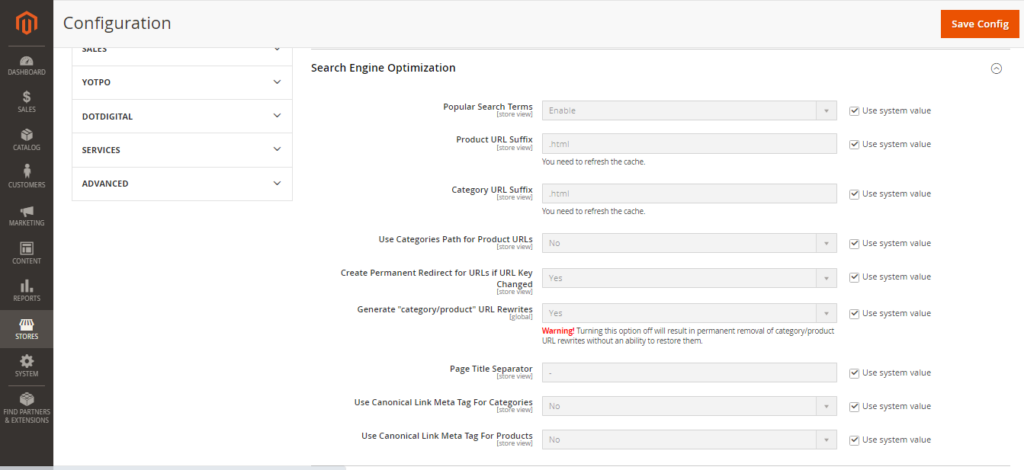
Here, ensure that your product URLs are SEO-friendly and that you’ve set meta tags for products and categories.
Consider adding SEO extensions from the Magento Marketplace that can automate and provide advanced features like generating sitemaps, managing meta tags, and providing SEO analysis.
Regularly update your website with high-quality, original content that includes relevant keywords. Product descriptions, blog posts, and educational articles should provide value to your users and be optimized for search engines.
Optimize Magento Site Performance
Slow loading times can turn away customers and negatively impact your search engine rankings. Fortunately, Magento offers several built-in tools to maintain a competitive edge and provide a smooth shopping experience. Here’s how you can configure these tools effectively:
- Enable caching in Magento by navigating to System > Cache Management and enable all caching features to improve page load times.

- Use built-in Magento features or third-party extensions to compress and optimize images to reduce load times without compromising quality.
- Enable minifying your JavaScript and CSS files in Stores > Configuration > Developer > JavaScript Settings and CSS Settings to significantly speed up your site.
SEO configuration and performance tuning directly affect your revenue. A one-second delay in page load can reduce conversions by up to 7%. Most Magento stores we audit have at least 3–5 performance issues that are costing them organic traffic or sales. Getting this right requires both technical Magento knowledge and SEO expertise working together.
Step 10. Pre-Launch Key Configurations
Pre-launch configuration is a checklist phase where all critical systems are verified before the store goes live. Missing something here, like a misconfigured tax rule or a broken payment gateway, can cost you sales from day one.
As a business owner, you should personally verify three things before signing off on launch: a real test transaction through every payment method you’re offering, a test order through every shipping method, and confirmation that order confirmation emails are landing in your inbox correctly. Don’t take your developer’s word for it. Test it yourself on a staging environment.
Here’s what needs to be reviewed and confirmed:
General Configurations
Store URLs
- Go to Stores > Configuration > General > Web
- Confirm that the store URLs for both the storefront and Admin are accurate in the live production environment. This ensures that customers and store managers can access the correct site pages.
Security Certificate
Install a fully signed and trusted security certificate for your domain (Base URL). This step is important for securing transactions and protecting data.
Store Email Addresses
- Go to Stores > Settings > Configuration > General > Store Email Addresses
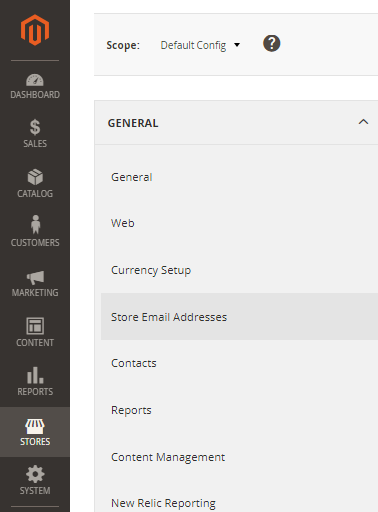
- Access the General Contact section and input the Sender Name and Sender Email. The Sender Name is the name of the person or department associated with the email identity, and the Sender Email is the actual email address that will be used for sending messages.
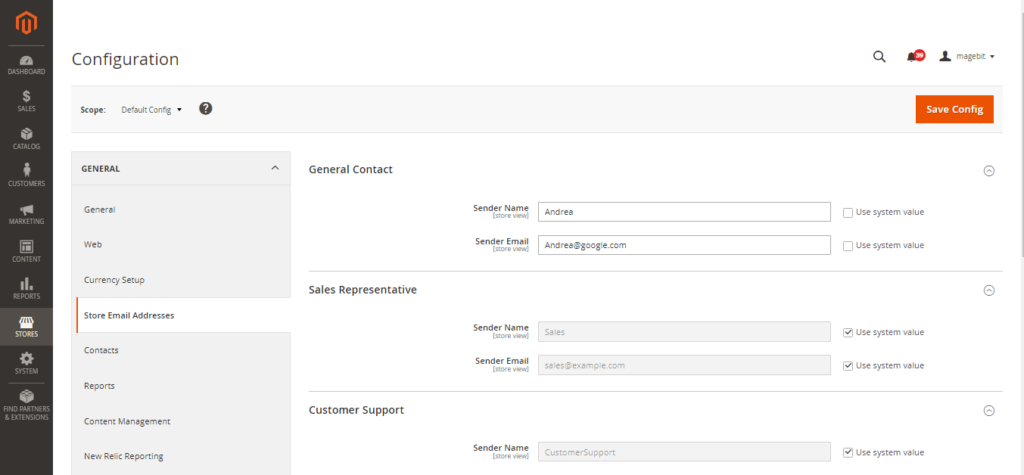
Repeat this process for each email identity you plan to use, such as Sales Representative, Customer Support, and Custom Emails.
Sales Email Configuration
- Go to Stores > Settings > Configuration > Sales > Sales Emails
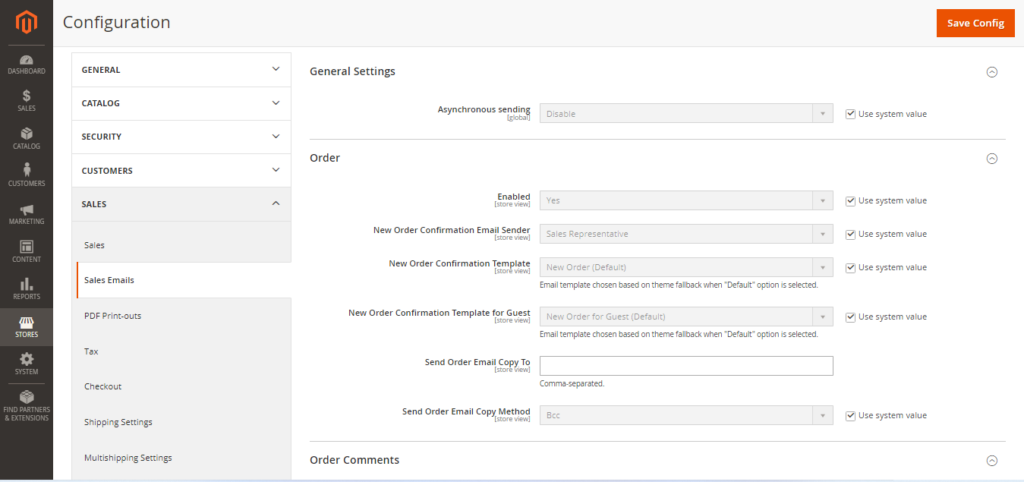
- In the Sales Emails section, you’ll find different subsections for Order and Order Comments, Invoice and Invoice Comments, Shipment and Shipment Comments, Credit Memo and Credit Memo Comments, and RMA-related emails (Adobe Commerce only).
- Expand each section and ensure that the correct sender identity is selected for each type of sales communication.
- Verify that the Enabled option is set to Yes, and configure the email templates for new order confirmations for both registered customers and guests.
- If you wish to send a copy of the sales emails to additional recipients, enter their email addresses in the Send Order Email Copy To field and choose the method (Bcc or Separate Email).
- Once all settings are configured, click Save Config to save your changes.
- Clear all invalid caches by clicking the Cache Management link in the message at the top of the workspace.
Marketing Configurations
Sales Communications
Update invoices and packing slips with your business information and branding to maintain a professional appearance in all customer interactions.
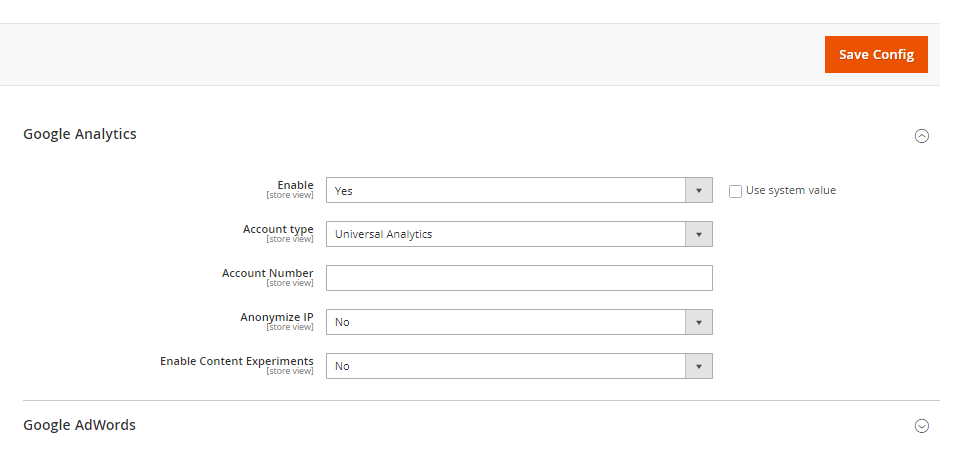
Google Tools
- Go to Stores > Settings > Configuration > Sales > Google API
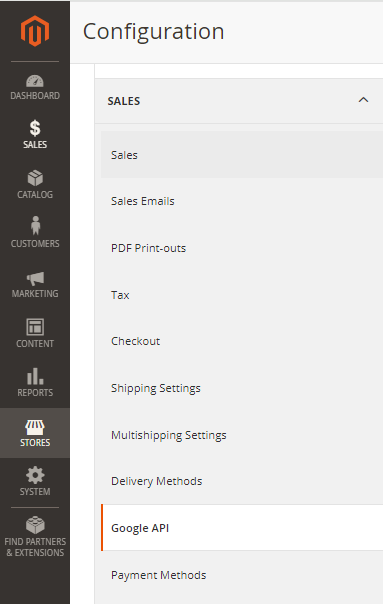
- Integrate your store with Google Analytics and Google AdWords using the Google API. This integration is essential for tracking performance and optimizing marketing efforts.
Sales Configurations
Cart Options
- Go to Stores > Configuration > Sales > Checkout
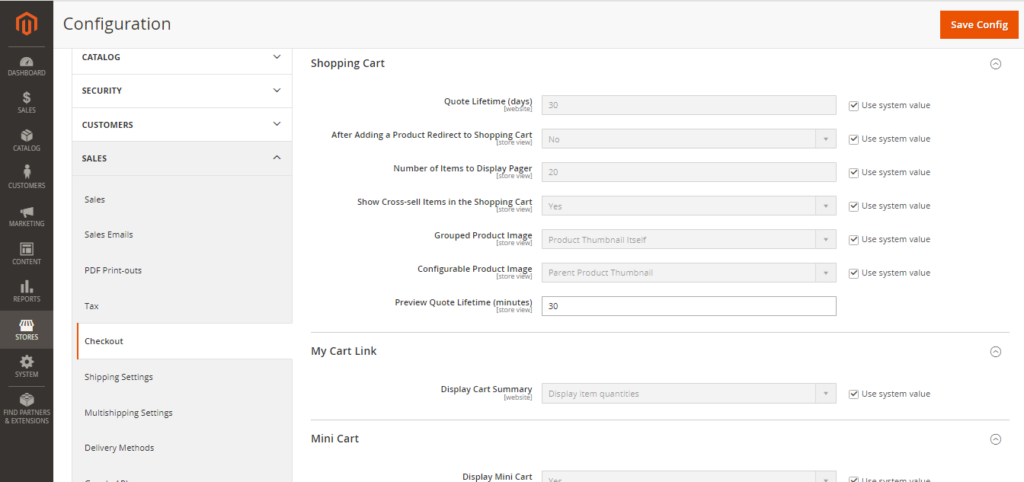
- Review and adjust cart settings, such as the minimum order amount and the lifetime of prices in the cart, to align with your business strategies.
Checkout Options
- Go to Stores > Configuration > Sales > Checkout > Checkout Options
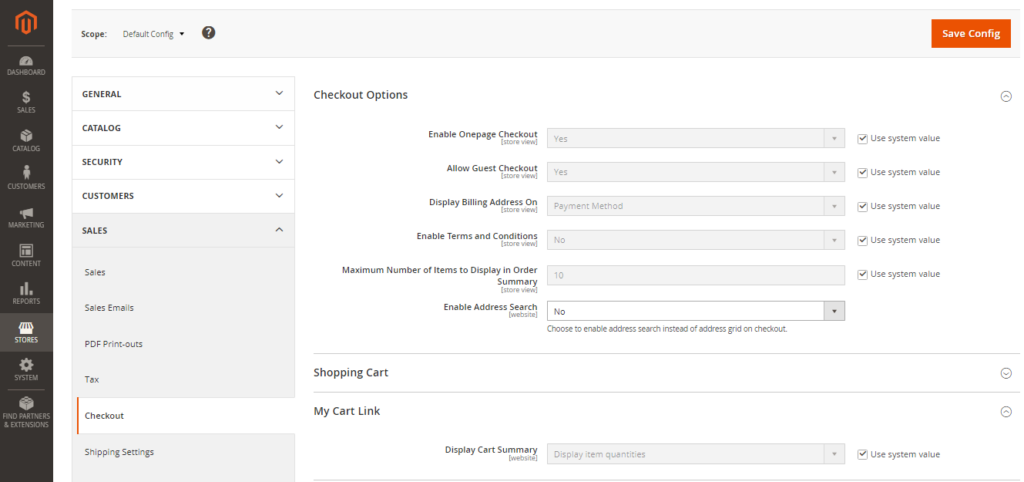
- Set up terms and conditions for your store and decide whether to enable guest checkout based on your customer service philosophy.
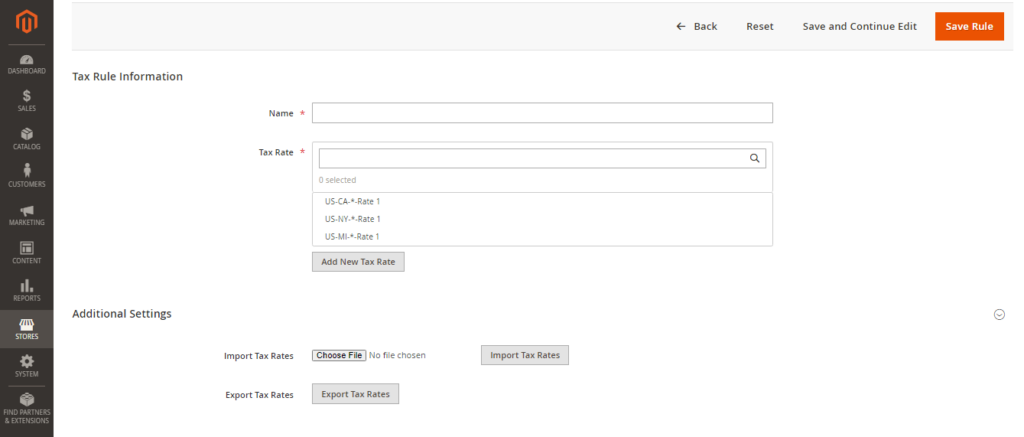
Taxes
- Go to Stores > Tax Rules and click “Add new tax rule”
- Configure tax settings to comply with your local tax laws and business tax rules.
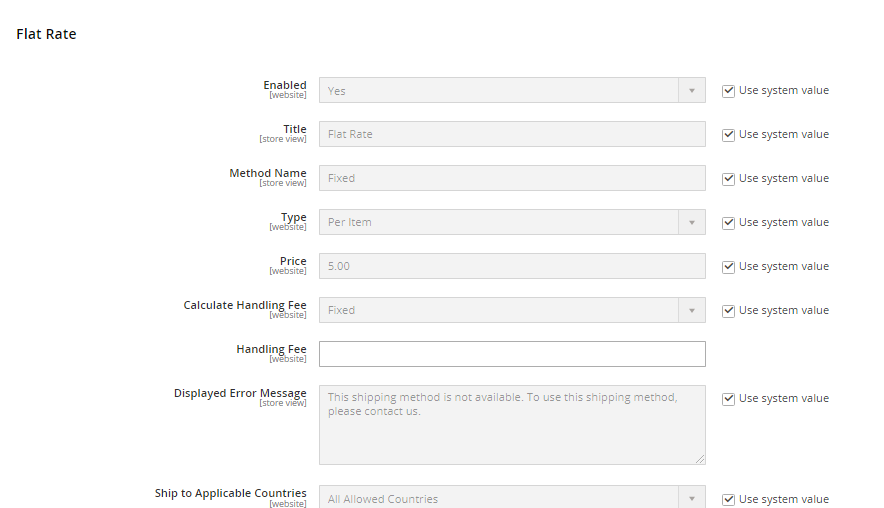
Delivery Methods
- Go to Stores > Settings > Configuration > Sales > Delivery Methods
- Activate and configure the delivery methods and carriers that your business will use to ship products to customers.
Payment Methods
- Go to Stores > Settings > Configuration > Sales > Payment Methods
- Enable and set up the payment methods you intend to offer. Make sure that the order status, accepted currencies, and allowed countries are correctly configured.
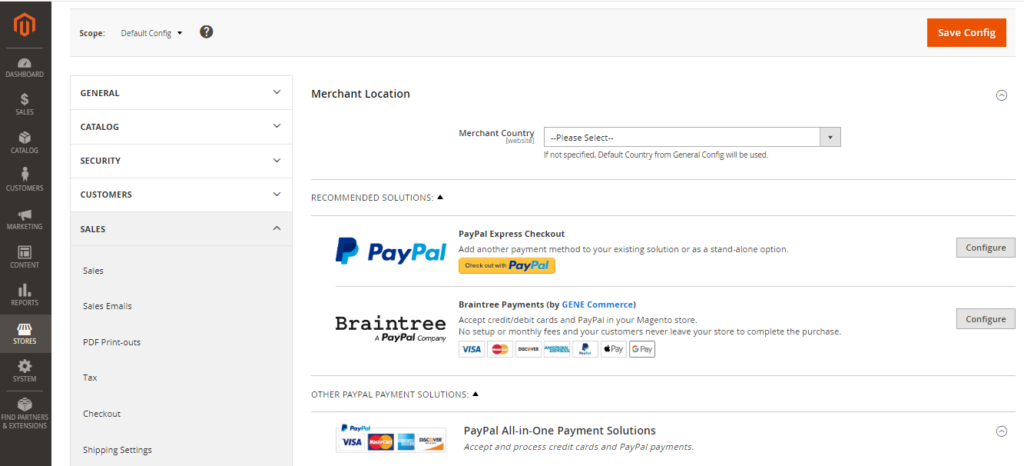
- If using PayPal, set up a merchant account, configure the payment method, and test transactions in Sandbox Mode to ensure everything works smoothly.
System Configuration
Cron (Scheduled Tasks)
- Go to Stores > Settings > Configuration > Advanced > System > Cron
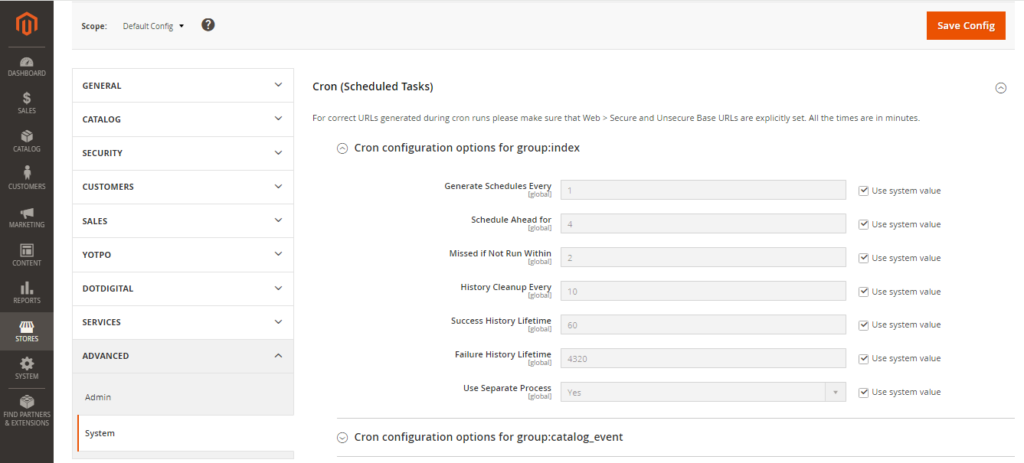
- Verify that Cron jobs are scheduled to run at the right intervals. These tasks are crucial for automated processes like sending emails, updating catalog price rules, managing newsletters, alerting customers, and refreshing currency rates.
A missed configuration at launch can mean lost orders, failed payments, or compliance issues. We run a structured pre-launch audit on every Magento store we build, and offer standalone audits for stores built by other teams before they go live.
Step 11. Test and launch your Magento site
Testing is not optional, and ‘checking it yourself’ is not enough. A structured QA process should cover every user-facing flow, every device, and every edge case in the checkout. Here’s what a proper pre-launch test covers:
Start by setting up a staging environment that replicates your live site. This is where all testing should take place to avoid disrupting the live user experience. Ensure that all functionalities, including user registration, product navigation, and checkout processes, work as expected.
It’s best to involve real users in the testing phase to gain insights into the actual user experience. They can provide valuable feedback on the site’s usability and identify any issues that developers or testers may need to clarify.
Once you’re confident that the site is functioning correctly and securely, you can proceed to launch.
Read more: A Complete UI/UX Guide for Magento Stores – Tips & Strategies
Post-Launch Best Practices
The launch of your site is not the end of your journey. Focus on the key post-launch activities to ensure your site remains efficient, secure, and user-friendly. Follow these best practices:
Monitor Site Performance
Regular monitoring allows you to identify and address any performance issues promptly. To understand how your site is performing, set up analytics tools like Google Analytics, Semrush, and Hotjar. These tools help you track website traffic, user behavior, and engagement. Regularly monitor key metrics such as page views, session duration, and bounce rates to gain insights into user interactions.
Install Magento Extensions
Magento extensions can significantly enhance the functionality of your online store. They allow you to add new features and capabilities, such as integrating with best payment gateways, implementing advanced search and navigation options, or adding social media integration.
Choose extensions carefully to ensure they complement your Magento site without causing conflicts. Regularly review and update these extensions to maintain compatibility and functionality.
Create a Staging Magento Website
A staging environment is important for testing new features, updates, and extensions without affecting your live site. Use this environment to test thoroughly and see how changes will look and function before they go live. This practice helps prevent potential disruptions to the user experience and maintains site stability.
Regularly Update and Maintain Your Magento Store
Staying proactive with updates and maintenance is critical for optimal performance and security. Keep your Magento core, themes, and extensions up to date to ensure they run the latest versions.
Why do Businesses Choose Magento to Build Their Online Store?
Businesses pick Magento when setting up online stores. Why? Many reasons make it a top e-commerce solution:
- Popularity and Community Support: Magento is a highly popular e-commerce platform; big brands like Coca-Cola and Samsung use it, too. A huge active community of developers, designers, and users constantly improve and support it.
- Open-Source Flexibility: As open-source software, Magento allows customizing the code to perfectly fit a business’s needs.
- Scalability: Magento scales well. Its modular design efficiently handles more traffic, products, and transactions as a business grows without slowing down.
- Responsive Design: Magento provides responsive design. The store layout automatically adjusts for optimal viewing on any device, like phones or tablets. So mobile users have a great experience.
- SEO Optimization: Built-in advanced SEO features help Magento stores rank higher in search results. This boosts online visibility, which is crucial.
- Security: Magento takes security seriously. It implements industry best practices to protect online stores from threats and maintain customer trust.
- Performance Enhancements: Magento speeds things up. Features like full-page caching and indexing improve the online store’s operation’s loading speed and overall smoothness.
- Customization and Integration: The platform’s open-source nature allows for end-to-end customization and easy integration with a wide range of third-party services and extensions.
- Multi-Language and Multi-Currency Support: Magento supports multiple languages and currencies, making it an ideal choice for businesses aiming to reach a global audience.
- Advanced Features and Analytics: Magento offers a suite of advanced features, including upsells and cross-sells, as well as analytics and reporting tools to track sales and customer behavior.
- Payment and Shipping Integrations: The platform is designed to integrate seamlessly with various payment processors and shipping carriers, simplifying transactions and logistics for both merchants and customers.
Magento vs. Other E-commerce Platforms
Here’s a comparison table of Magento with other popular eCommerce platforms:
| Platform | Hosting | Pricing | Ease of Use | Customization | Scalability | Feature-Rich | Community Support |
| Magento | Requires separate hosting | Expensive | Complex | High | High | High | High |
| BigCommerce | Cloud-based | Affordable | Easy | Moderate | Moderate | High | Moderate |
| WooCommerce | Requires separate hosting | Free (excluding hosting and extensions) | Moderate | High | Moderate | High | High |
| Shopify | Cloud-based | Affordable | Easy | Moderate | Moderate | High | Moderate |
(Magento vs. Other E-Commerce Platforms)
Conclusion
Building a Magento store the right way takes real technical depth, careful planning, and ongoing commitment. If reading through these 11 steps has given you a clearer picture of the effort involved, that’s the point.
Magento rewards businesses that invest in it properly. The stores that struggle are almost always the ones that cut corners on development, choose the wrong edition, or underestimate ongoing maintenance.
Aureate Labs has built and maintained Magento stores across retail, B2B, fashion, and manufacturing. Whether you’re starting from scratch, rescuing a project that stalled, or looking to improve a live store, we can help you move forward without the guesswork.
Contact us today!
Frequently Asked Questions
What is the difference between Magento Open-source and Magento Commerce?
Magento Open Source is a free, self-hosted e-commerce platform that offers basic e-commerce capabilities, suitable for small to medium-sized businesses.
On the other hand, Magento Commerce is a paid, commercial version that builds upon the foundation of Magento Open Source. It includes advanced features such as marketing tools, B2B functionality, customer loyalty tools, and live search. It is designed for medium to large businesses.
Is Magento suitable for beginners?
Magento can be suitable for beginners, but it has a steeper learning curve than other platforms. While Magento Open Source is a flexible and customizable platform, it requires technical knowledge and expertise in PHP and Magento’s architecture. Beginners may need to invest time in learning the platform or seek assistance from developers.
Can I build my website using Magento?
Yes, you can build your website using Magento. Magento Open Source offers a user-friendly interface and customizable themes, making it a viable option for creating an e-commerce website. However, technical expertise is often required for customization and development work.
Can I migrate my existing eCommerce store to Magento?
Yes, it is possible to migrate your existing e-commerce store to Magento. However, The migration process may require technical expertise and resources for a smooth transition.
How secure is a Magento website?
Magento websites are known for their strong security features. Magento Open Source offers basic security features like CAPTCHA and two-factor authentication, while Adobe Commerce provides PCI-compliant security standards, 24/7 support, and encrypted user data. Adobe Commerce Cloud also includes CDN and DDoS protection.
Can I integrate other systems with Magento?
Yes, Magento allows for integration with other systems. It supports custom extensions and integrations, as well as a range of pre-built modules that can be easily integrated into the platform.
What kind of support is available for Magento website owners?
Support for Magento website owners includes a vibrant community of developers and users, dedicated account management, and technical support from Adobe for Commerce users.
How much does it cost to build a Magento site?
The cost to build a Magento site varies based on the version chosen, hosting, required extensions, development, maintenance, and support costs. Magento Open Source is free to download, but there are associated costs for hosting and development. Adobe Commerce and Adobe Commerce Cloud are paid versions, with licensing fees starting at $24,000 per year for Commerce and higher for Commerce Cloud.
What to read next??
- How to Optimize Core Web Vitals for Magento Store?
- Comparison: Magento Hyva Themes vs. Headless Commerce
- Time and Cost to Implement Hyva Theme in Magento
- Time and cost to build Headless Magento store
- 13 Magento Fashion Store Features to Maximize Revenue
Resources:


Post a Comment
Got a question? Have a feedback? Please feel free to leave your ideas, opinions, and questions in the comments section of our post! ❤️